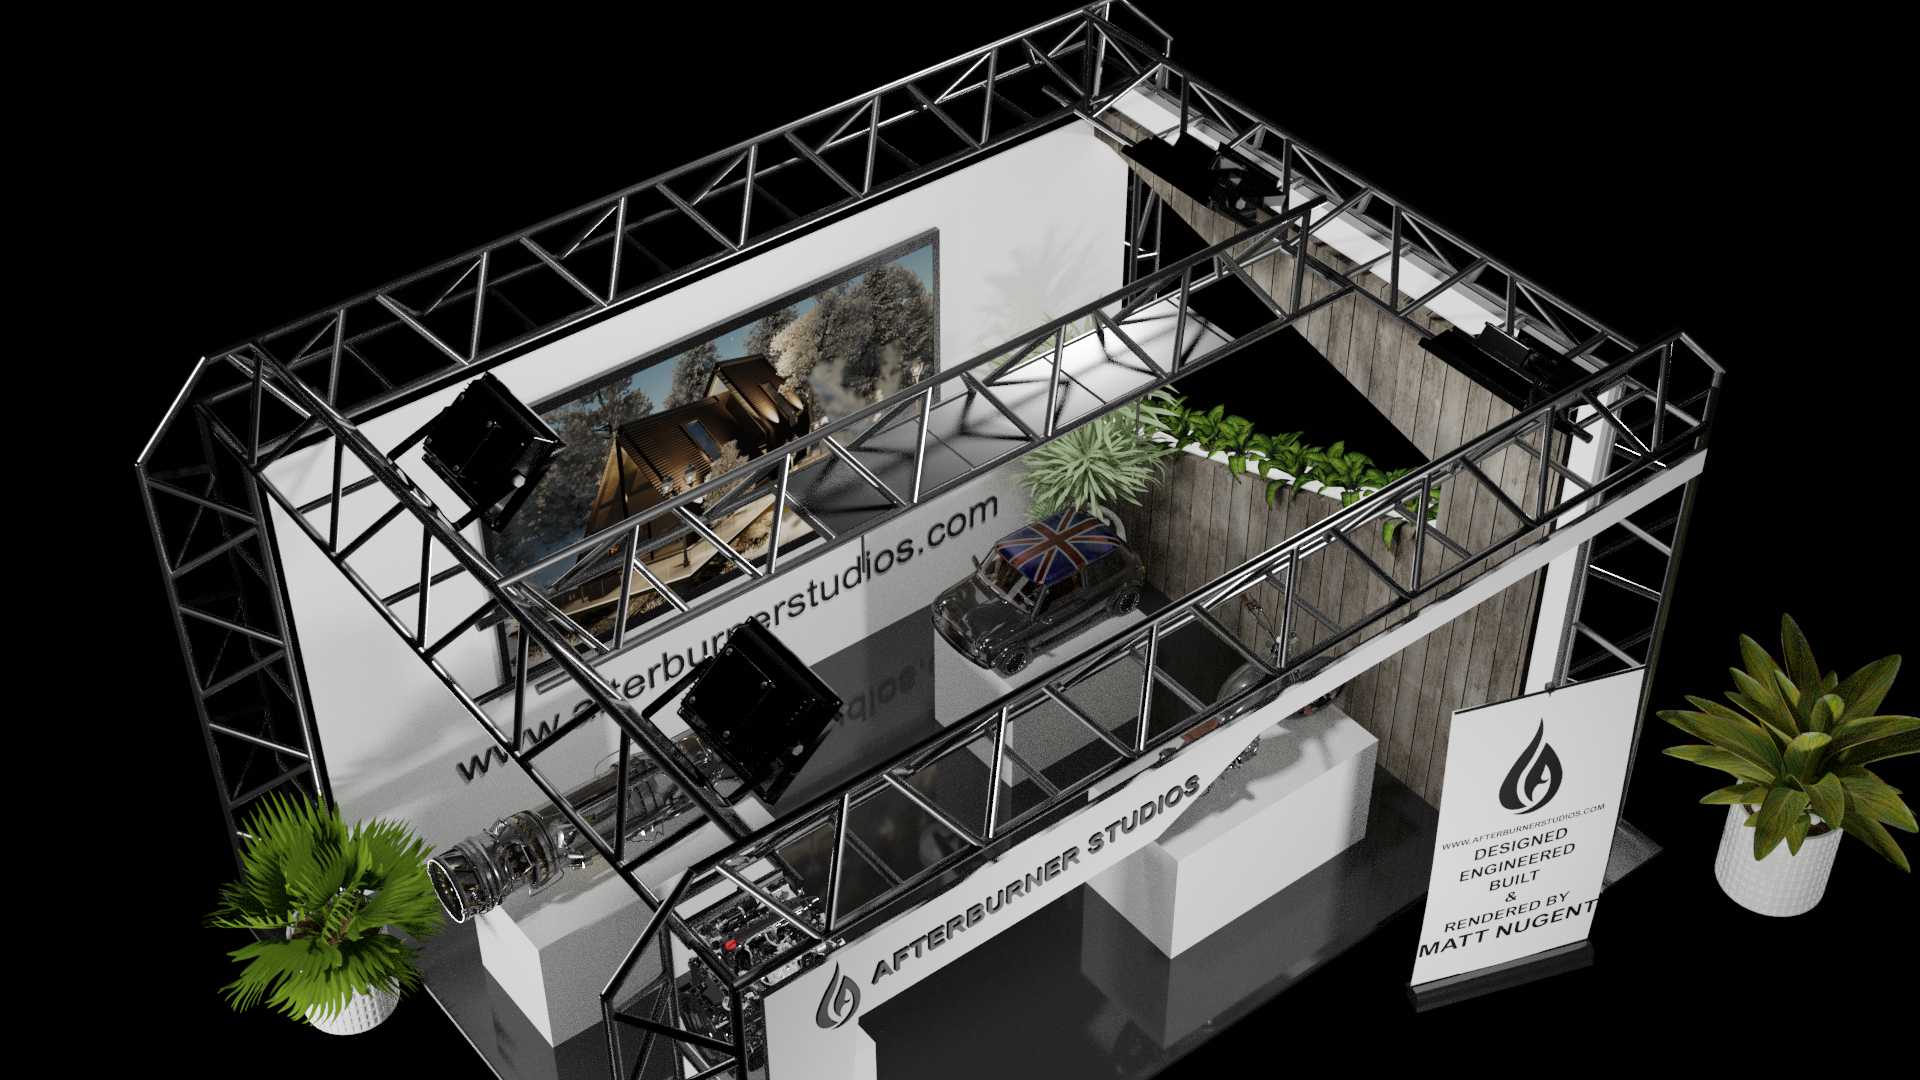
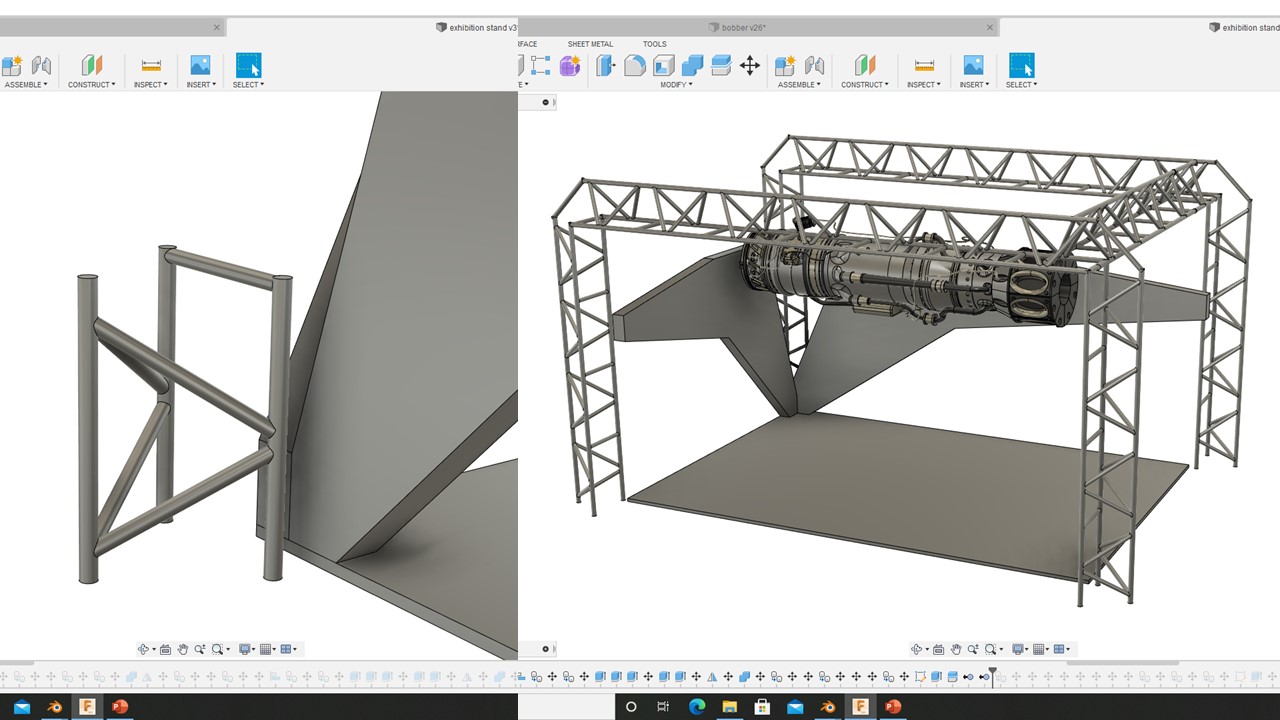
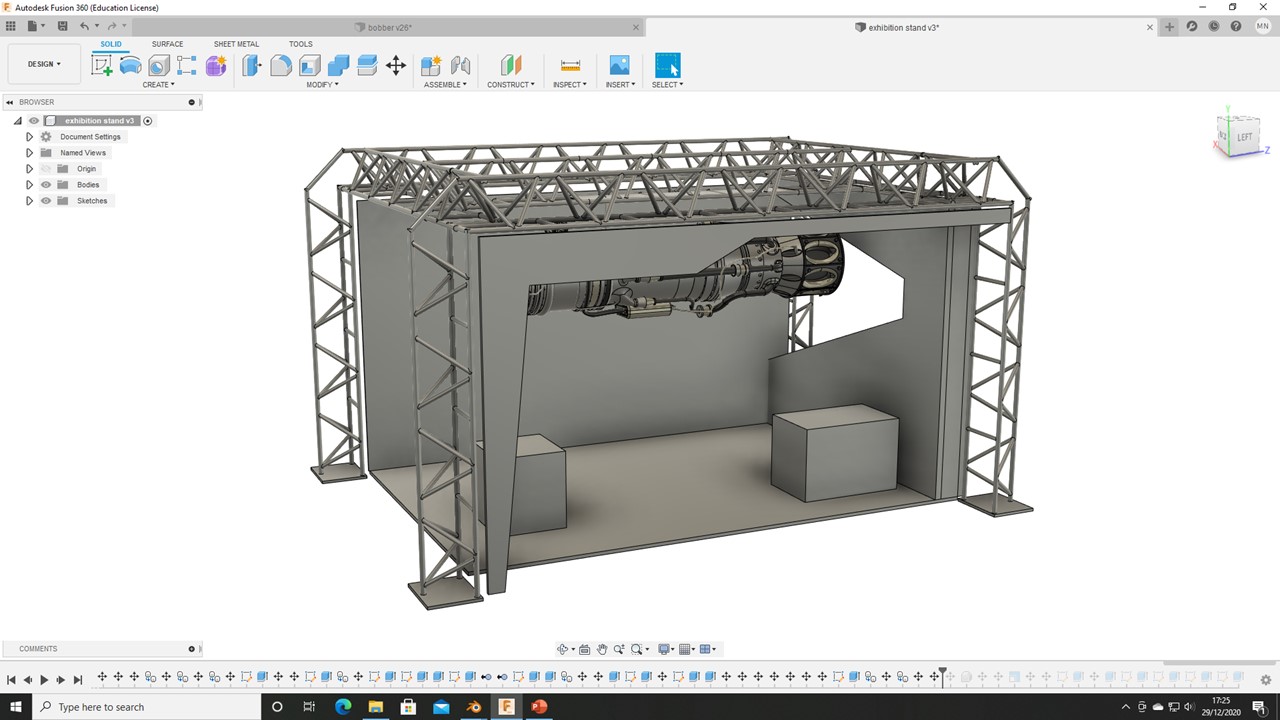
To enable maximum light to reach my exhibition stand I have used the structure of a lighting rig. This was because I could use Lights I had already modelled for the Van renovation project to illuminate the setup and draw maximum attention.
Product Focus
Due to the fact that the exhibiton is happening virtually this means our exhibition stands do not have to be held down by physics. Therefore I said to all those contributing to go as mad as they want with their stand as long as it was within the budgetted amount of space.
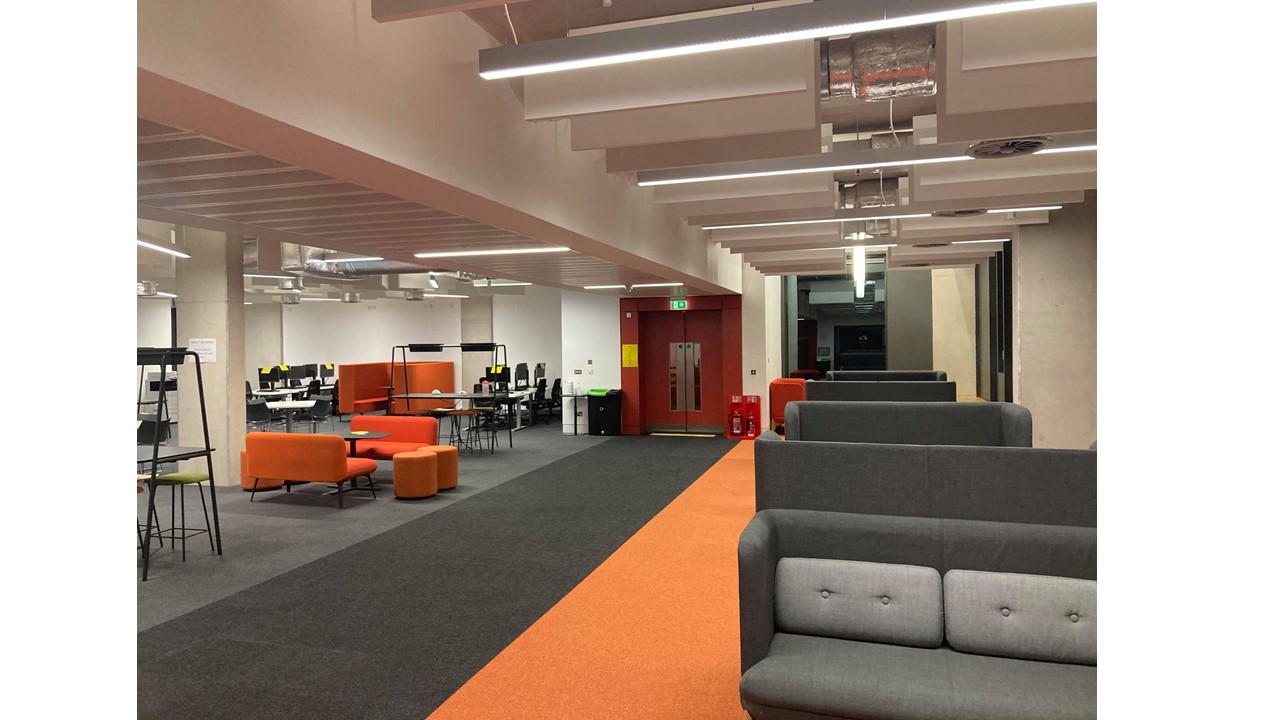
Digital Futures Floor
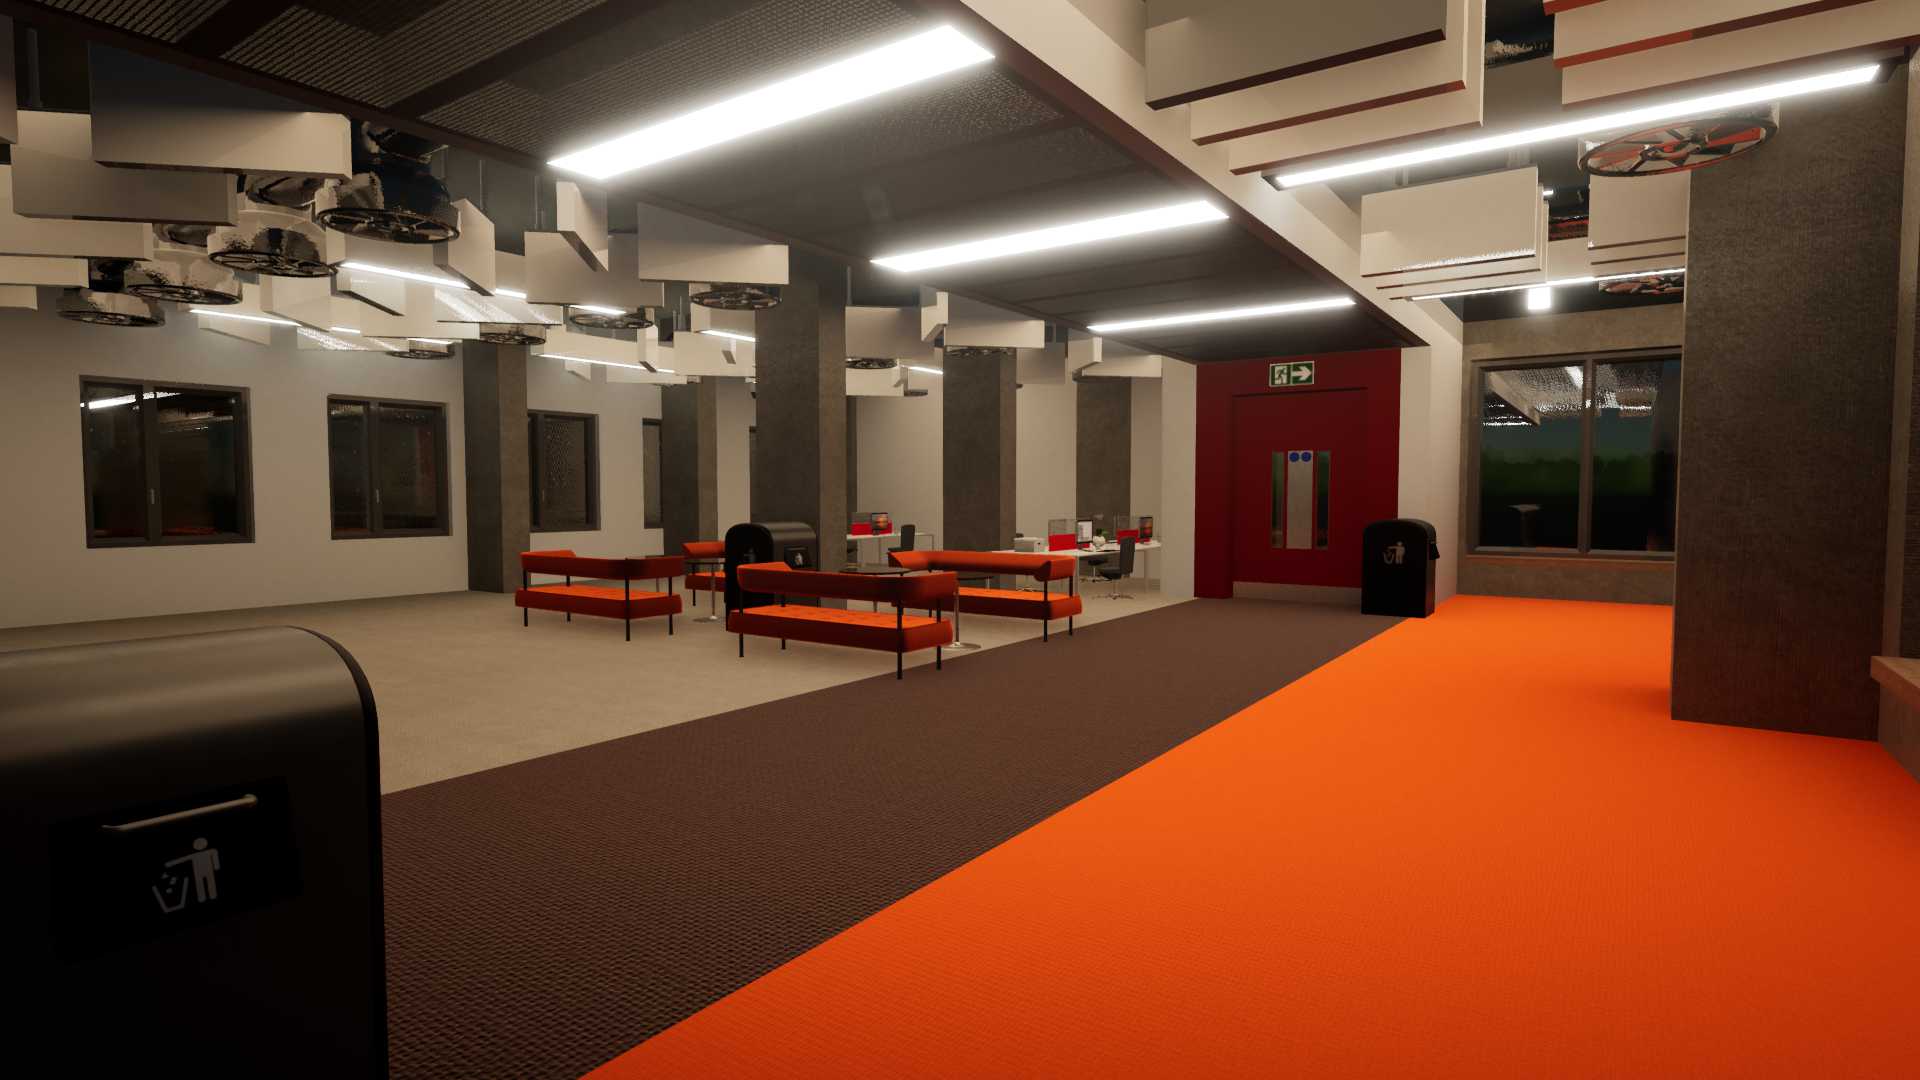
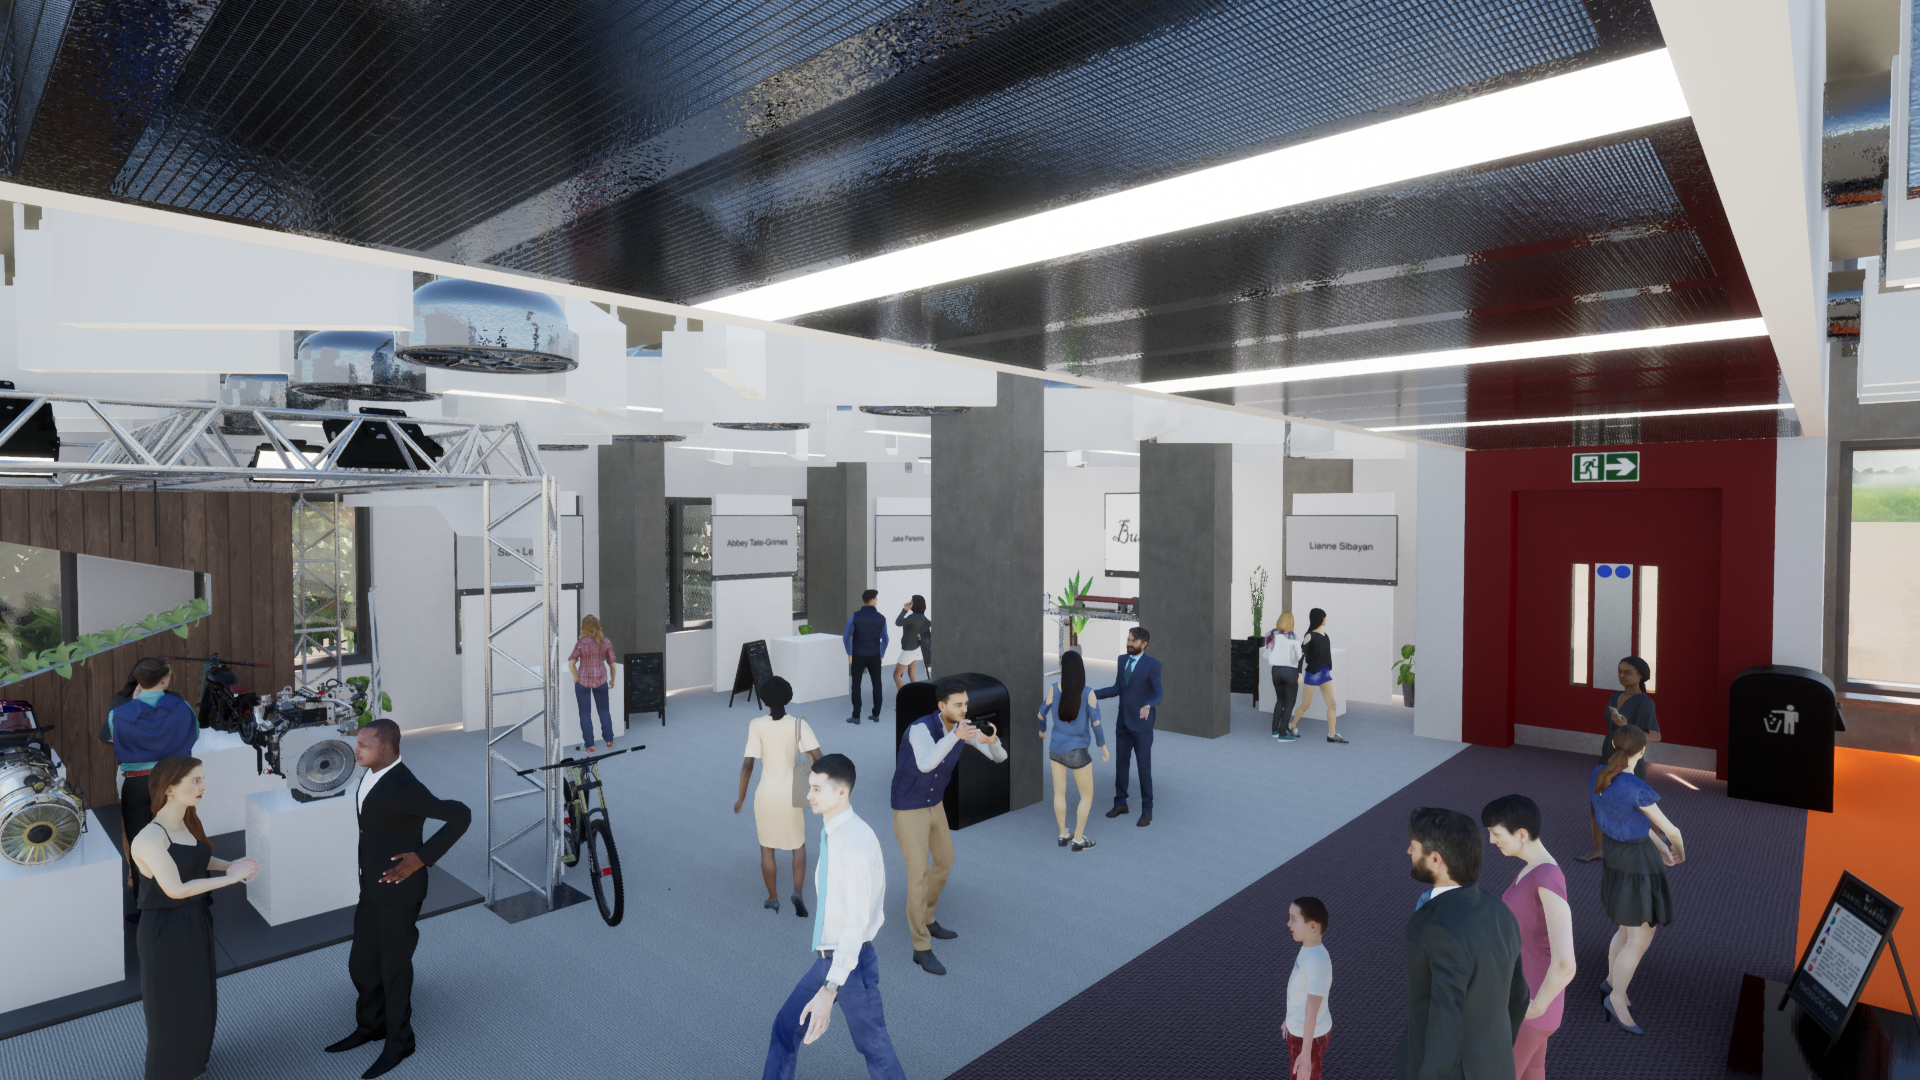
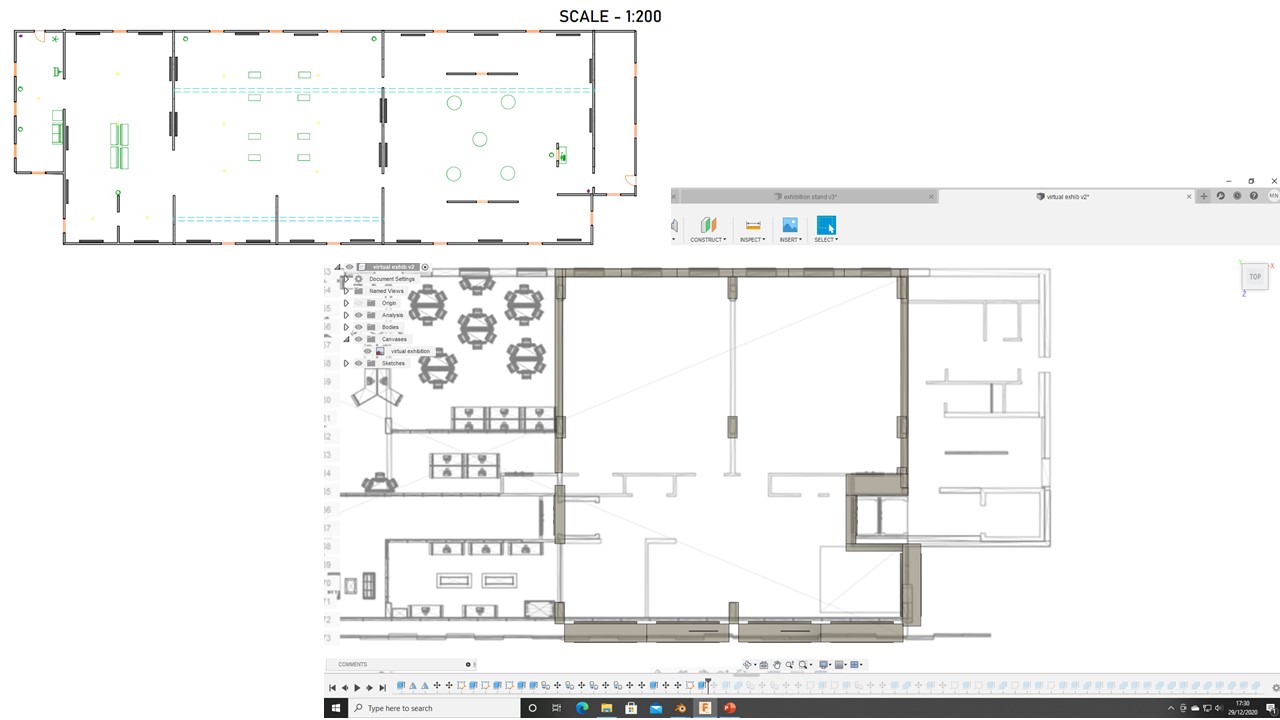
As the work exhibition was meant to take place in our new floor in the West Downs centre, I thought I would mock-up the main area of the floor for the person using the virtual exhibition to explore and hopefully recognise.
Adding Stands to the final space
To add the stand to the space was easy as I requested everyone to make their stand within Twin motion and send me their final. Therefore all I had to do was merge .TM files and then scale and position their models.
Collaboration Effort
To collaborate and share ideas I created a chat with all the Third year CAD students in, to inspire and give each other ideas for this project. Then I would send them a final rendered animation of their model within the virtual space.
How I did It
Research
Research for this project was simple. As someone else had already drawn up a floor plan for the new space in the West Downs centre I already had the materials ready to begin building. Pinterest was absolutely teaming with innovative ideas which I shared with the group chat. Therefore I was set to begin designing my own stand by picking and using features from different stands on Pinterest.
Concept & Sketches
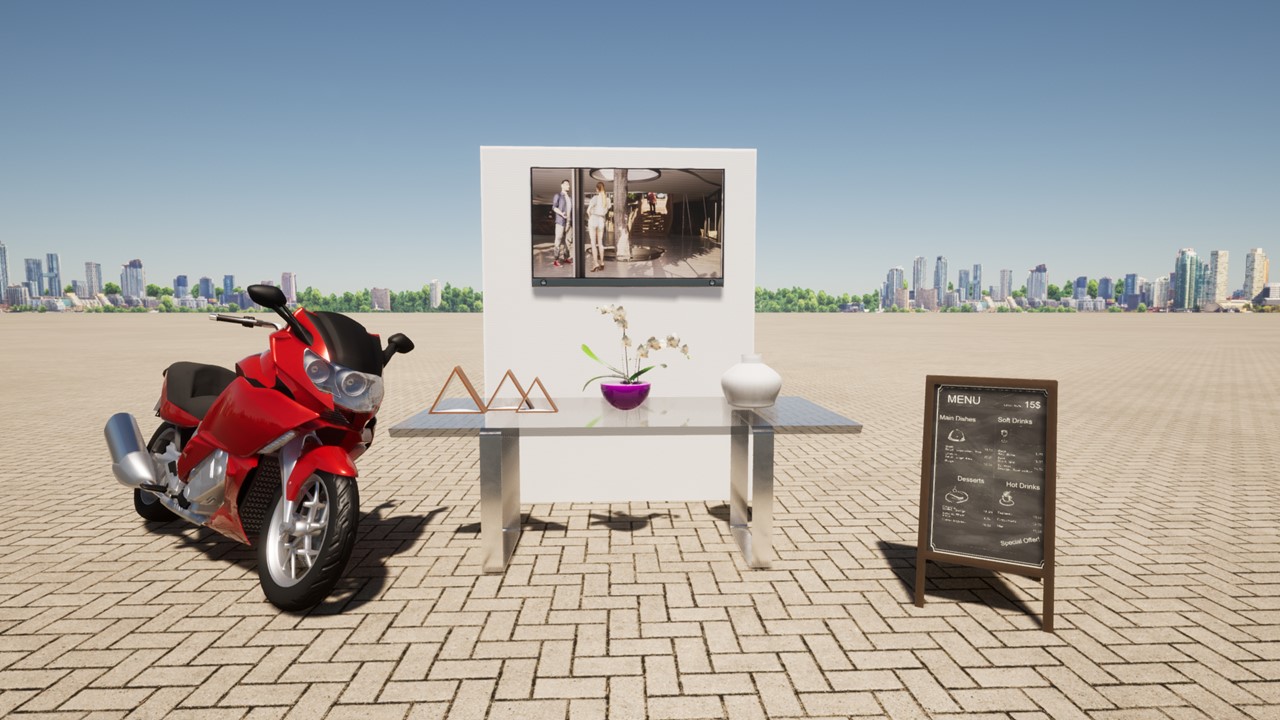
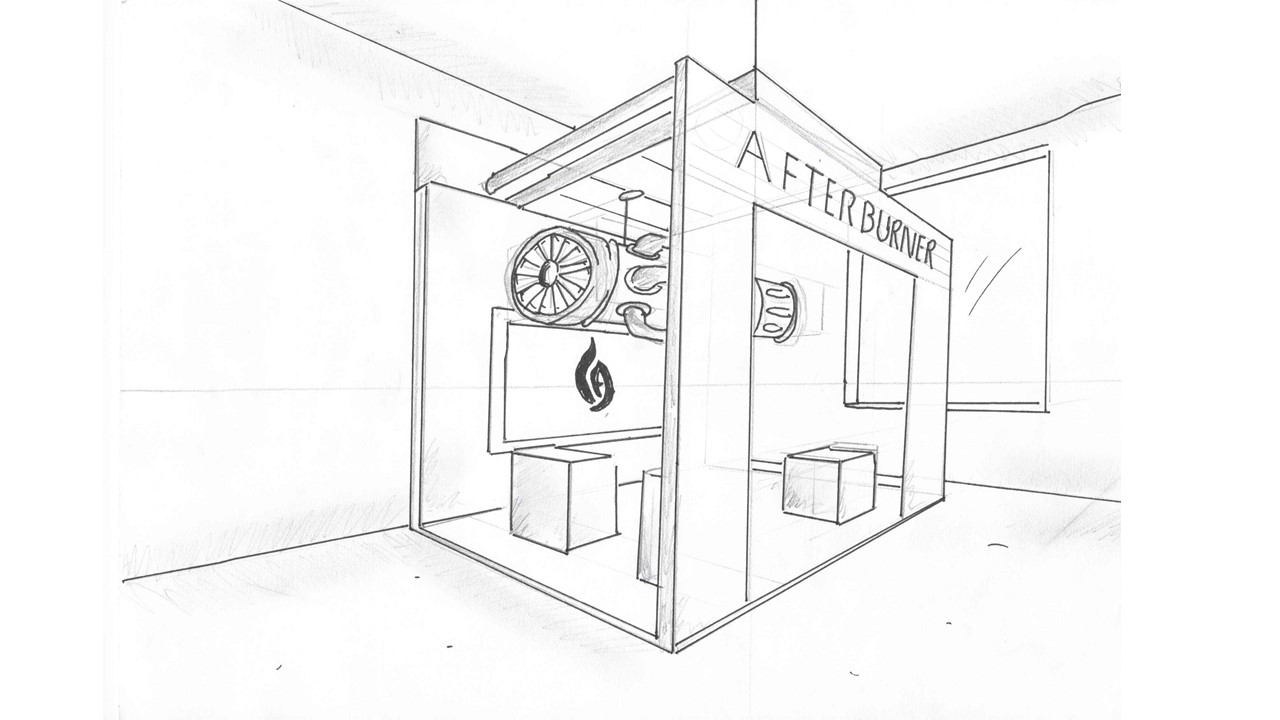
To better get my ideas across to those who would be collaborating with me, I made a very quick example to show them to get the ball rolling with their own ideas. Meanwhile I began to sketch out ideas for my own stand once again using the new two-point perspective trick I had learned.
Building The Environment
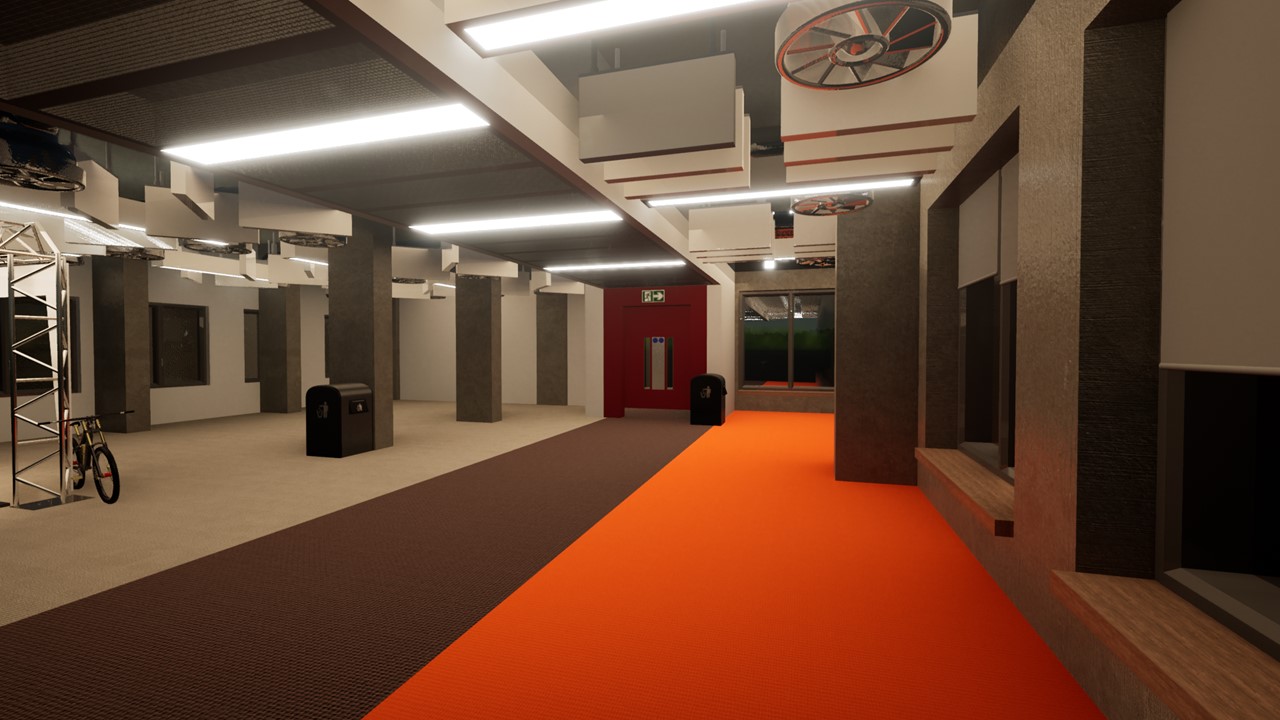
Modelling Using Revit & Fusion
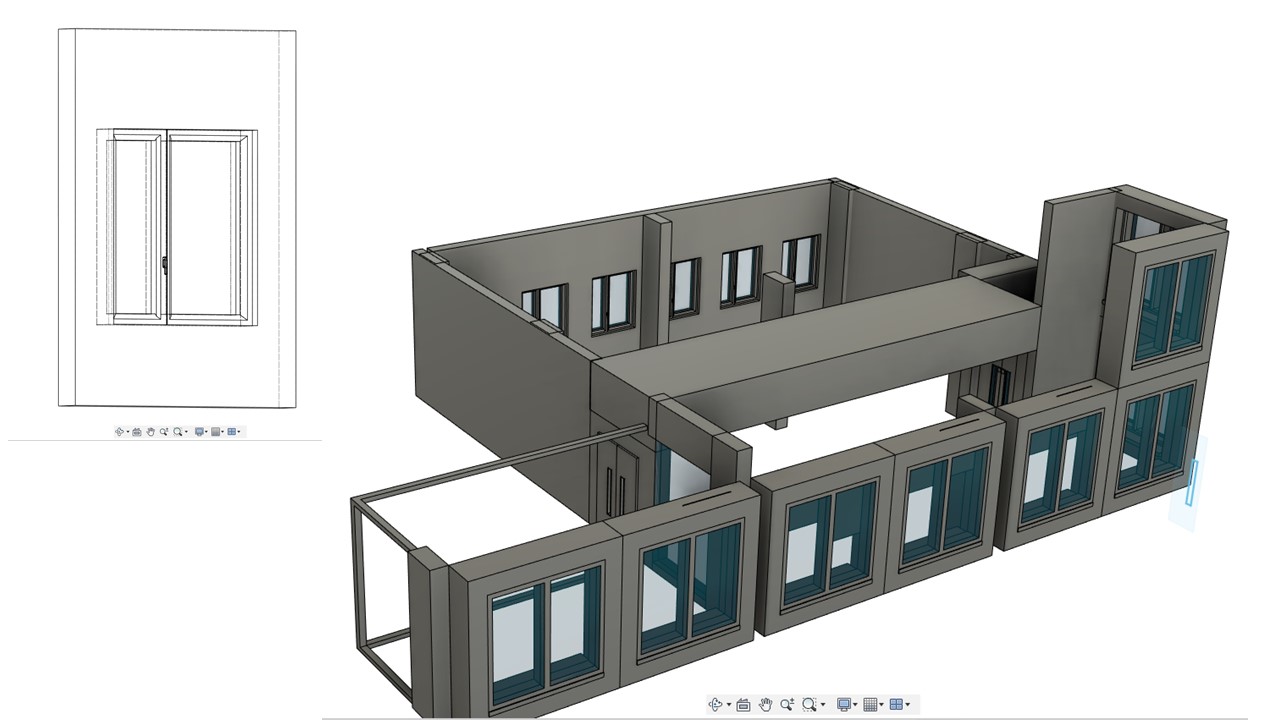
To begin building. I used the floor plan I had been sent as a canvas on Revit. Then used the draw wall feature to trace around the walls on the plan. I also added the concrete columns that are in the space. After this I used Fusion to create wall components that were unique to the building which I was not confident modelling in Revit.
Unique details
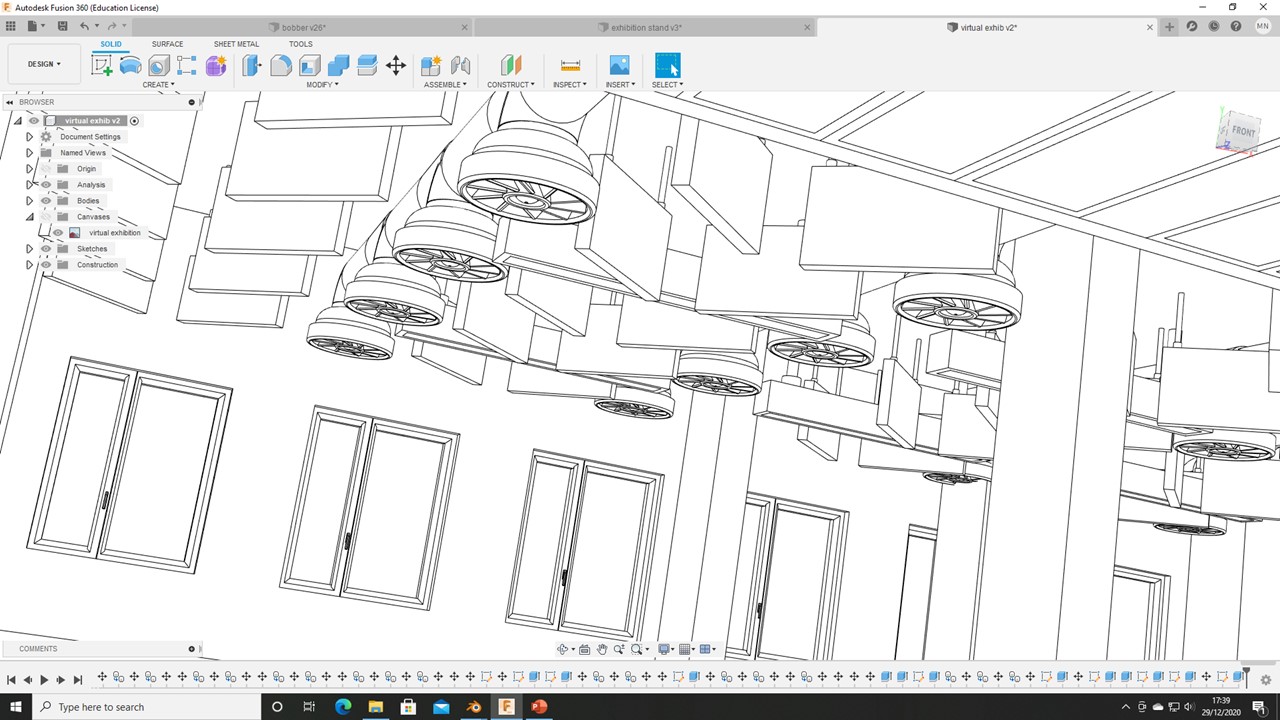
The Digital Futures Floor has a very recognisable ceiling with exposed concrete lining the absolute ceiling as well as large, exposed foil vents hanging down. I believed that the room would not be recognisable without these features therefore set about creating them in Fusion and their own entities. Then I was ready to export to Twin motion.
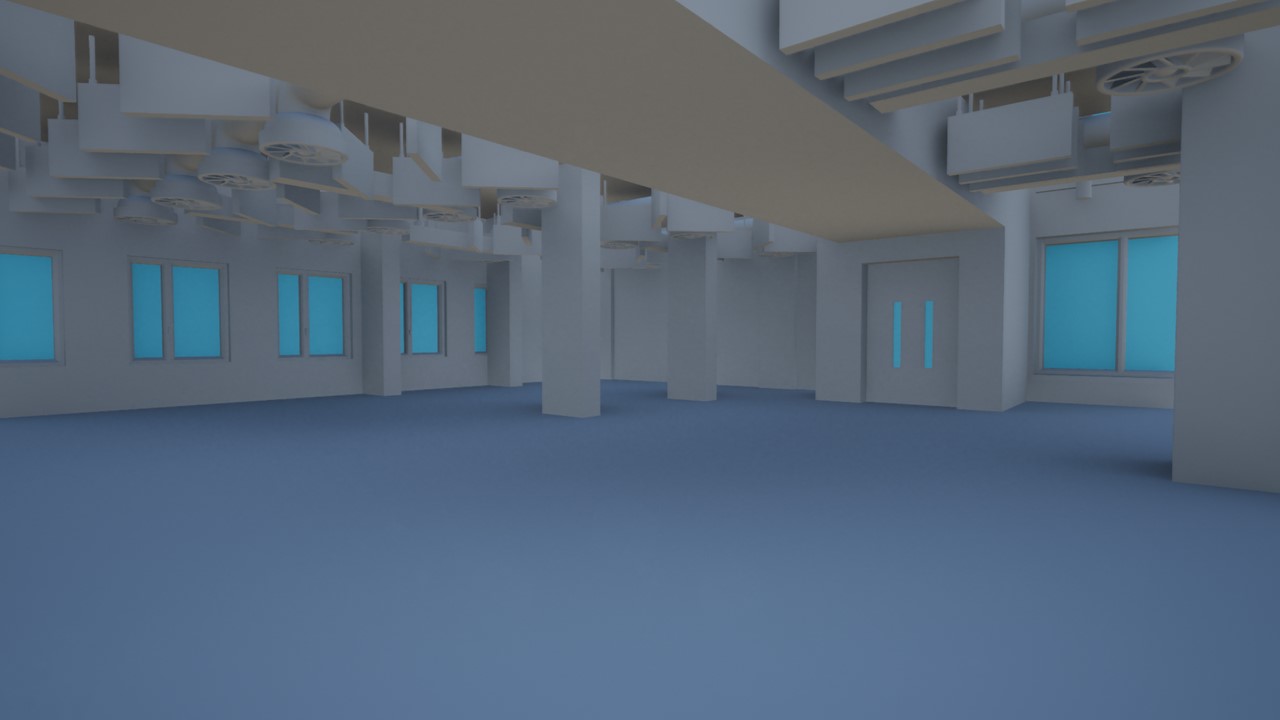
Texturing
Texturing
To texture the photo, I had to take a reference photo to work with, as I was not going to be able to always look around and see the colours and textures. Given more time I would have liked to have used Blender to do this to achieve a higher quality render. However, since this had to be viewed in real time Twin motion was a great tool for this and I took advantage of its extensive library.
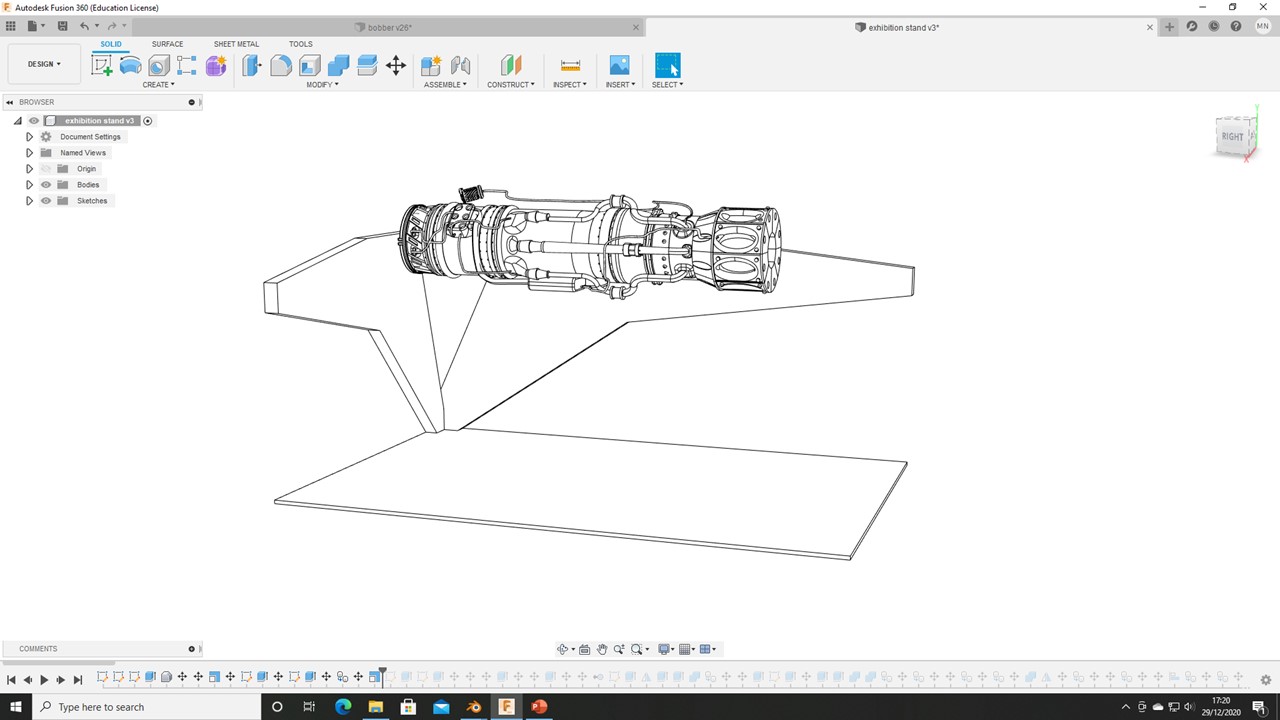
Modelling My Stand
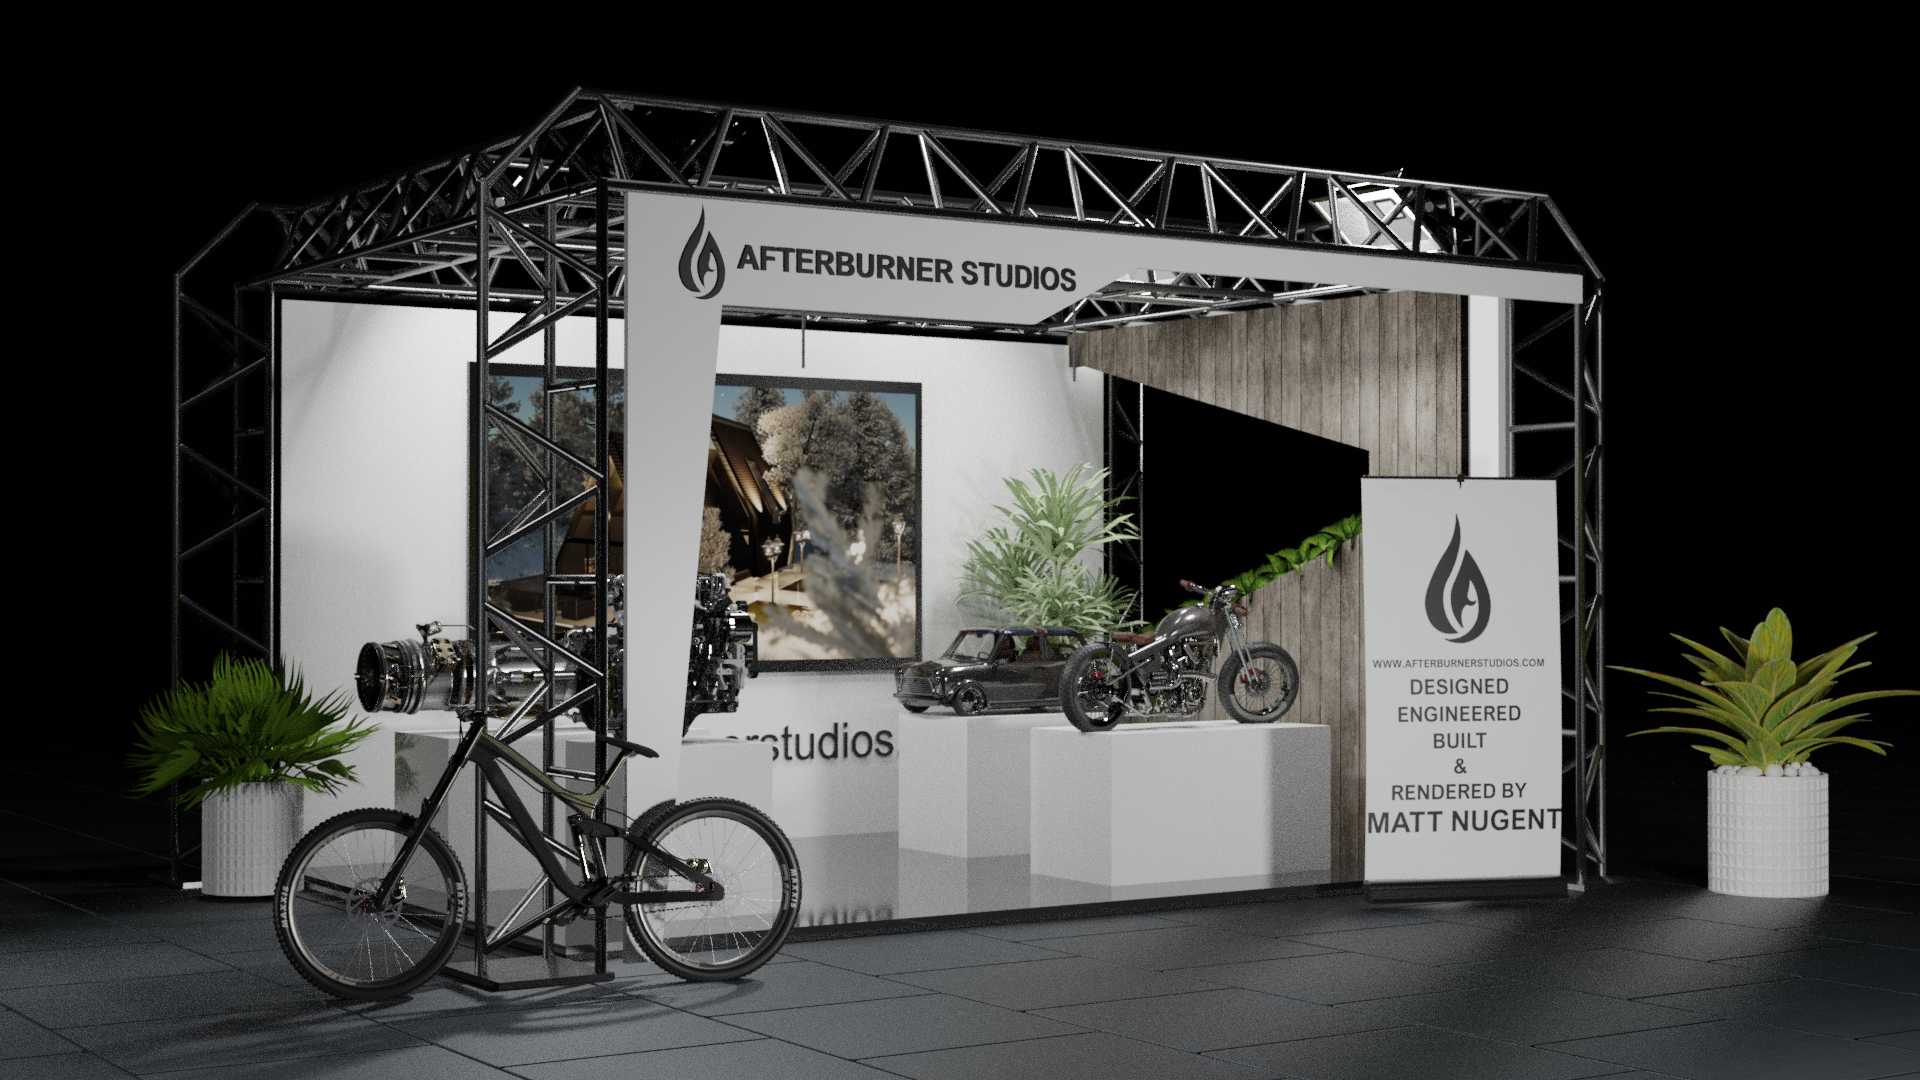
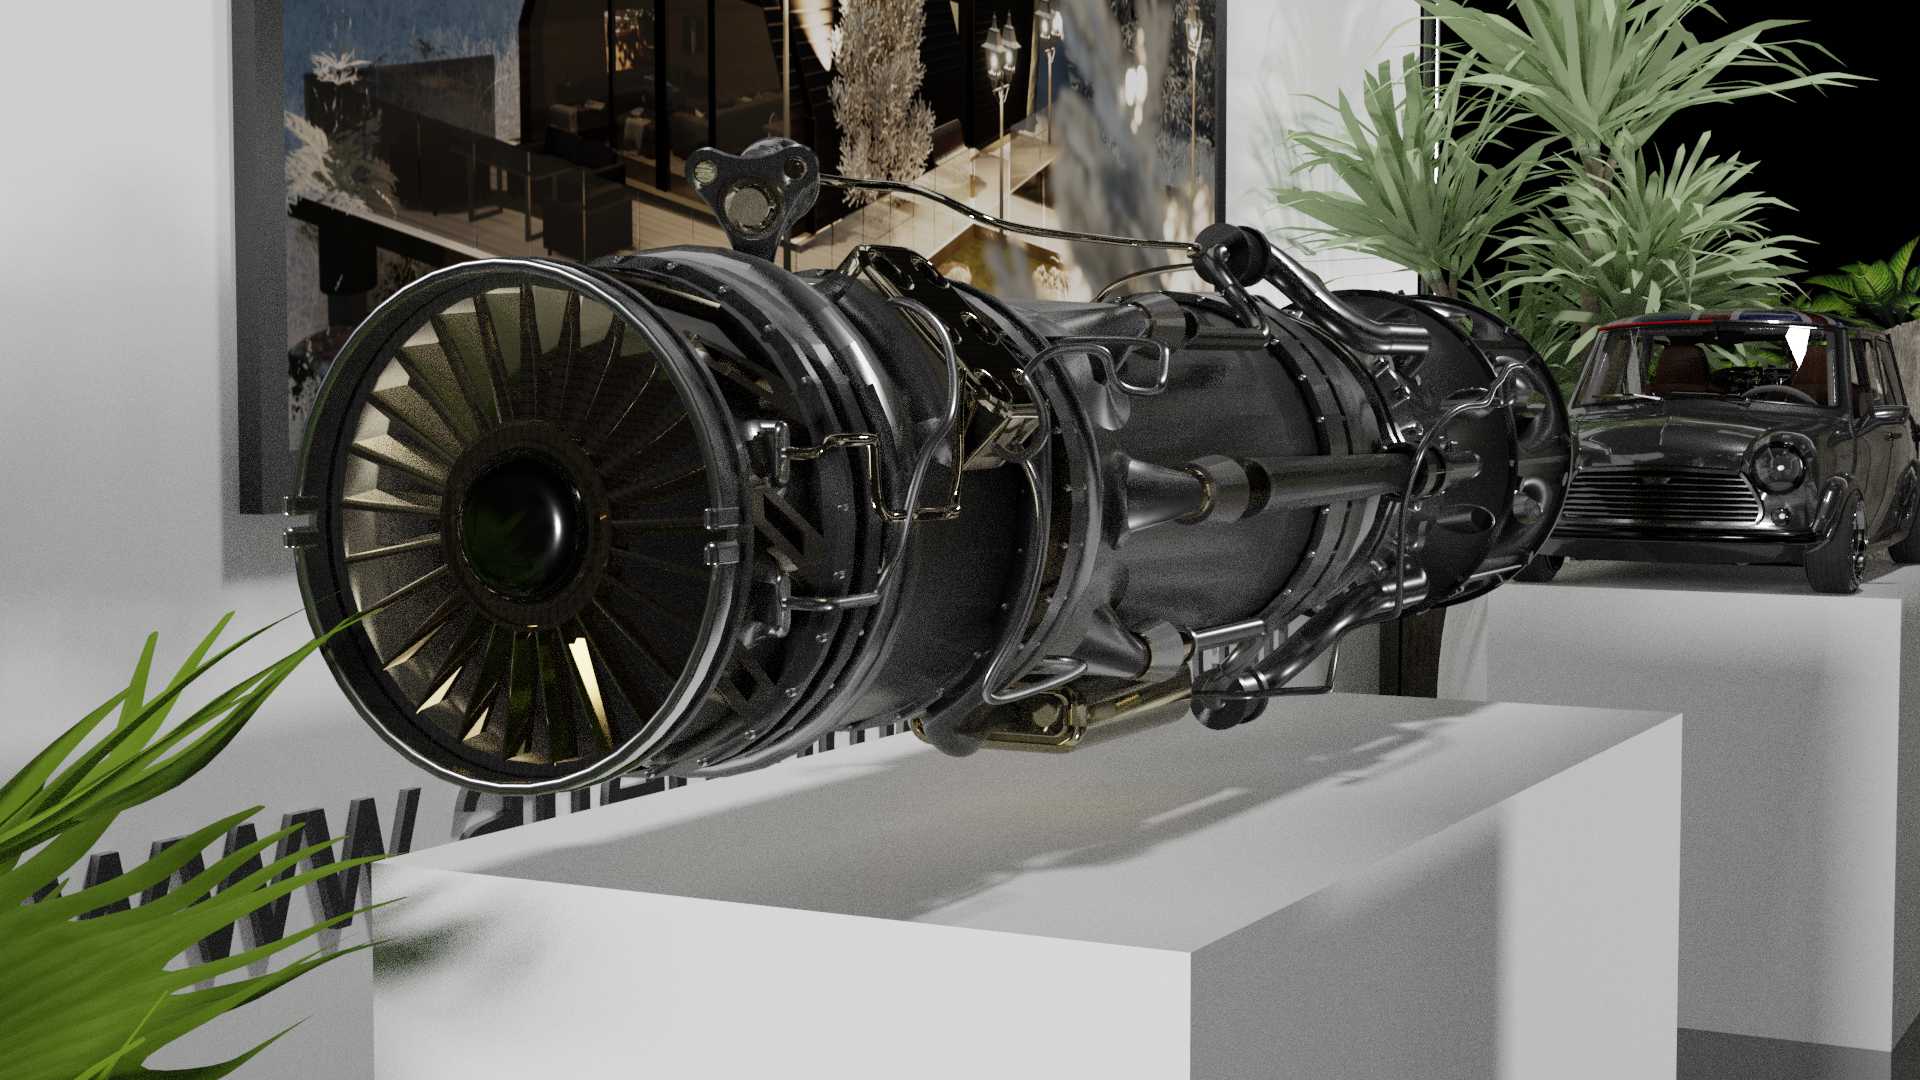
I wanted my model to have an industrial metal feel to it. Therefore, to begin with I drew out my space and imported a model of a jet engine I made in second year to be the focus point for the stand. I then went about modelling the structure that would both hold up the stand and illuminate it. This was based on a camera lighting rig which was a few simple circle extrusions to model then many move, copy and combine commands to make.
Branding
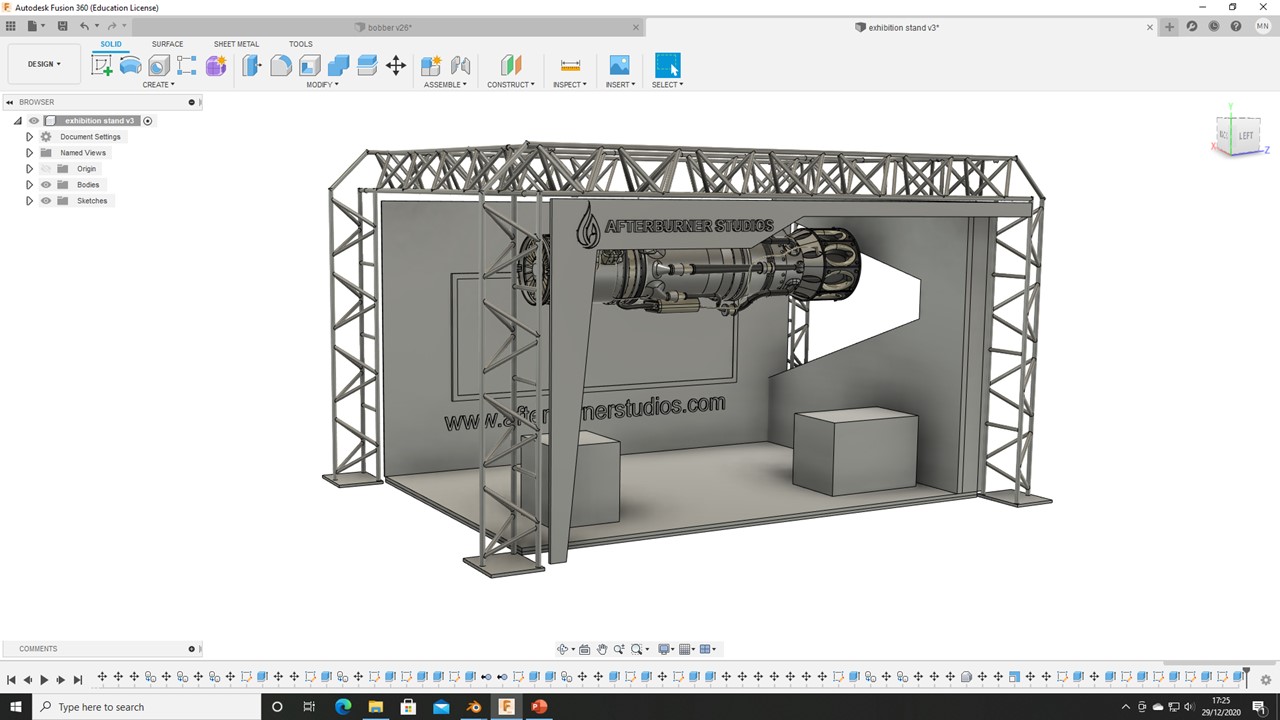
To brand my stand I wanted the main focal point to be my banner video. The reason being this is one of the most time-consuming things I do during the semester and showcases all my most recent products. The way I wanted to show this was with a large screen on the back of the stand which would hold a video texture. I also added three-dimensional text to the main facade of the stand.
Final render
For a final beauty render of my stand, I exported to Blender to get a photorealistic look. Its worth noting here that I removed the jet engine. The reason being that as I mentioned I wanted the focus point to be the Screen at the back and this was hindering that with its size. Therefore, I scaled it down and added it to a product stand within the main area to allow a clearer view of the screen.
Final
Final Collabaration
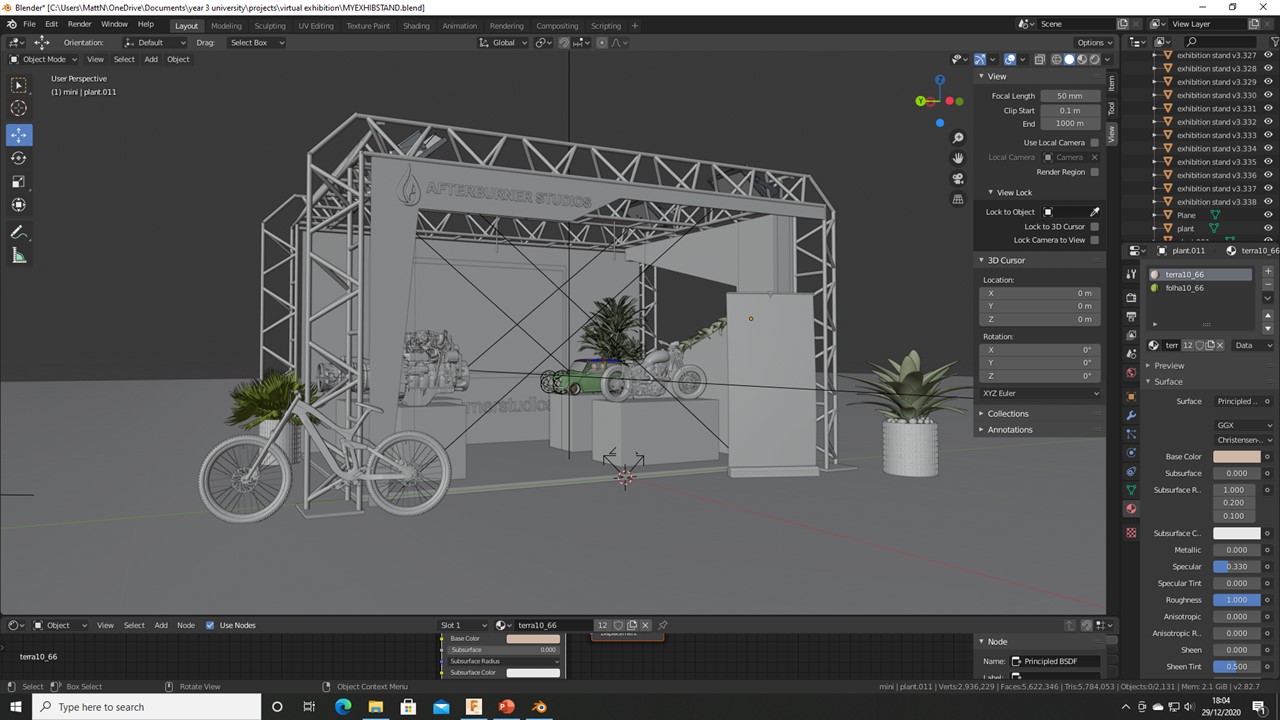
For the final collaboration of the virtual exhibition, I used Twin motion. Twin Motion has a presenter feature which allows someone without the program to view and walk around the model. Therefore, this feature was perfect, and the folder can be emailed around, and the project can gain some real traction. Unfortunately, at time of upload I was only sent two of the course members models, Therefore I made placeholders for everyone else.
Handover Documents
Here is the final video render of the final collaboration document featuring all the work.