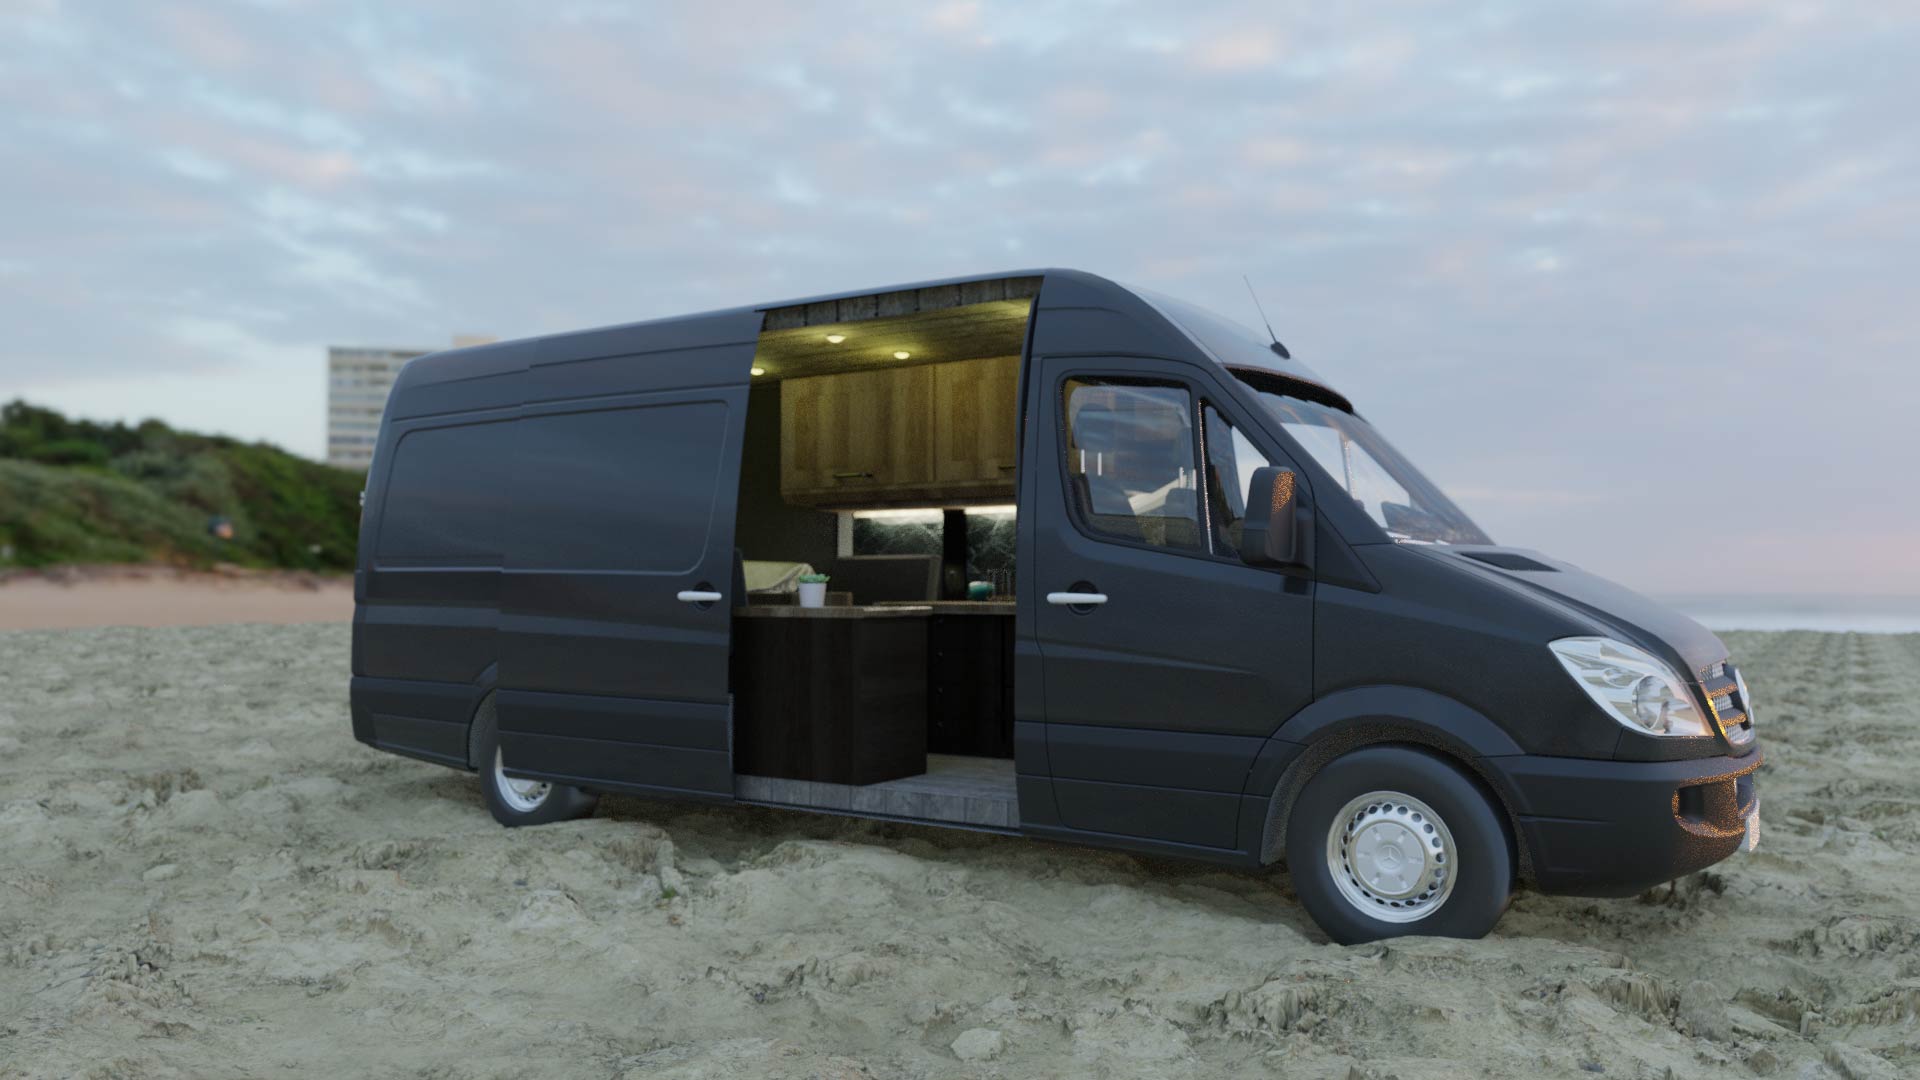
For this project I approached the client who I knew was renovating a van. I asked if I could help by creating CAD drawings and renders for him. Therefore, I split the project into two making one basic model (The Pioneer) and one Deluxe model (The Voyager). The aim for the Voyager part of this project was to create a deluxe living space that could go anywhere with you.
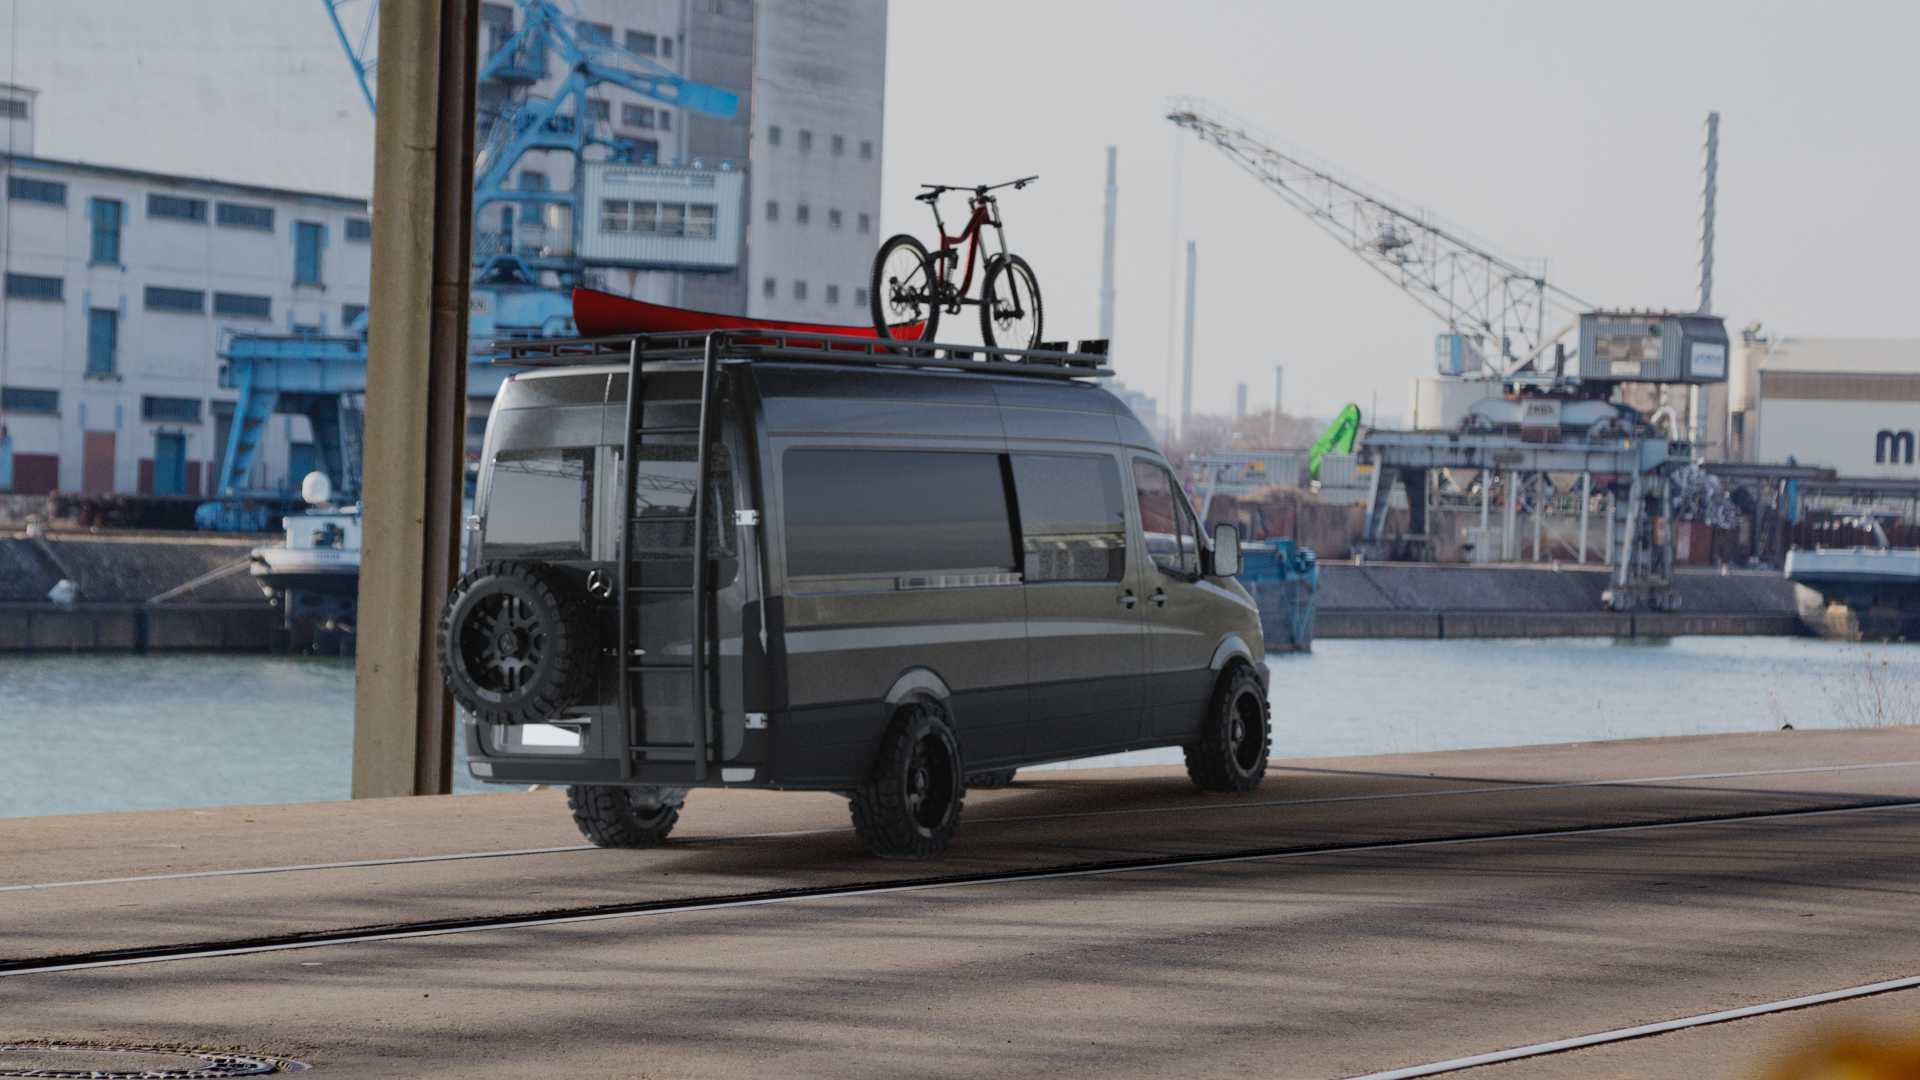
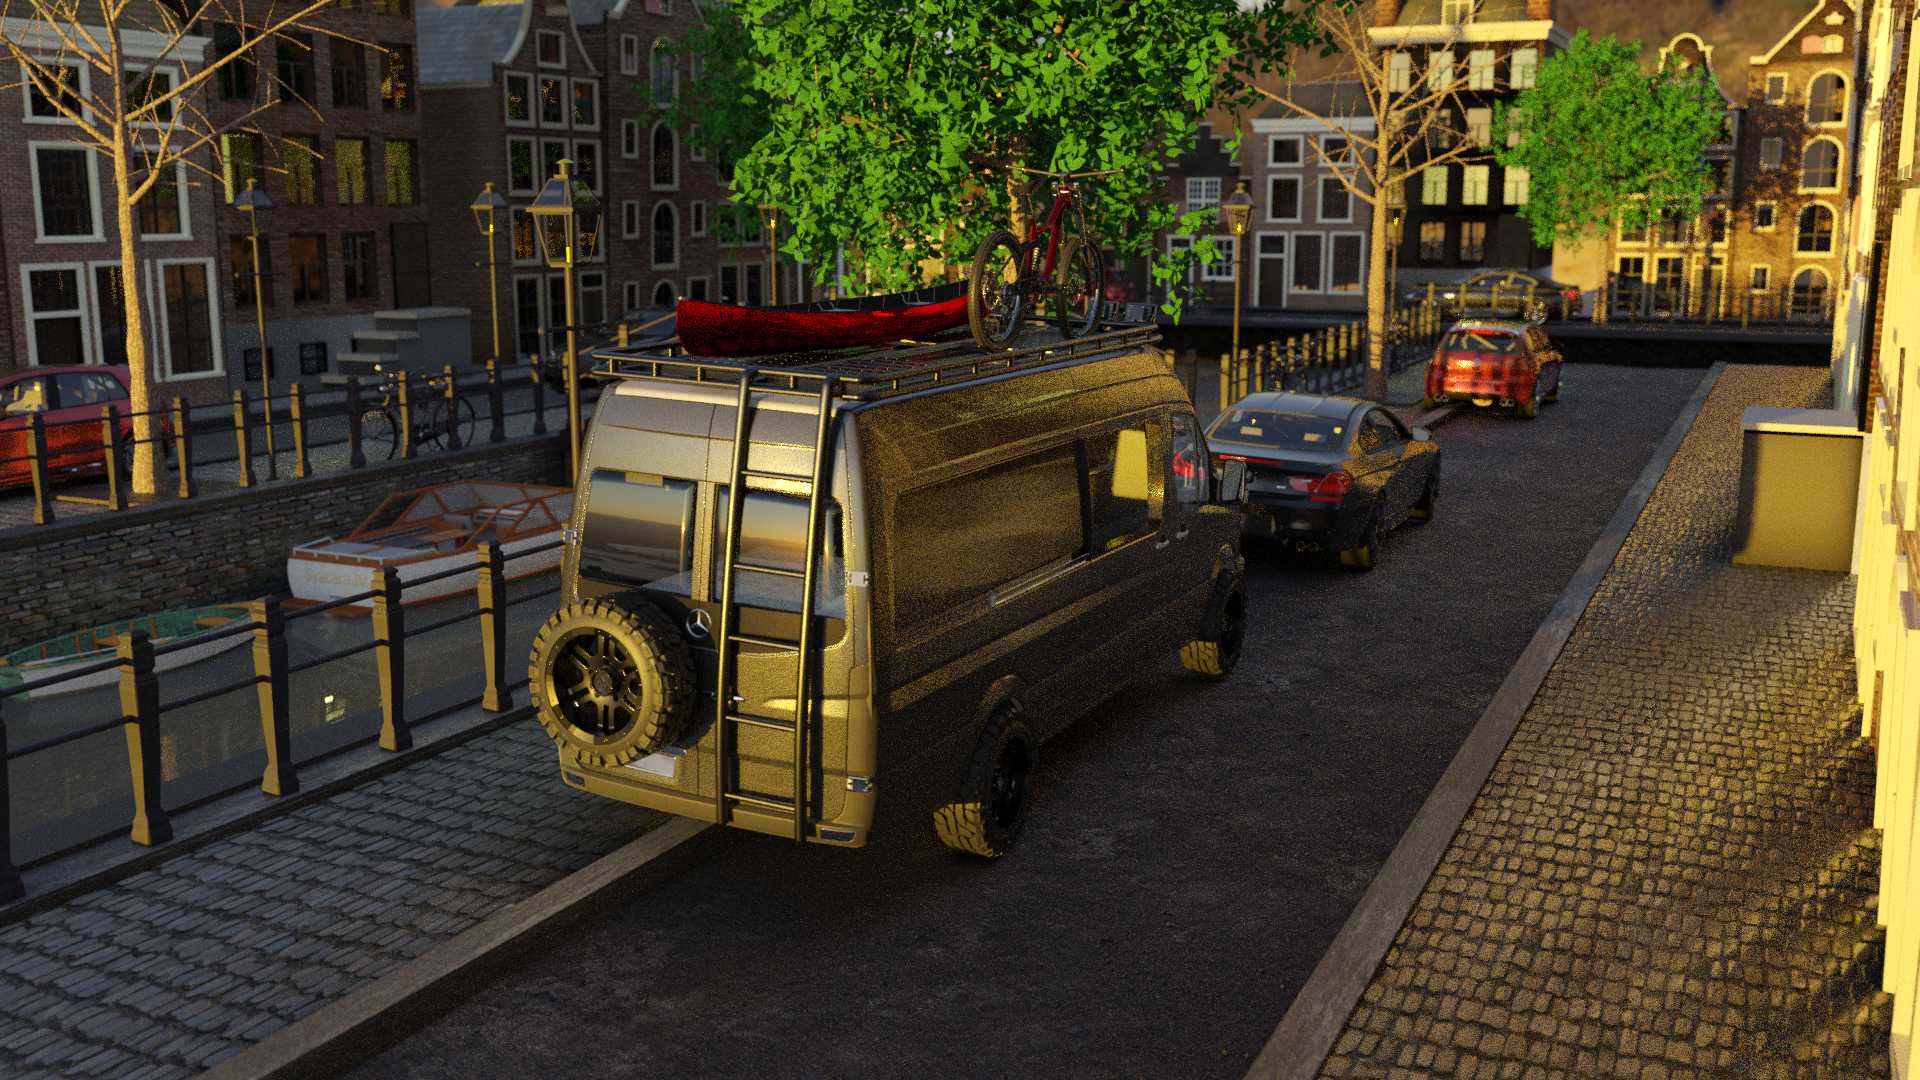
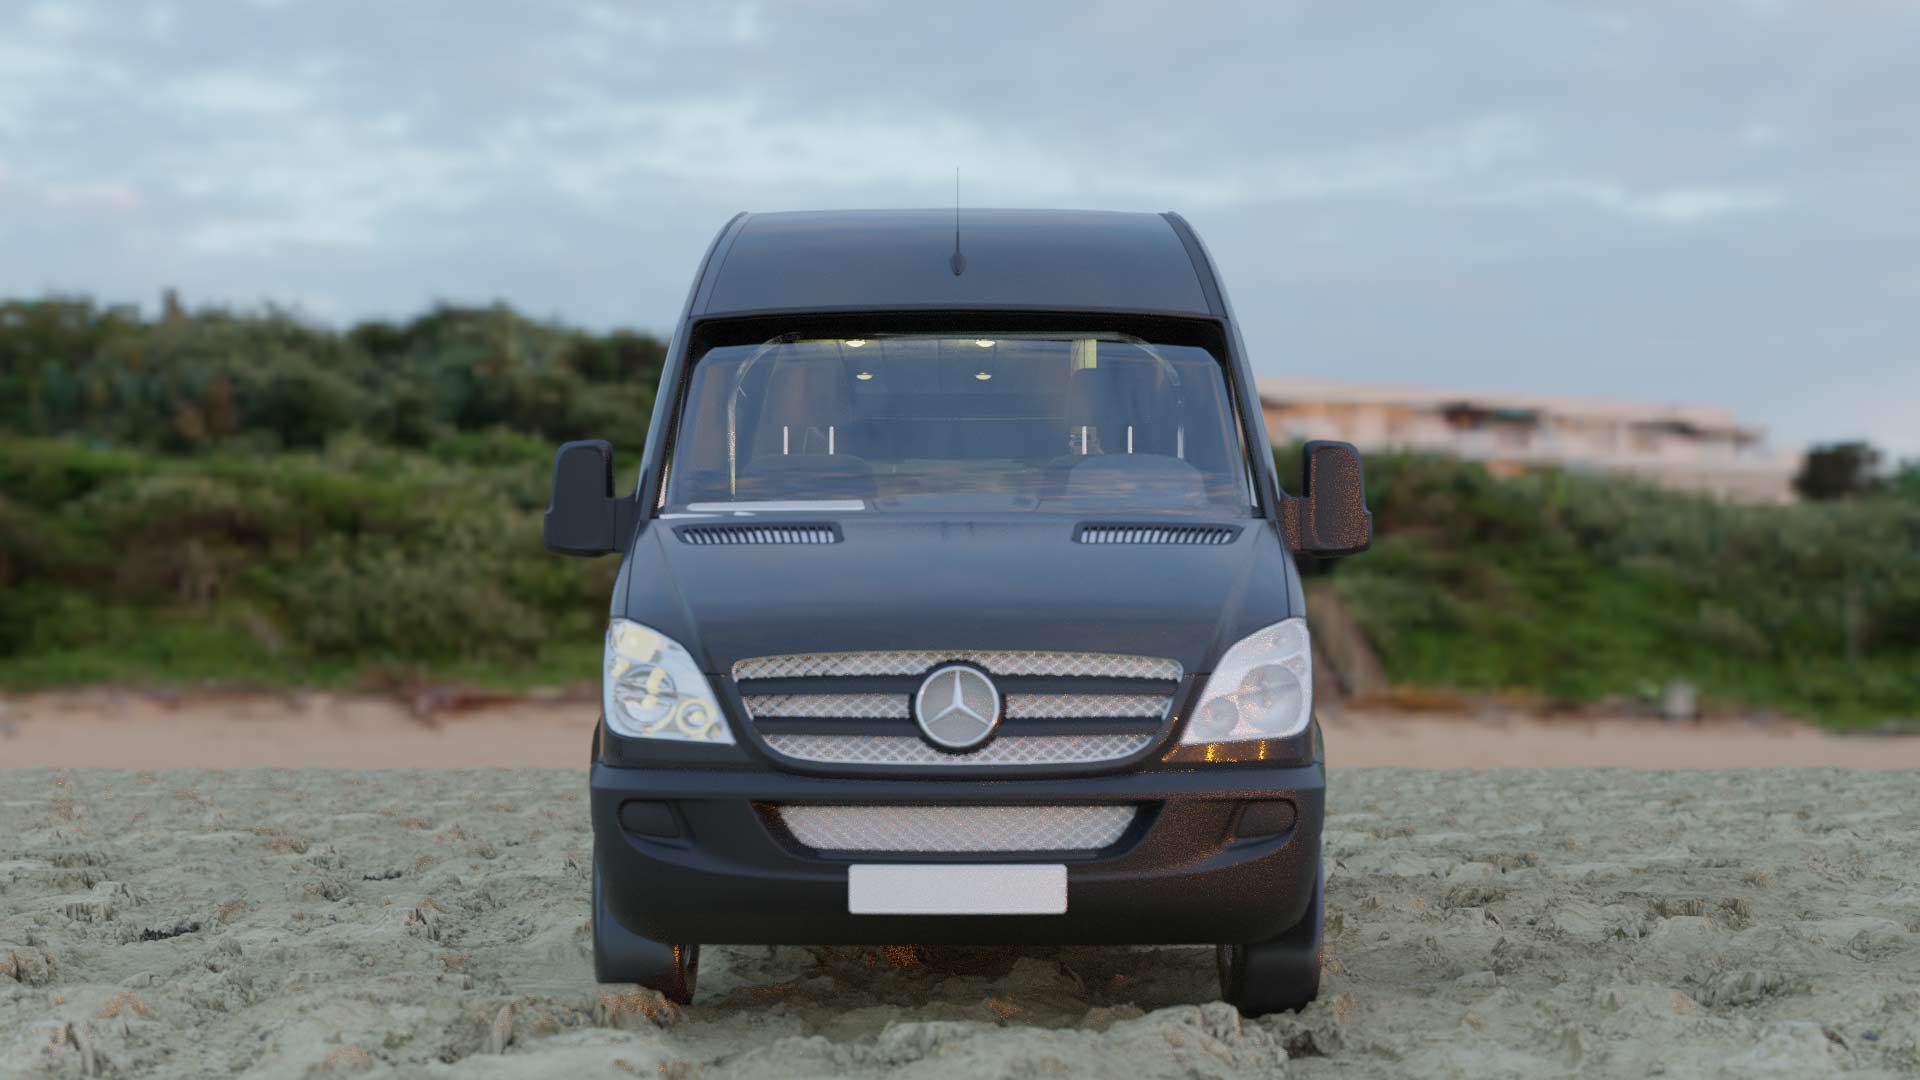
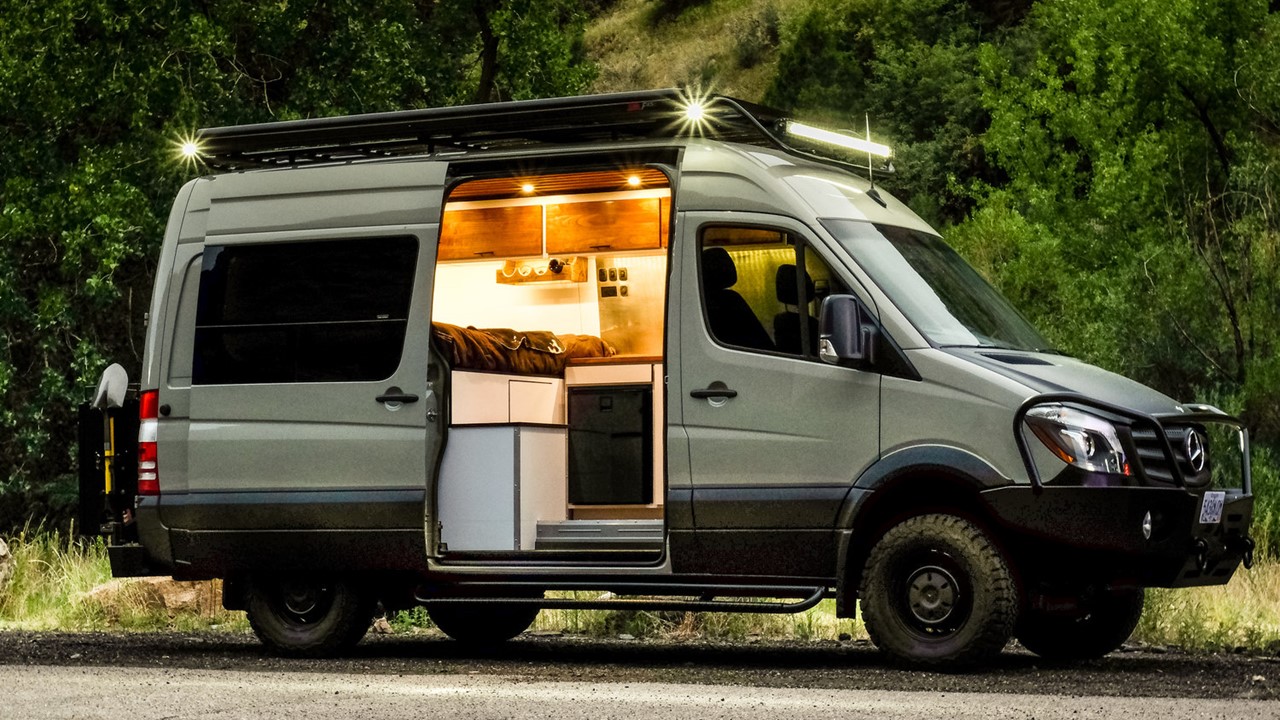
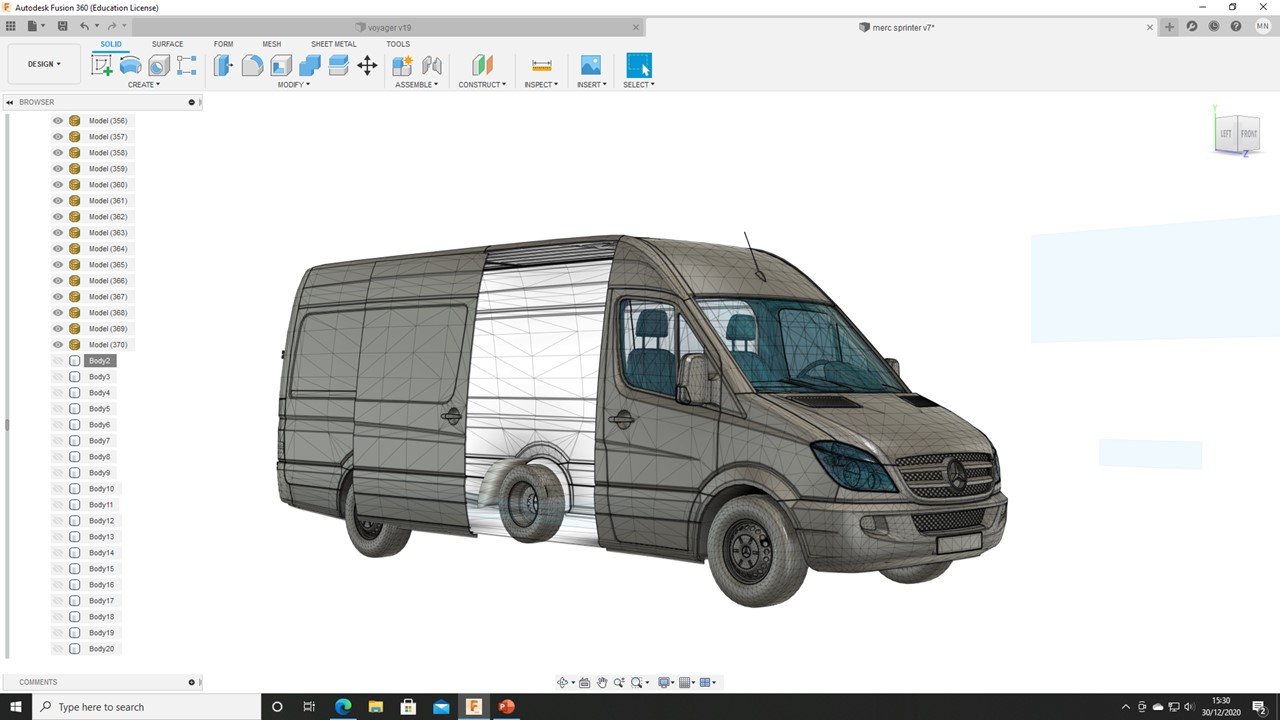
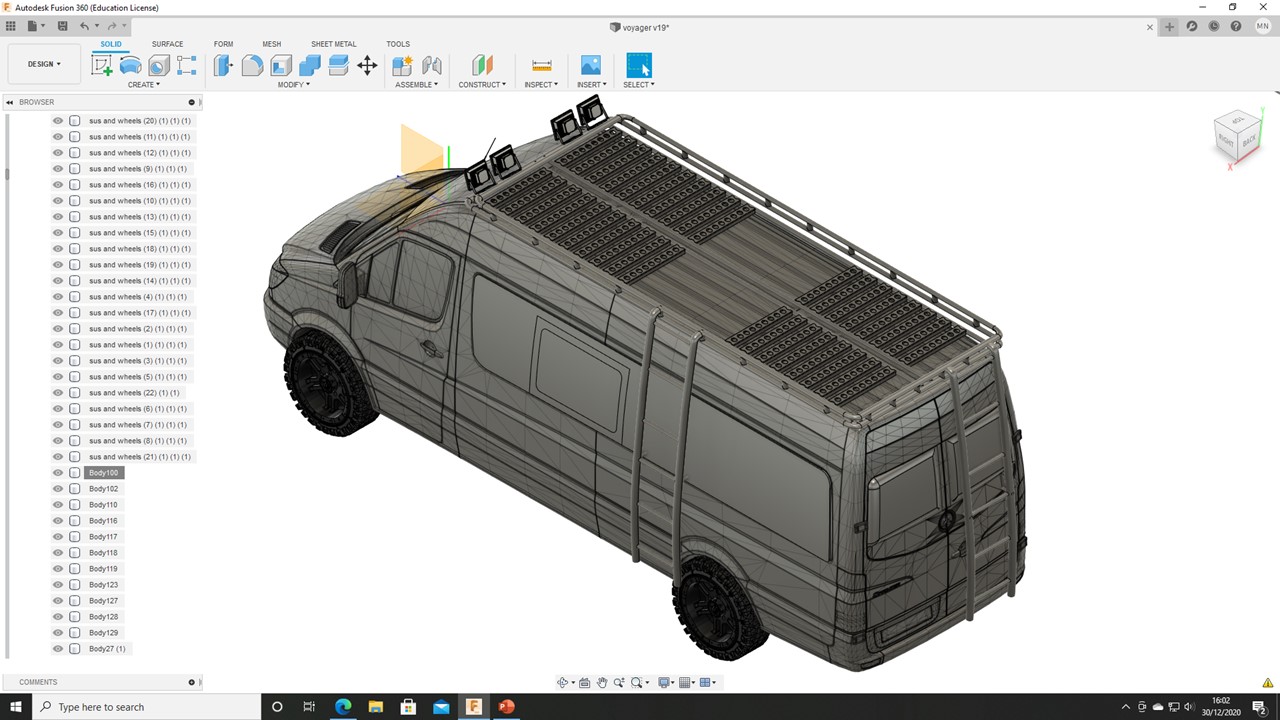
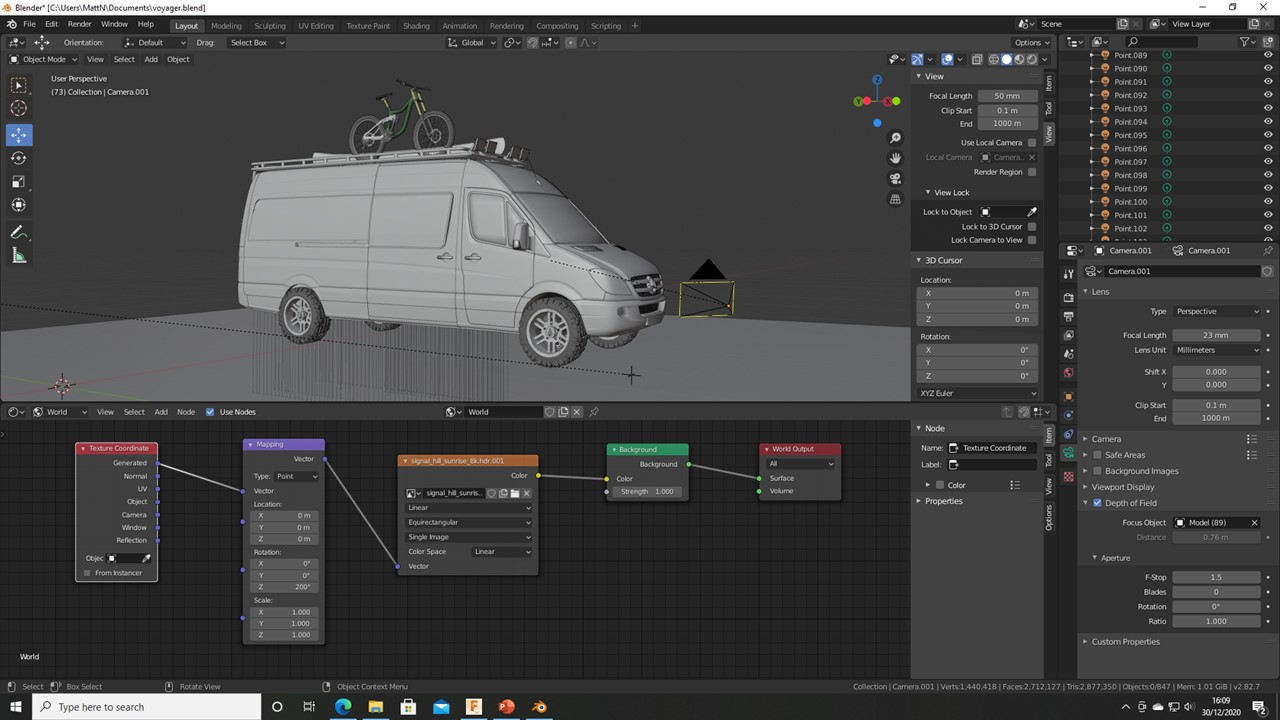
For this deluxe model I wanted to upgrade both the interior and exterior of the Van. Therefore, to the exterior I added a roof rack, floodlights, and ladders to allow for more storage and carrying capabilities. I also raised the van a considerable distance off the ground to make room for the larger off-road tyres and for more ground clearance.
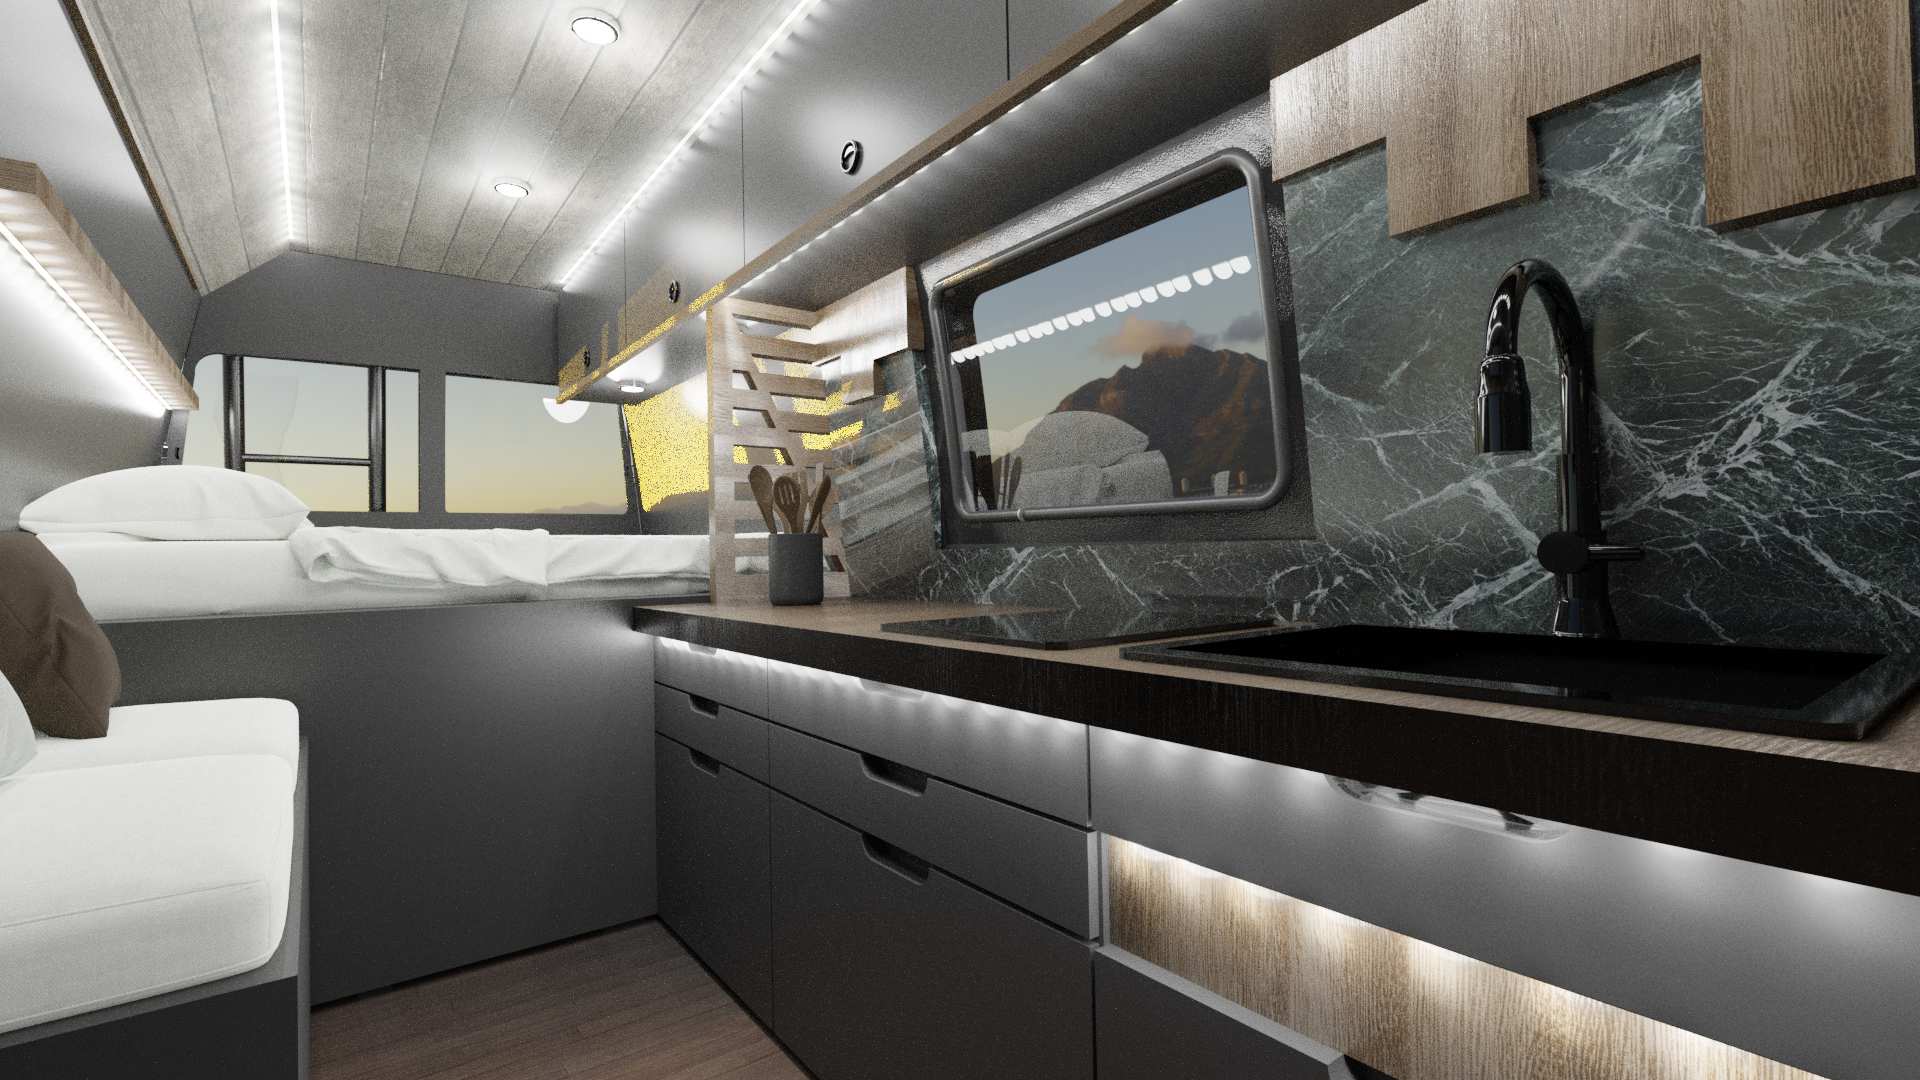
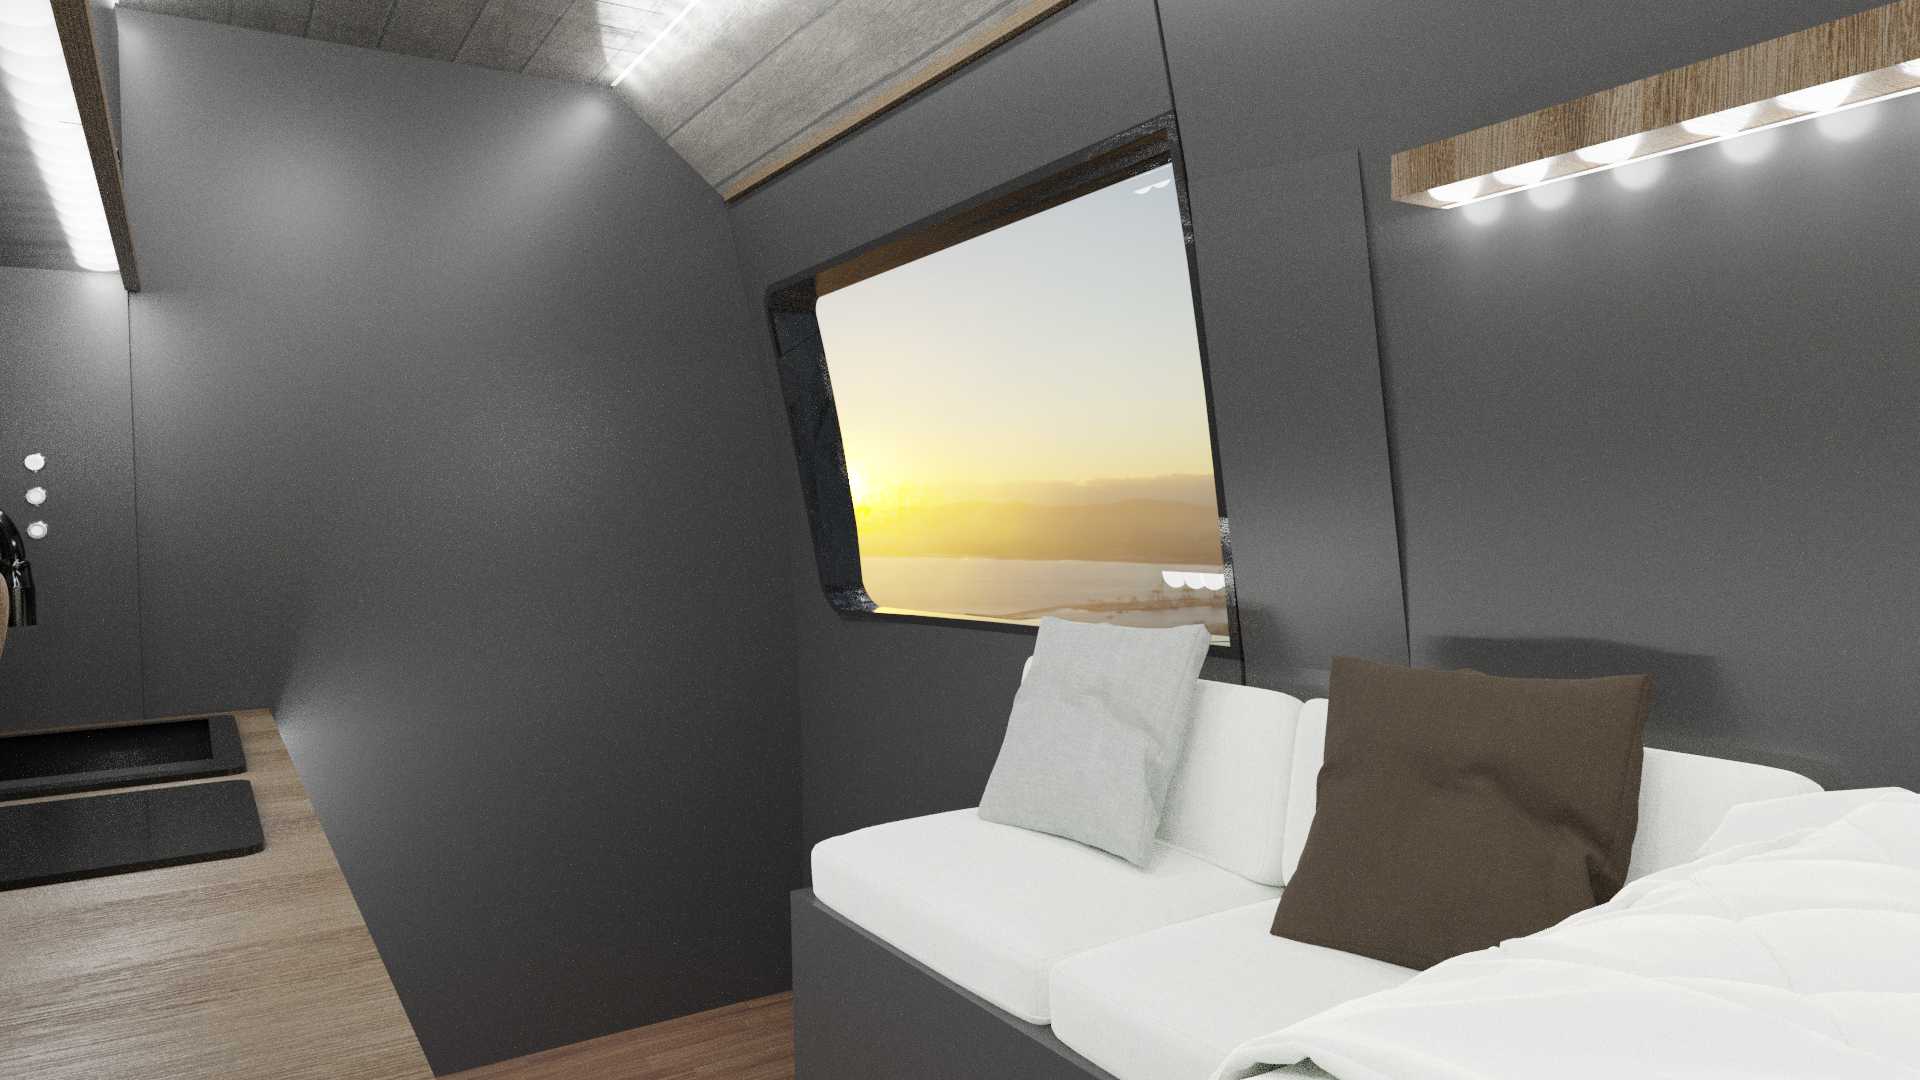
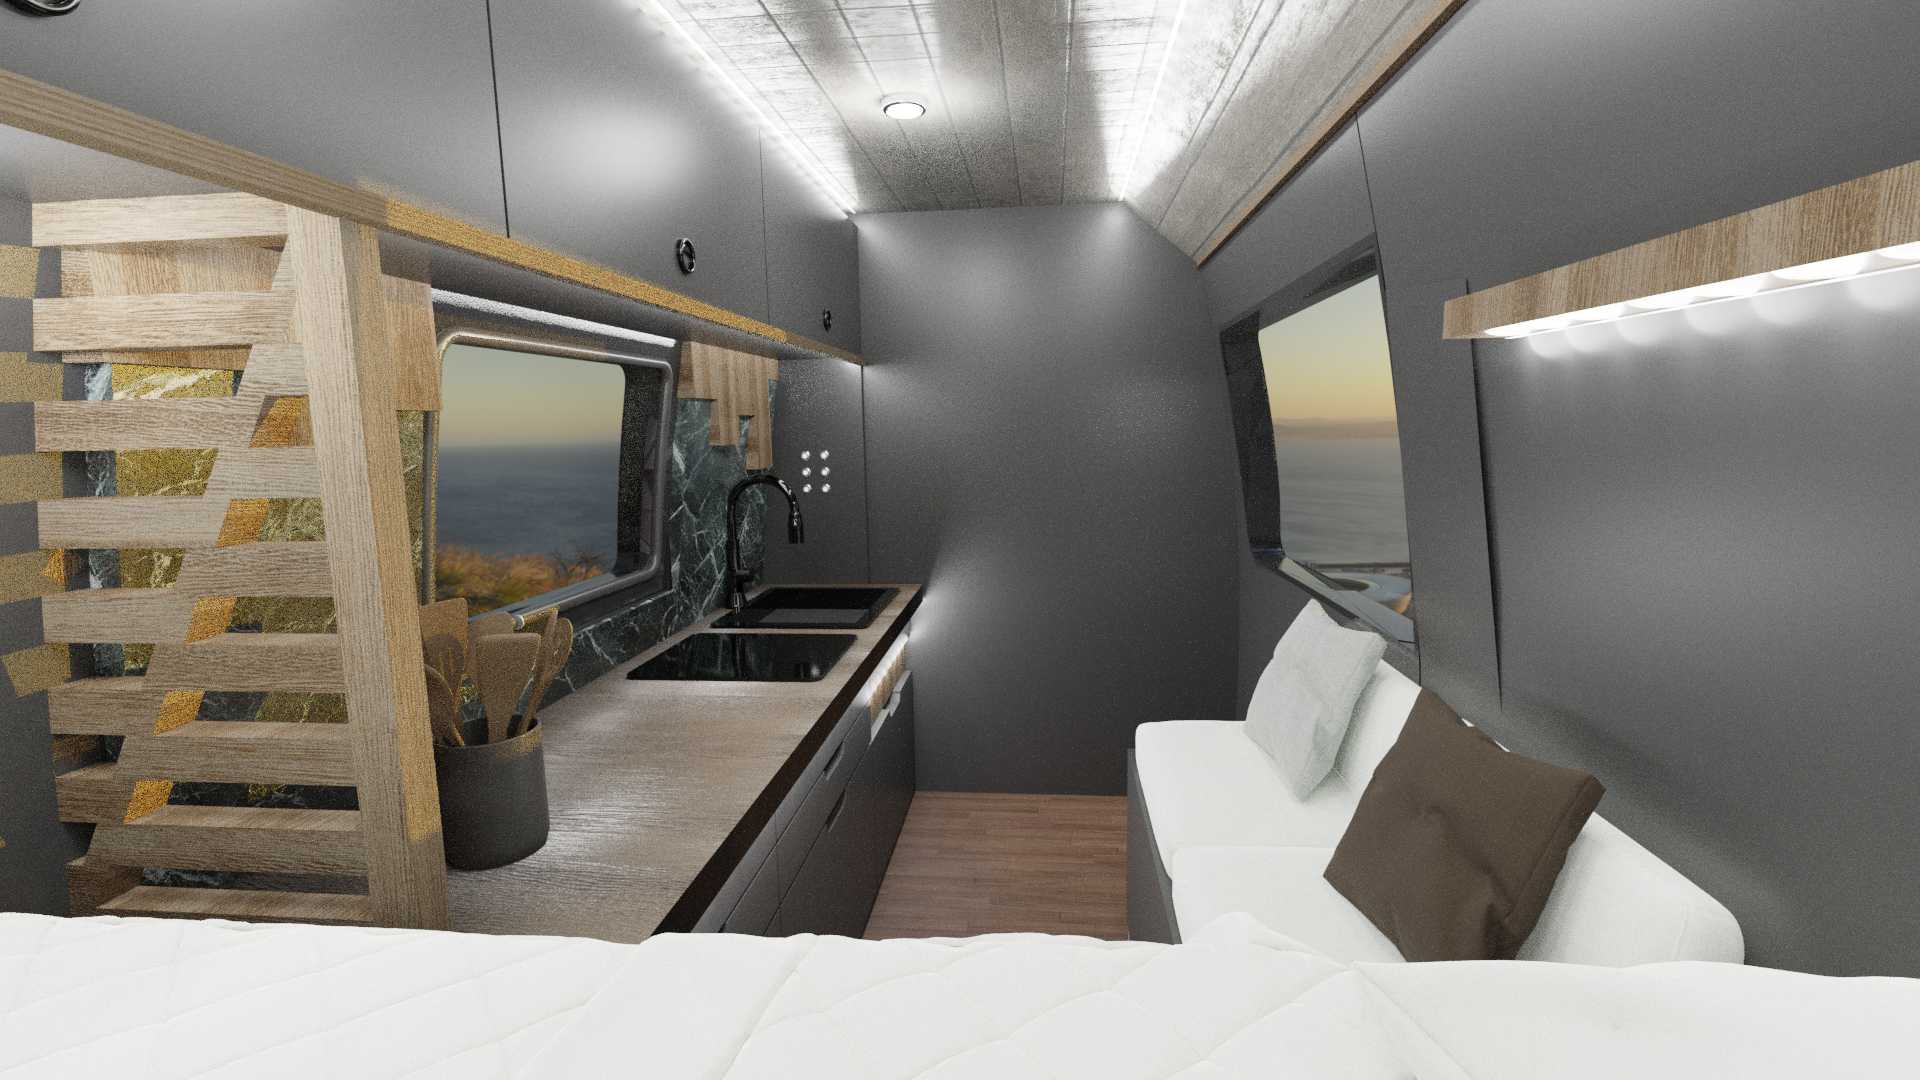
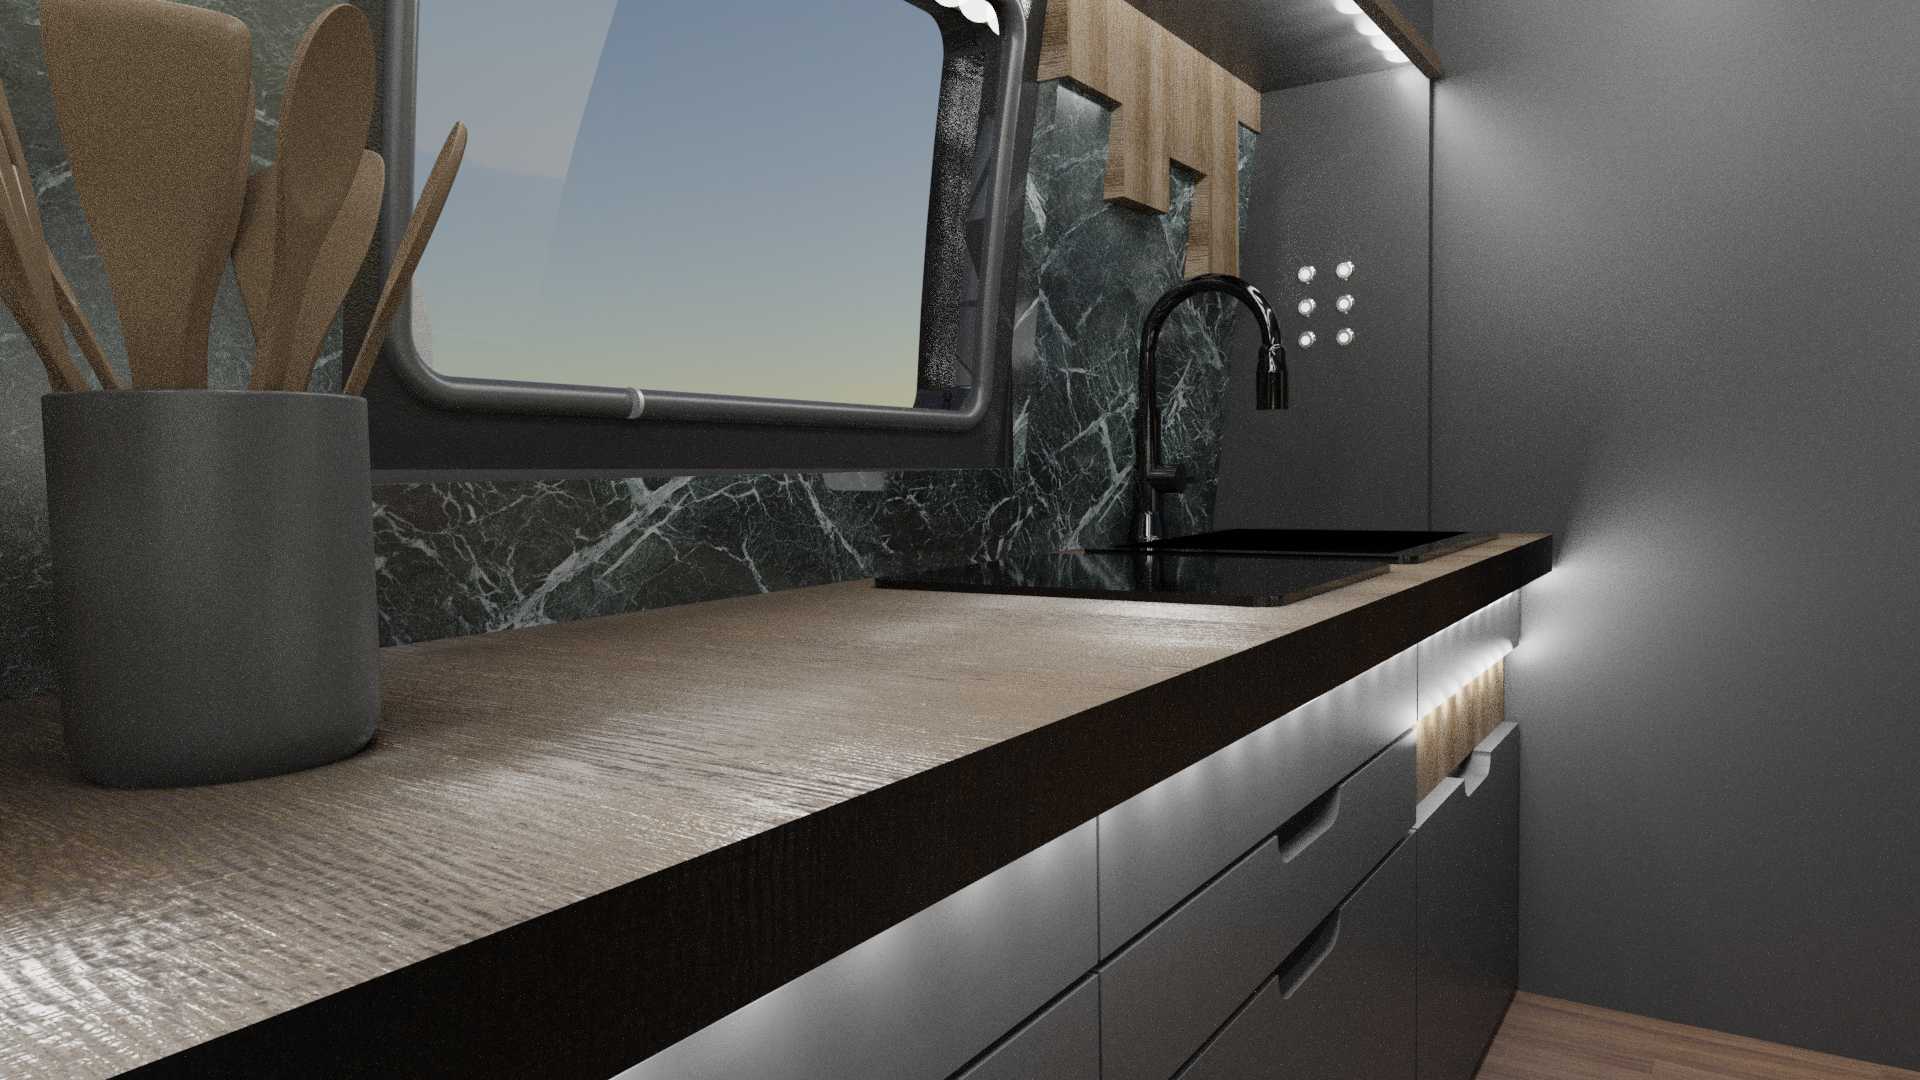
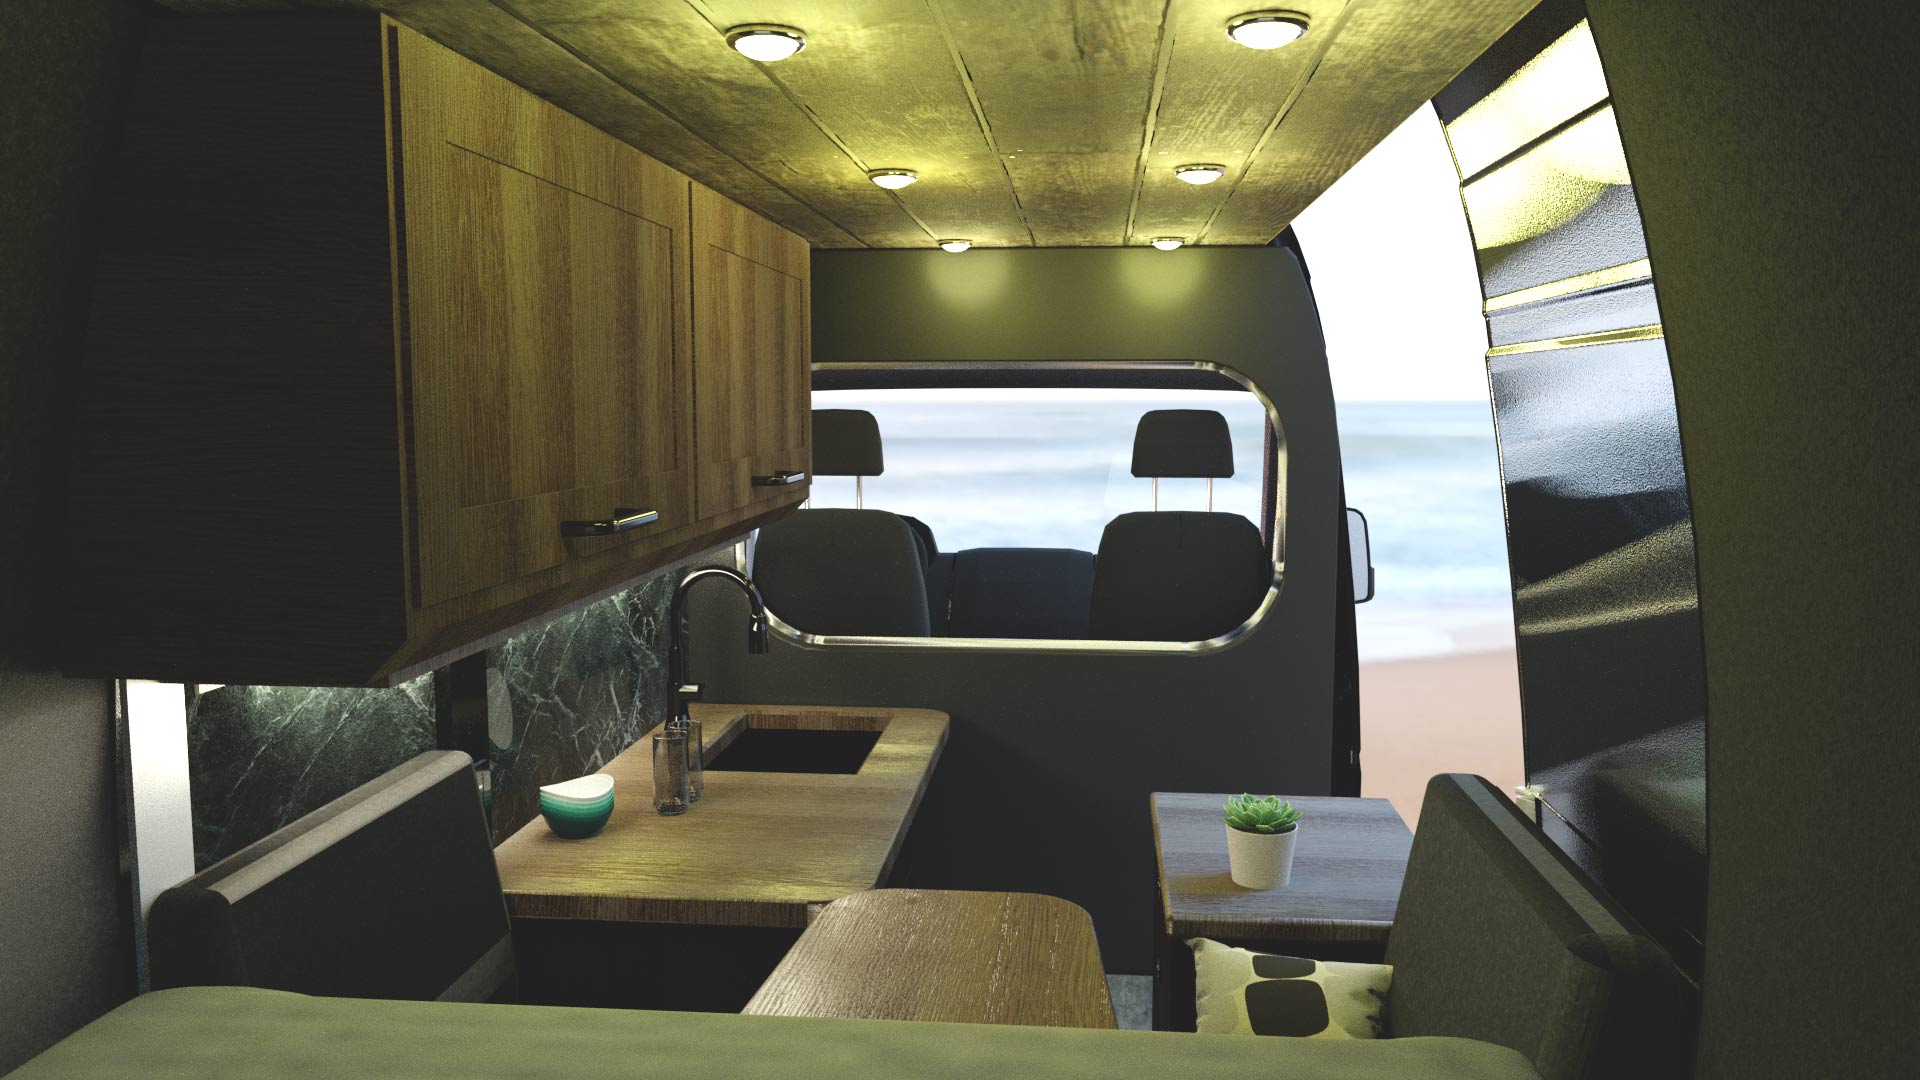
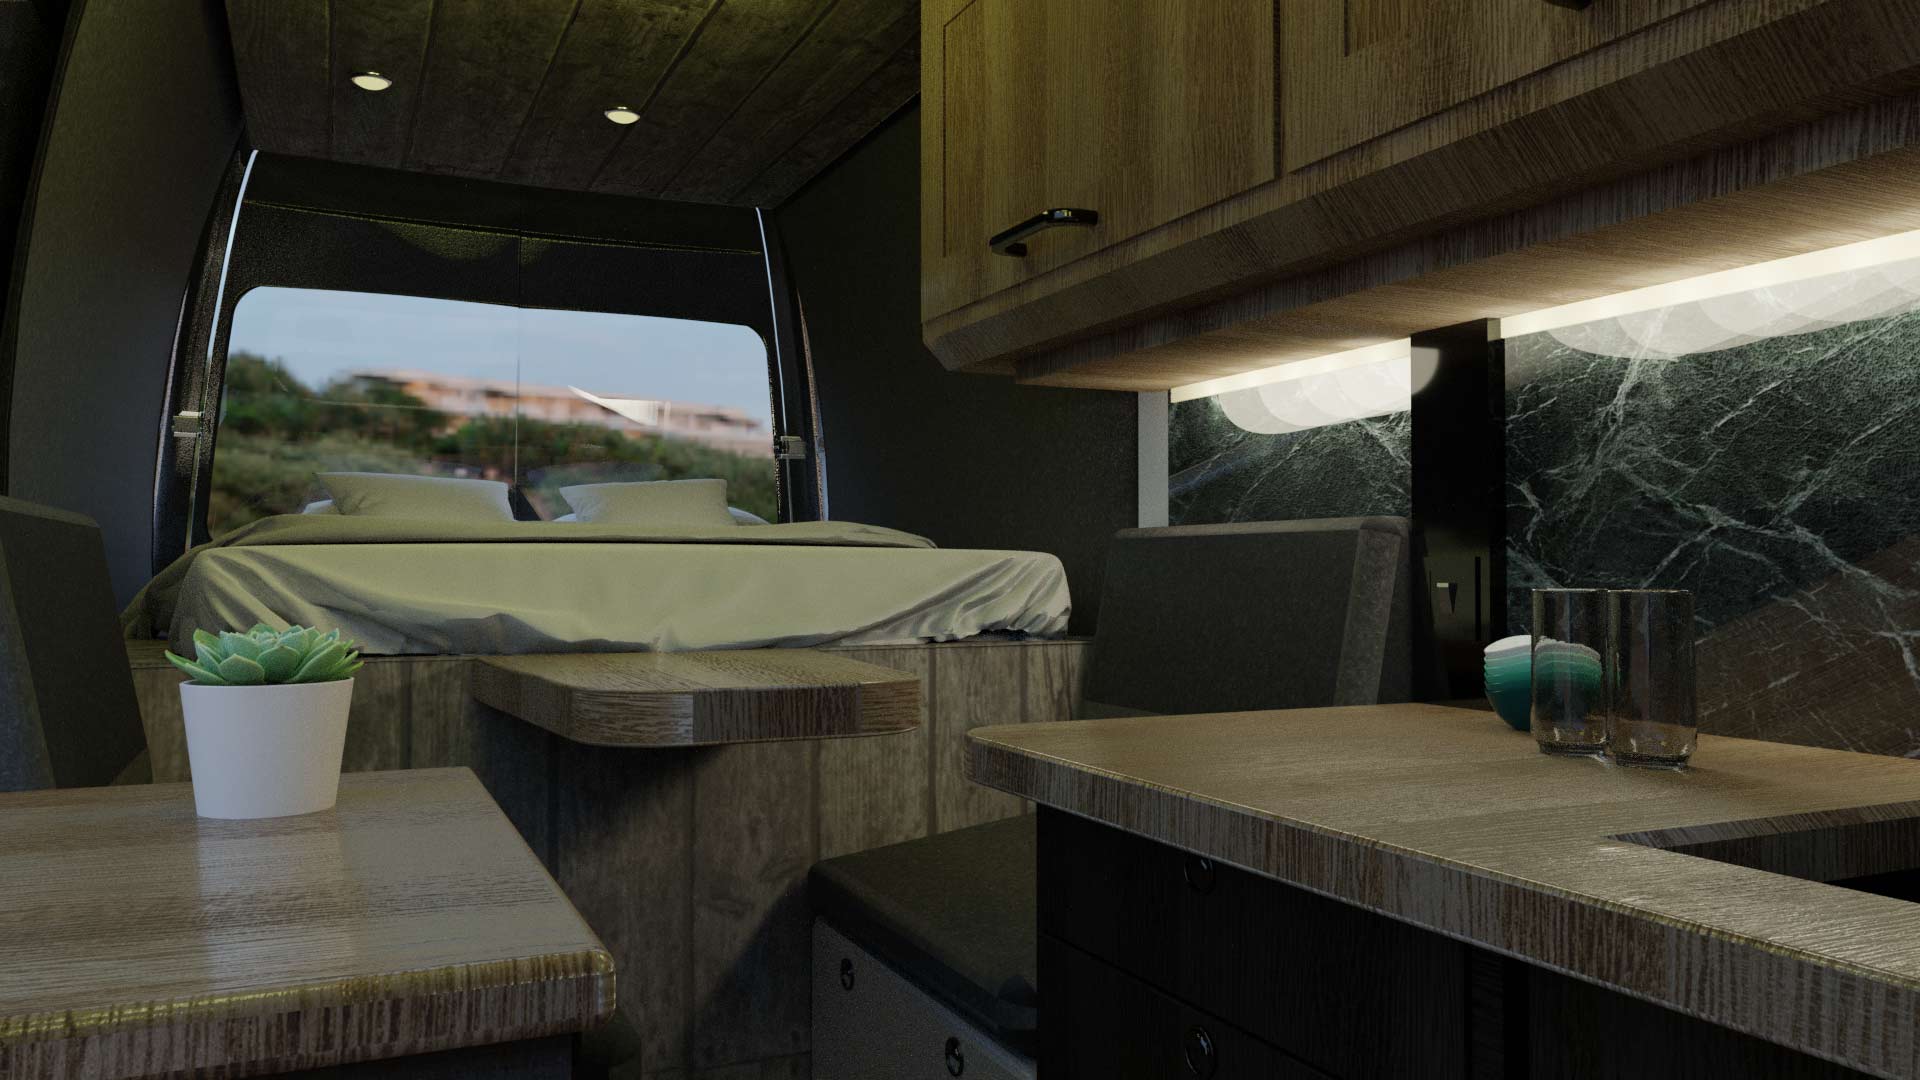
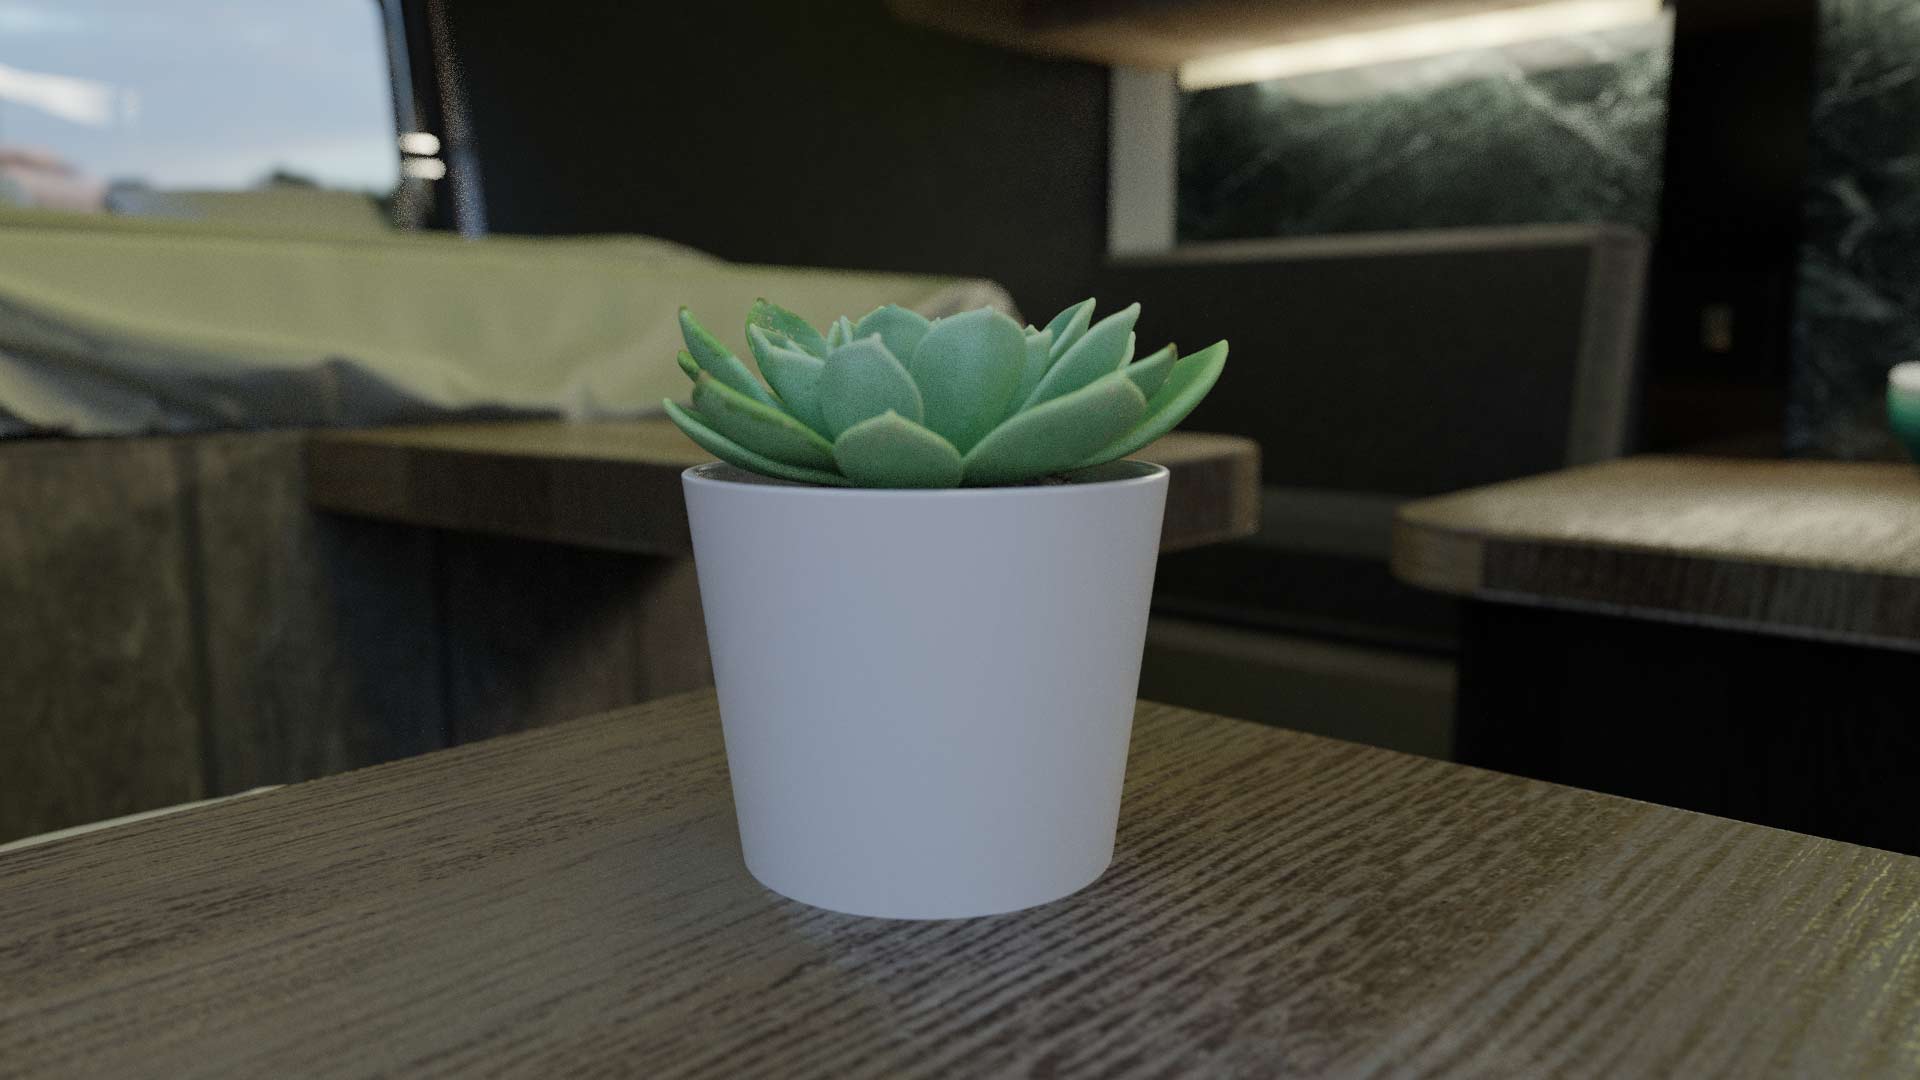
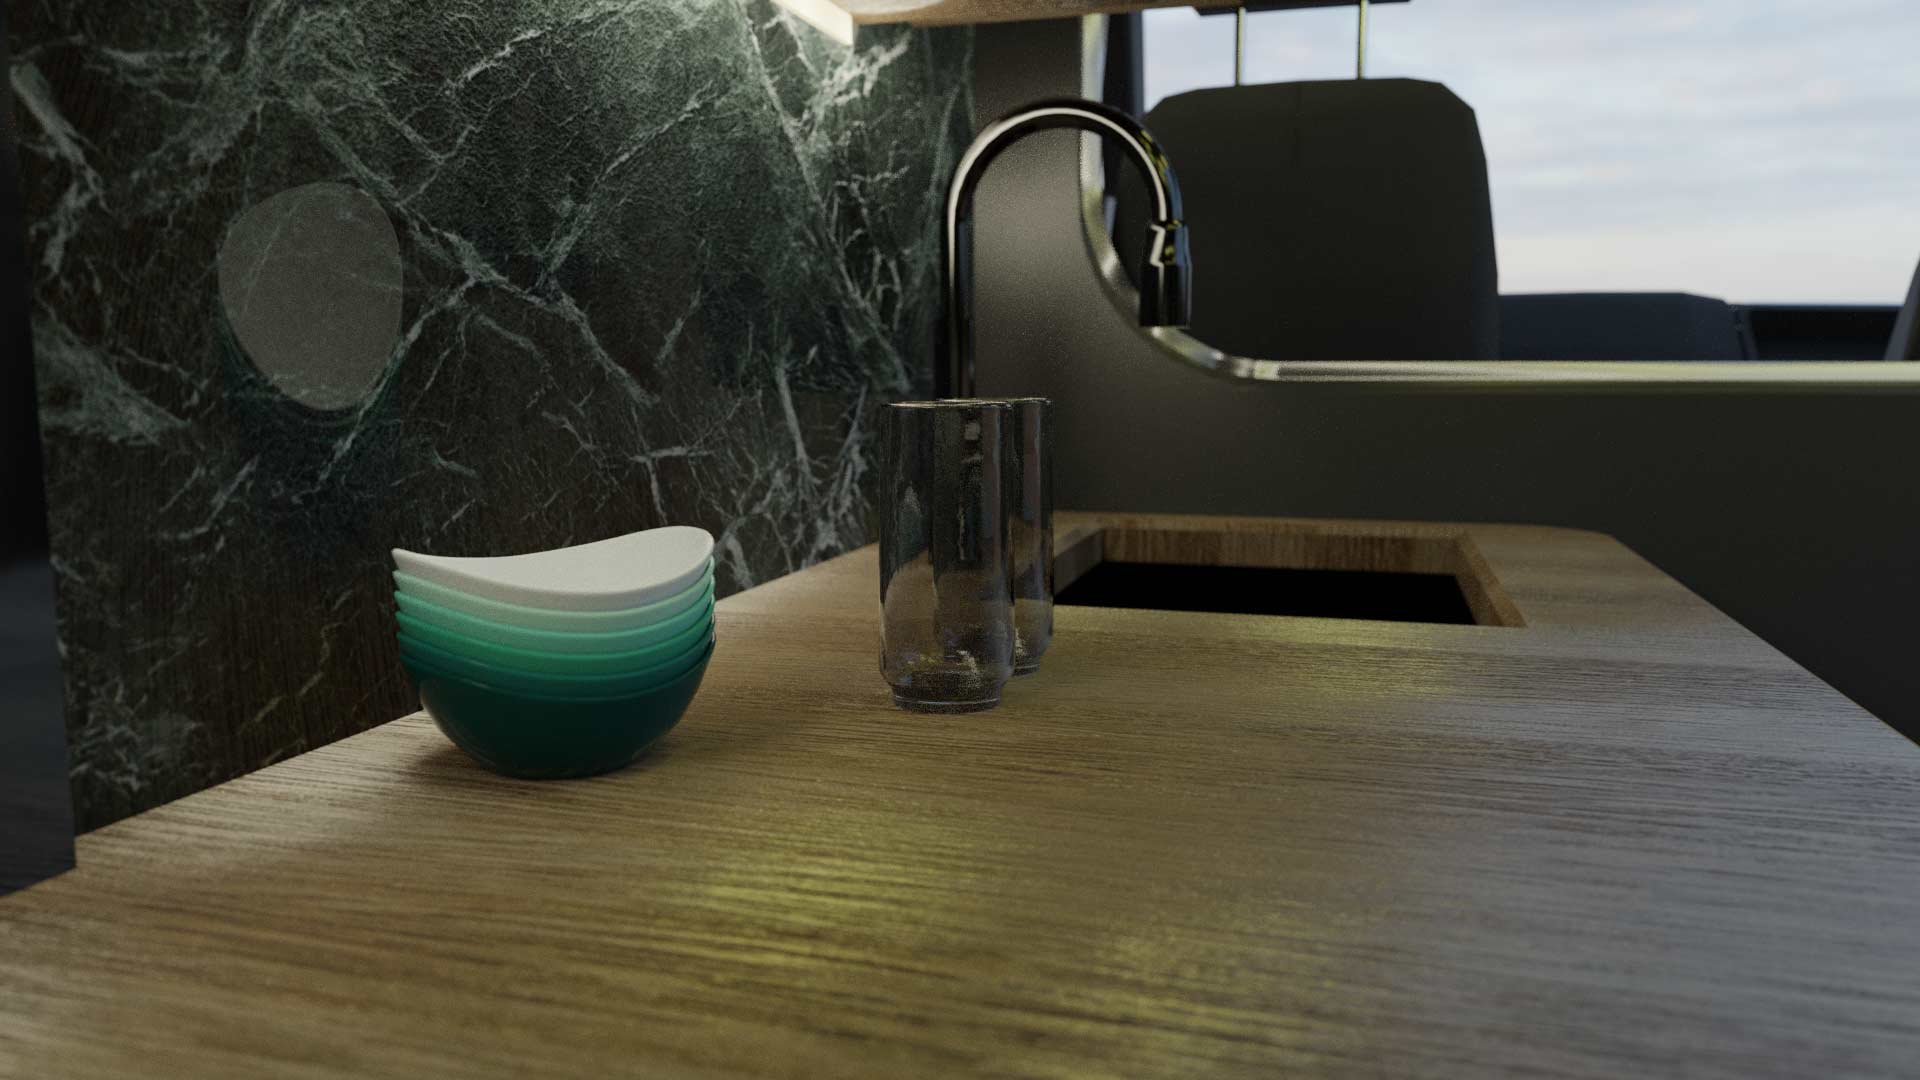
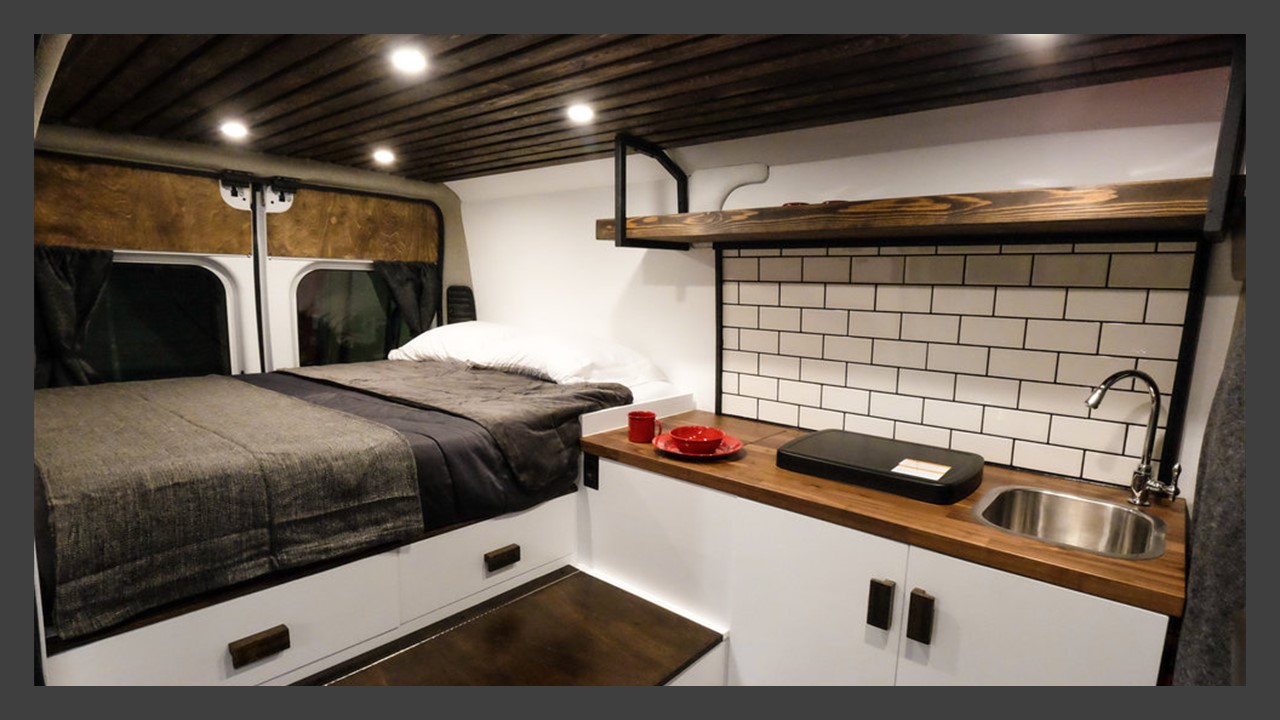
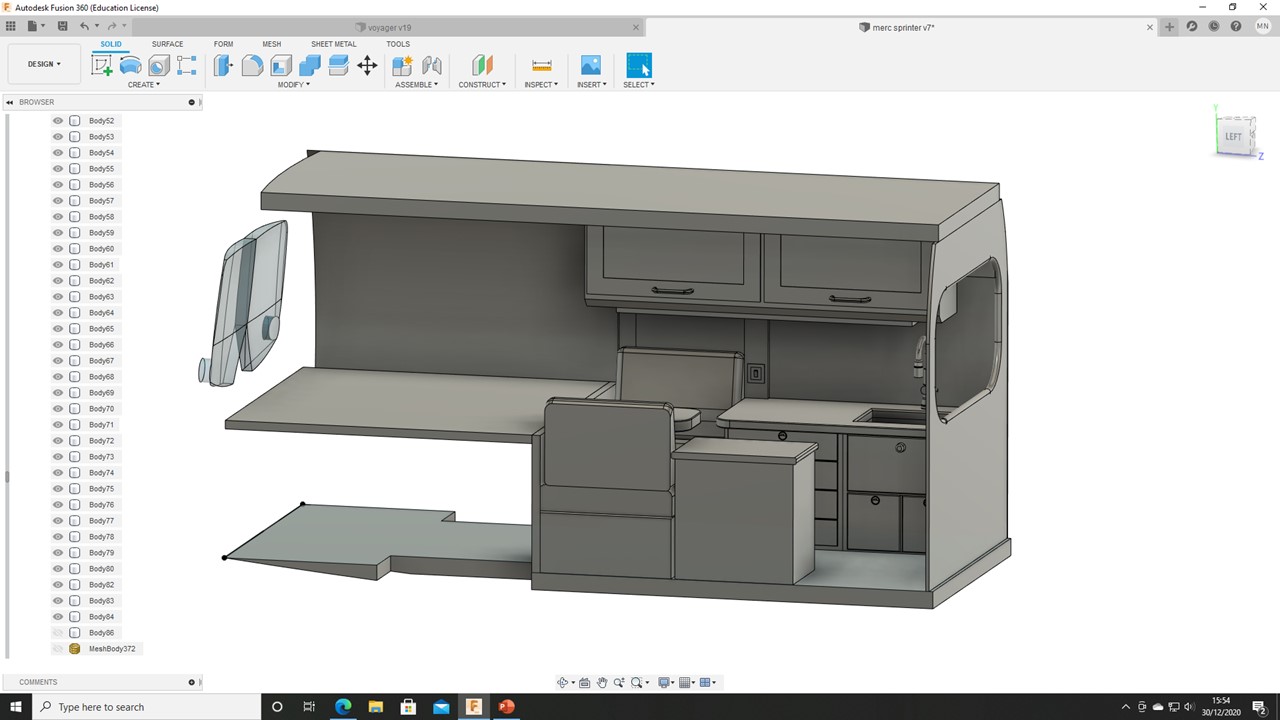
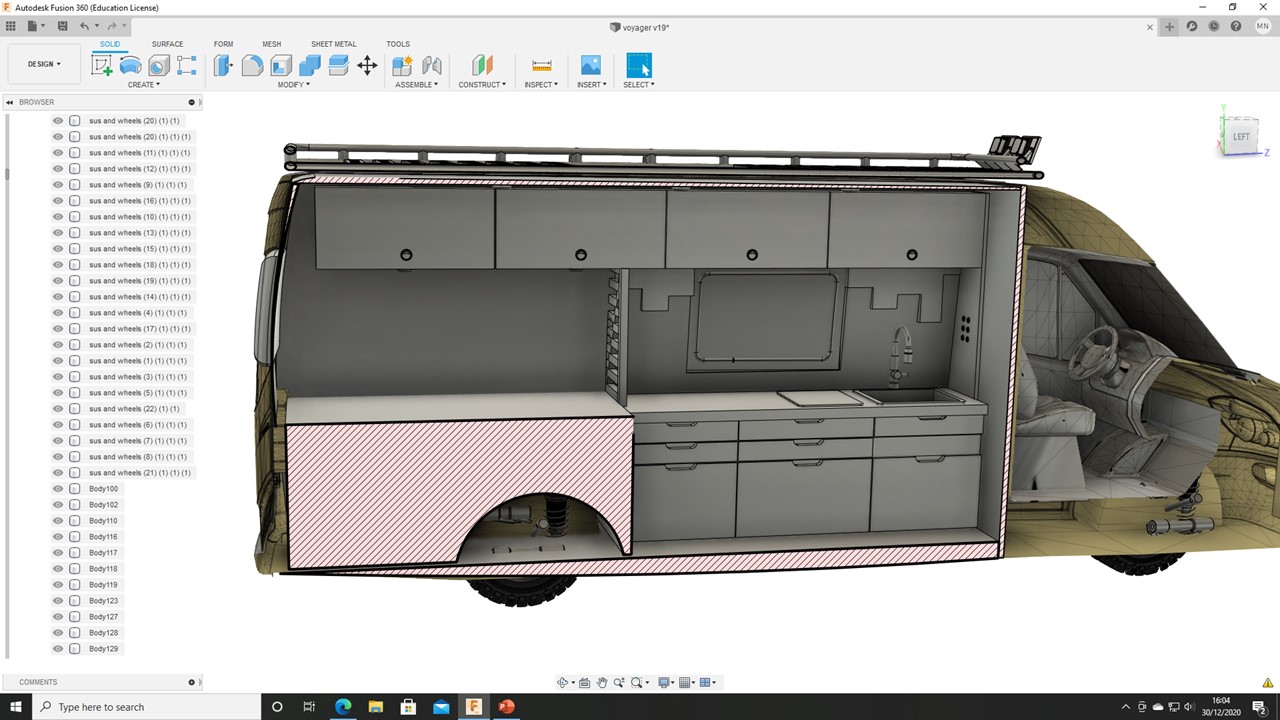
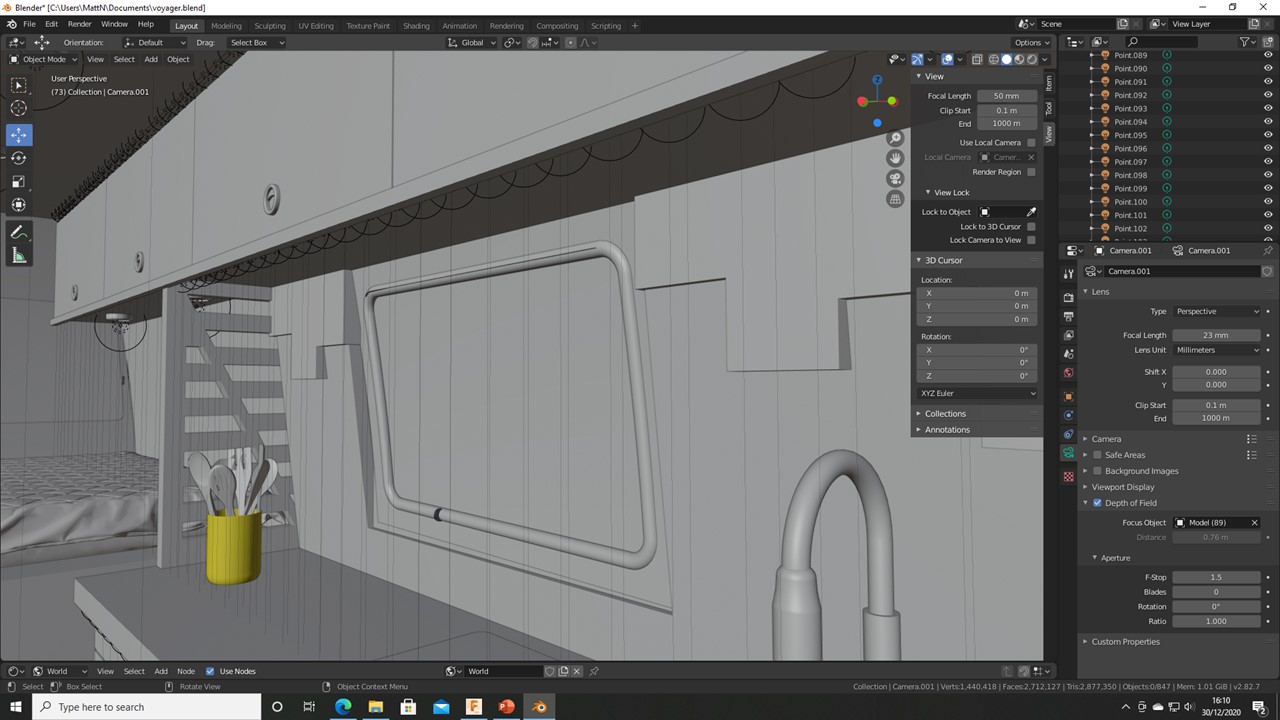
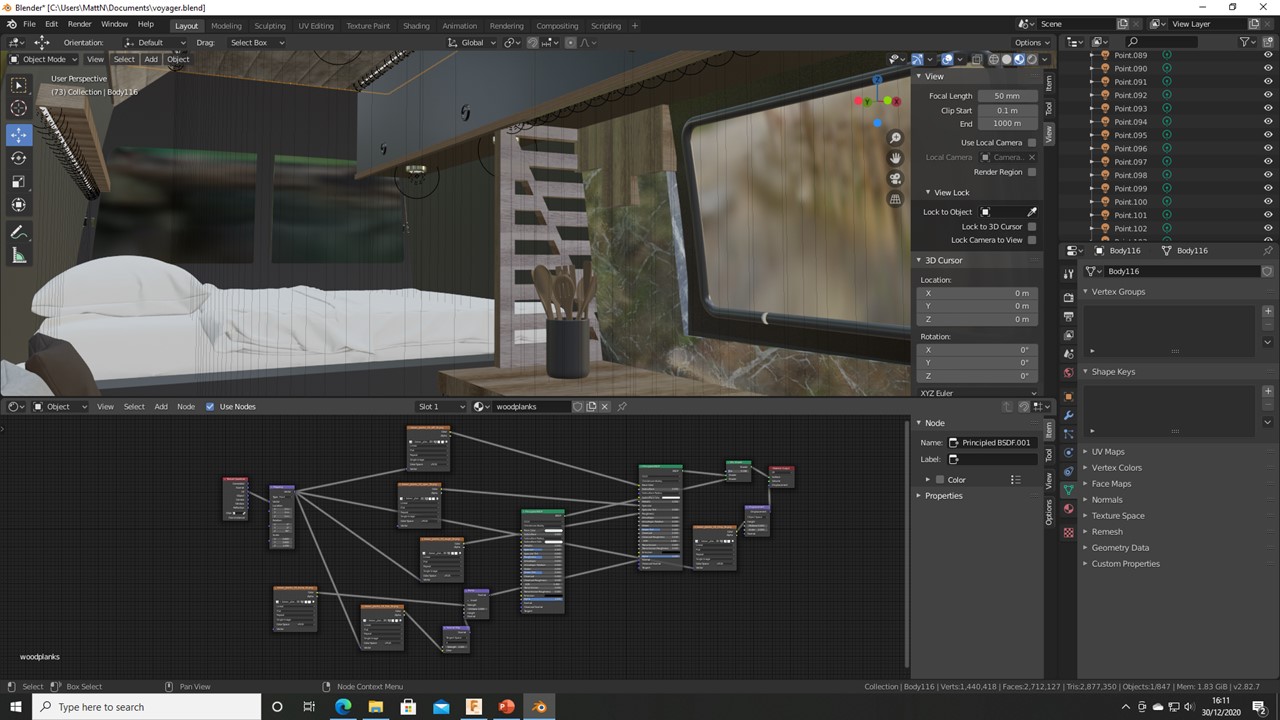
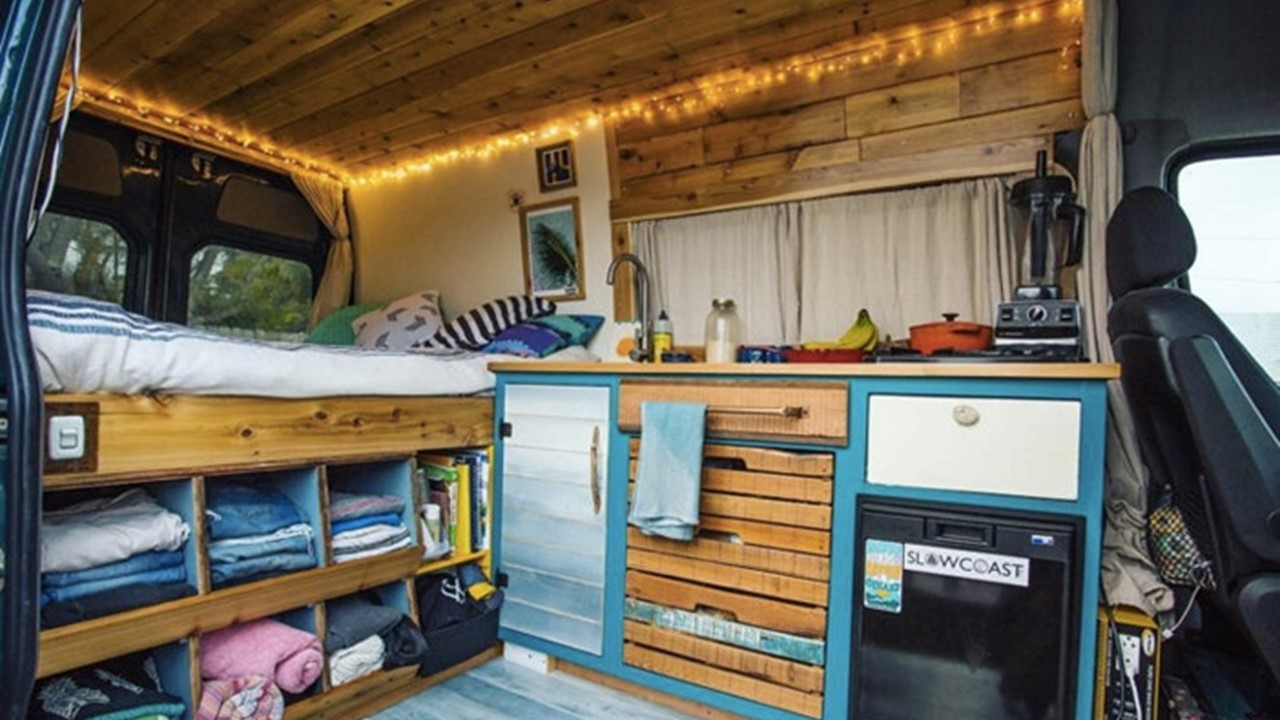
For the interior of the Voyager, I wanted to go big. Therefore, I decided to try and replicate a high-end modern kitchen inside the van. Therefore, I went for a flat gunmetal material for the draws and cabinet faces. For the surfaces I used a polished light hardwood. Then finally to give it a more modern touch I created LED light strips which I ran down the length of the van.
Take your home just about anywhere
Built using the latest techniques and innovations
For this project I approached the client who I knew was renovating a van. I asked if I could help by creating CAD drawings and renders for him. Therefore, I split the project into two making one basic model (The Pioneer) and one Deluxe model (The Voyager). The aim for the Pioneer part of this project was to create a basic living space that could go anywhere with you.
The Pioneer was a more cost-effective design. Therefore, there were no exterior upgrades to the Van. All the money for the build would be going towards the interior of the van and making it a pleasurable living space.
For the interior I wanted to create a cosier setting therefore I thought that a modern style would not be appropriate. I used wood for the cabinet spaces and to line the floor and roof of the van. This gave a more industrial feel to the interior. I created an in-place seating area as well as usable kitchen space with a dark marble backsplash.
How I did It
Research
To research this project as always, I turned to Pinterest. I was very pleased to see a flood of similar projects undertaken many of which people had designed and built completely independently. Therefore, there was no shortage of design ideas that I could pick and choose from. I also began watching people who had made time lapse videos of themselves making their own vans to see the order in which I would build my own.
Inspiration & sketches
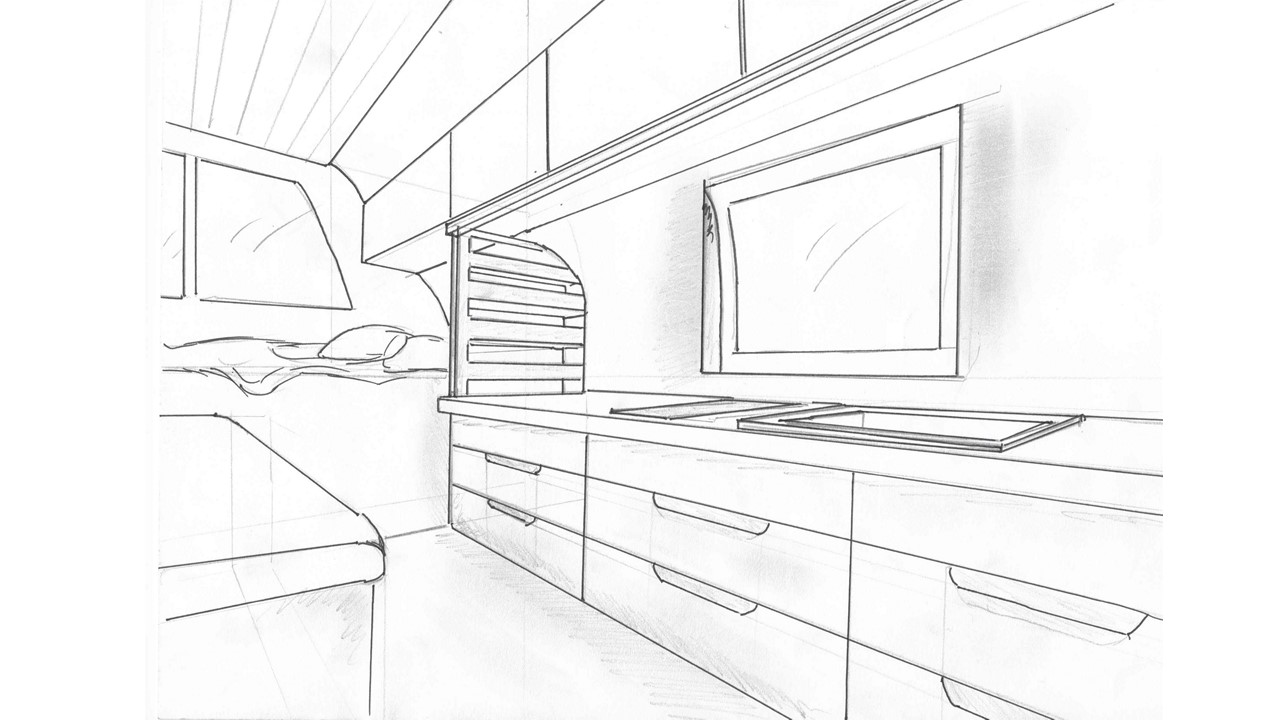
Now that I had a basic idea of the style I wanted to achieve; I began sketching out ideas for the interior once again taking advantage of a 2-point perspective drawing style. Almost every example I had seen in my research had the bed at the back I therefore replicated this in my own design work.
The Build
Mesh parts
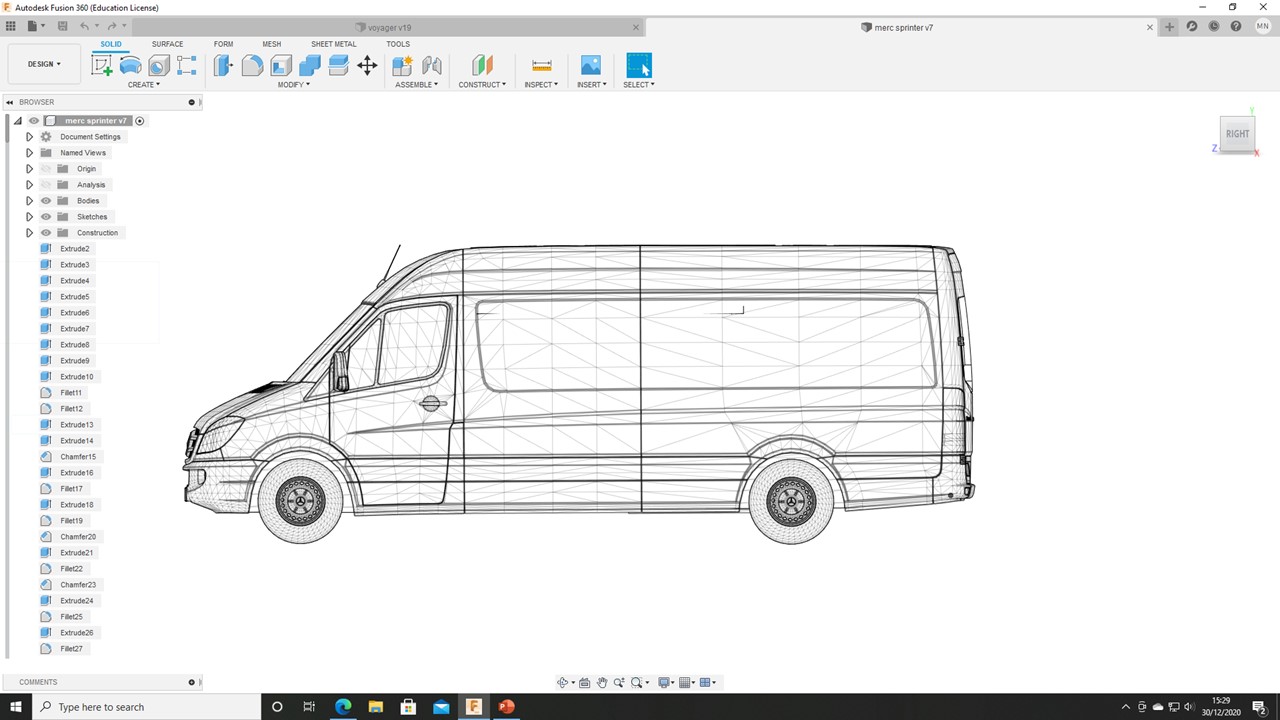
Now I had an idea of what I wanted to achieve I could begin modelling. For this I had a choice, model the van myself with all its inaccuracies or just get a pre-built model from the internet. I decided to go with the latter as the project is not to design a van it is to renovate it. Therefore, I would just be wasting my own time if I were to model It myself. There was an issue with the model I got as it was a mesh not a B-rep therefore I had to convert it which meant turning off design history which is slightly perilous as it means you can not longer go back in your work and edit things.
Parametric parts
Now that I had an editable van model, I could begin creating the interior. For this I sketched out the boundary of the back of the van on the orthographic sides so I knew exactly where the model could reach up to. As all the furniture has basic flat geometry it was a fast exercise to create it all.
Final Parts
Exterior
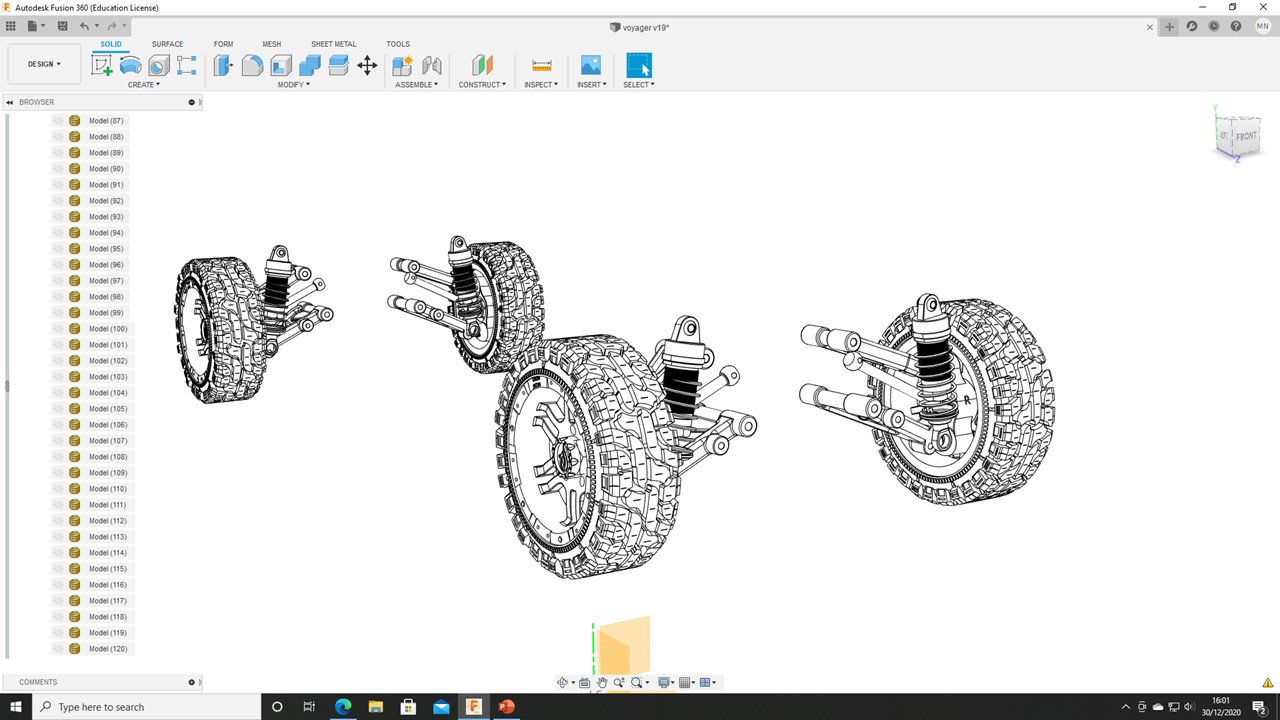
For the exterior, the main upgrade was raising it and switching the tyres. Luckily at the time of modelling I had already created the type of wheel and suspension I needed with the Boxer cart. Therefore, I took the suspension and drive parts of the cart imported them to the van document and positioned them correctly. As well as this I added a roof rack and ladders. This was done using simple sculpt tools for curved geometry and simple circle extrusions for straight parts.
Final Touches
For the final touches to the modelling stages of the van I used Fusions section analysis tools to get at the parts that were difficult to model with everything visible Once I was finally happy with the model, I exported It as an FBX file to conserve the different components. This meant I would apply textures quicker as the materials were already separated.
Interior
Interior
For the interior I used Blender to texture it for a final render. This allowed me to use PBR materials on all the surfaces to create a high-quality final render. As well as this I had to create the LED lights. As Blender does not come with a built-in strip light setting, I had to copy each individual point light to achieve the desired effect.
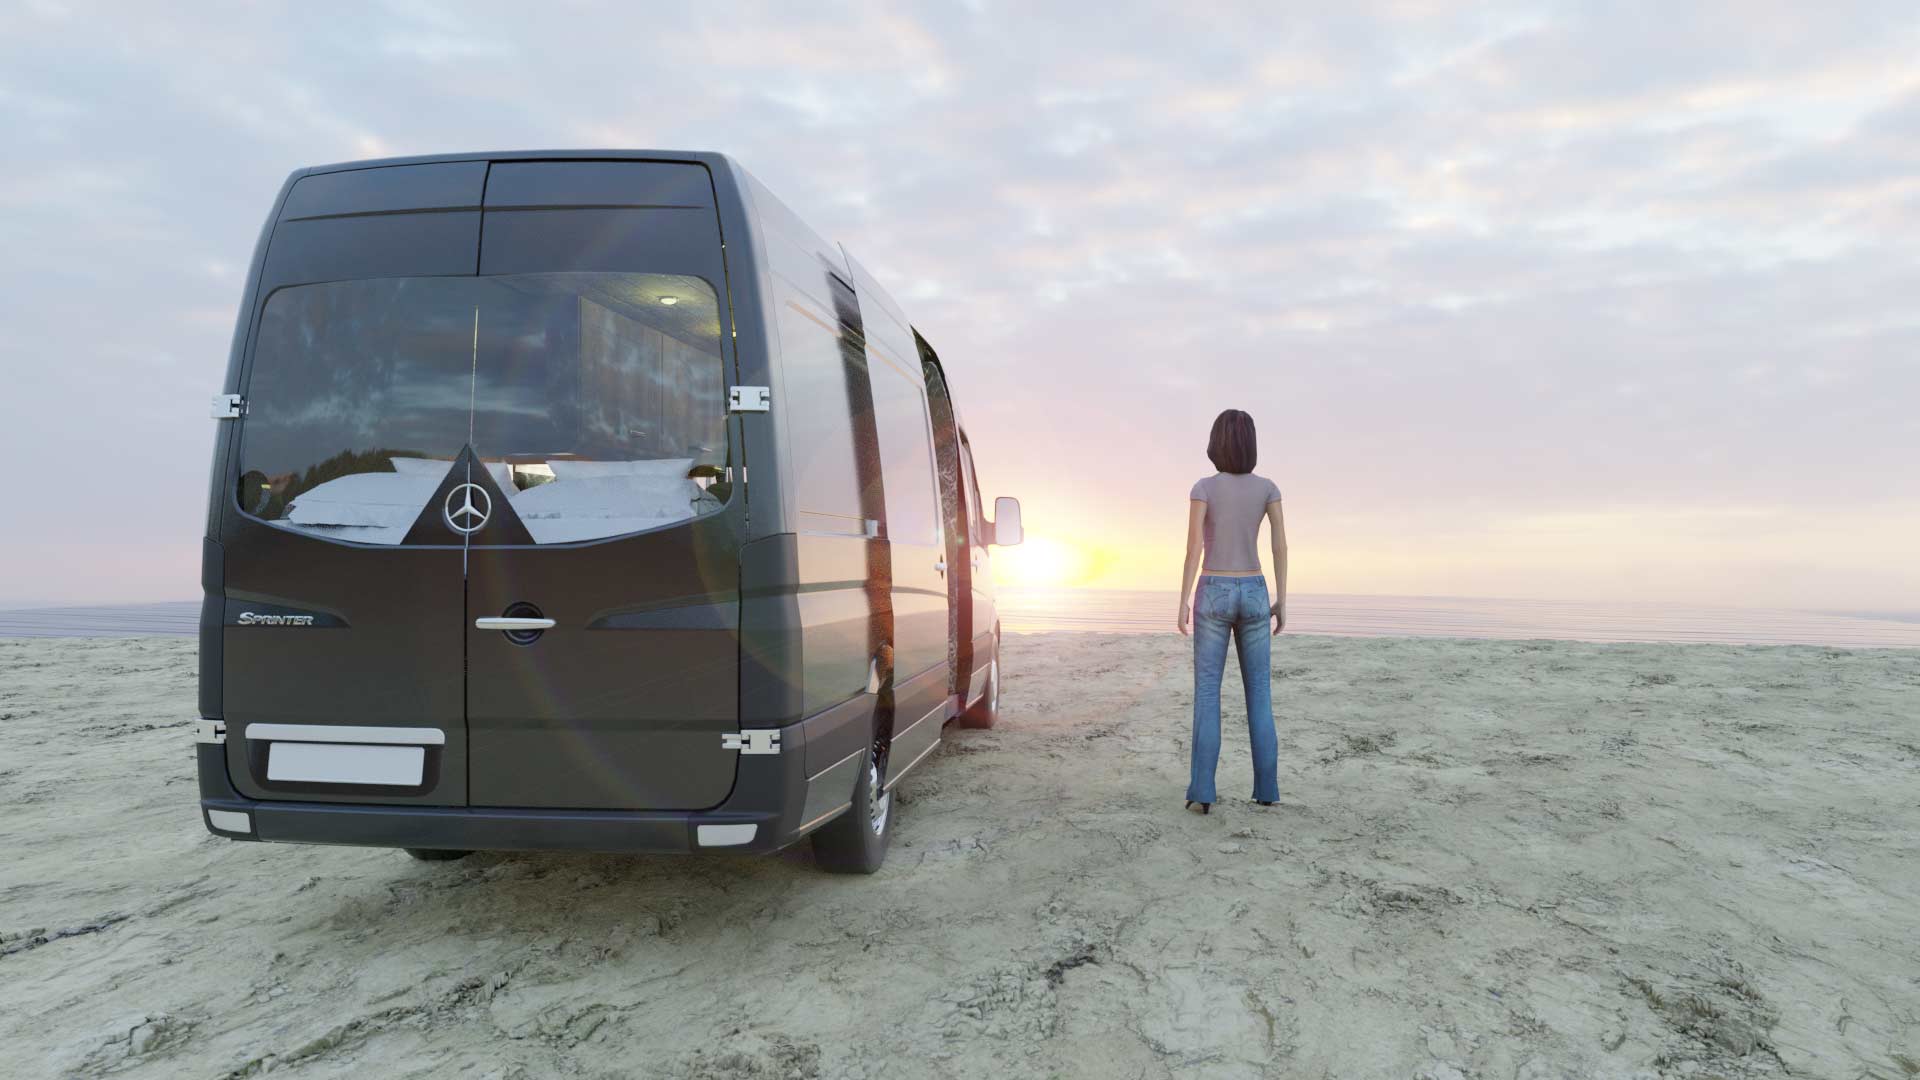
Final Render
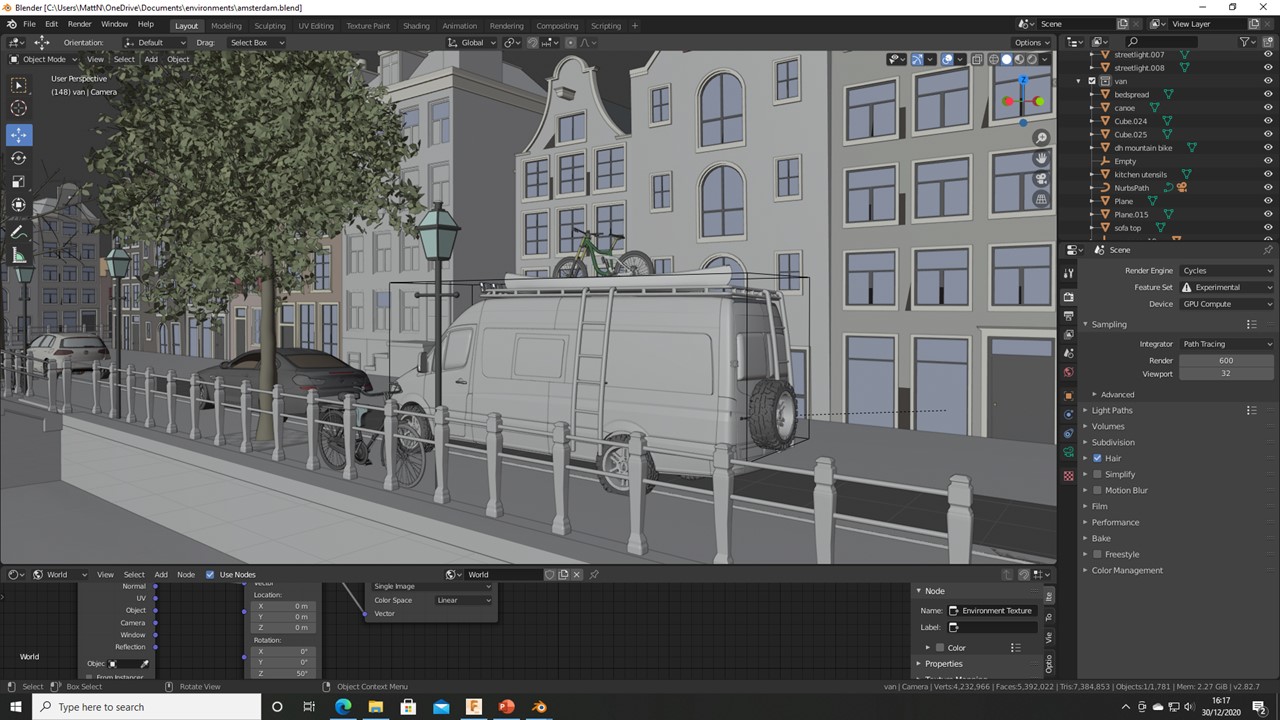
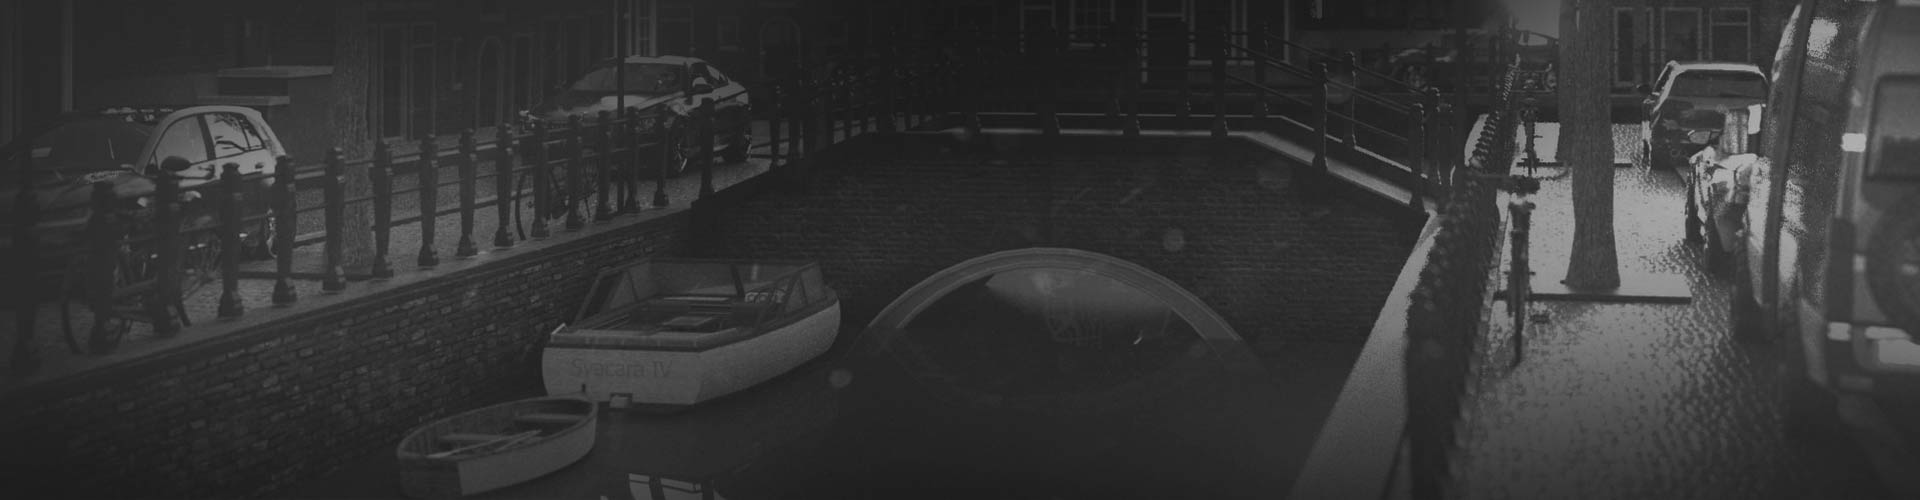
For the final render I merged two projects together, I used the Amsterdam street model and the van model to create a more realistic environment for the final render. For the sunset effect here, I plugged a HDRI into the world node of Blender and rotated it to get the orange effect seen in the final render. As this was a very large file the total render time for this was 5 hours and it is still a noisy image.