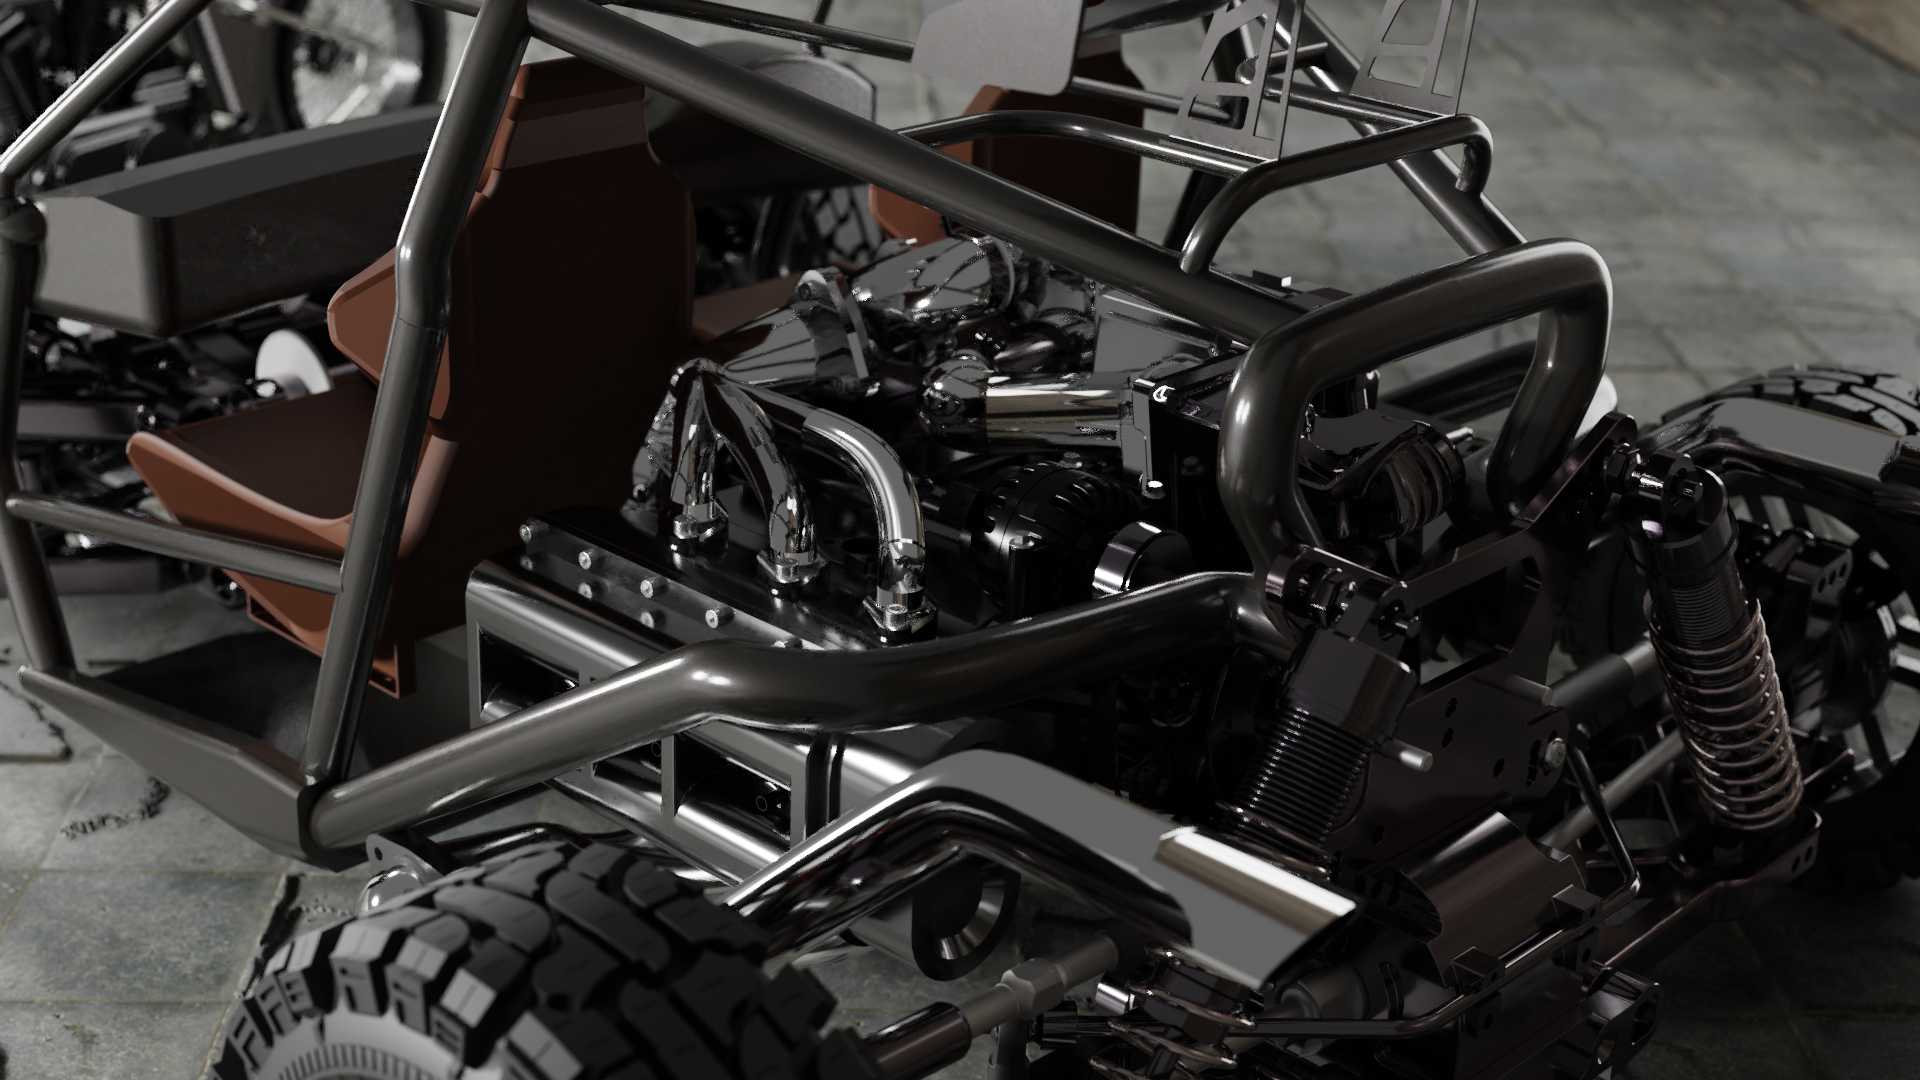
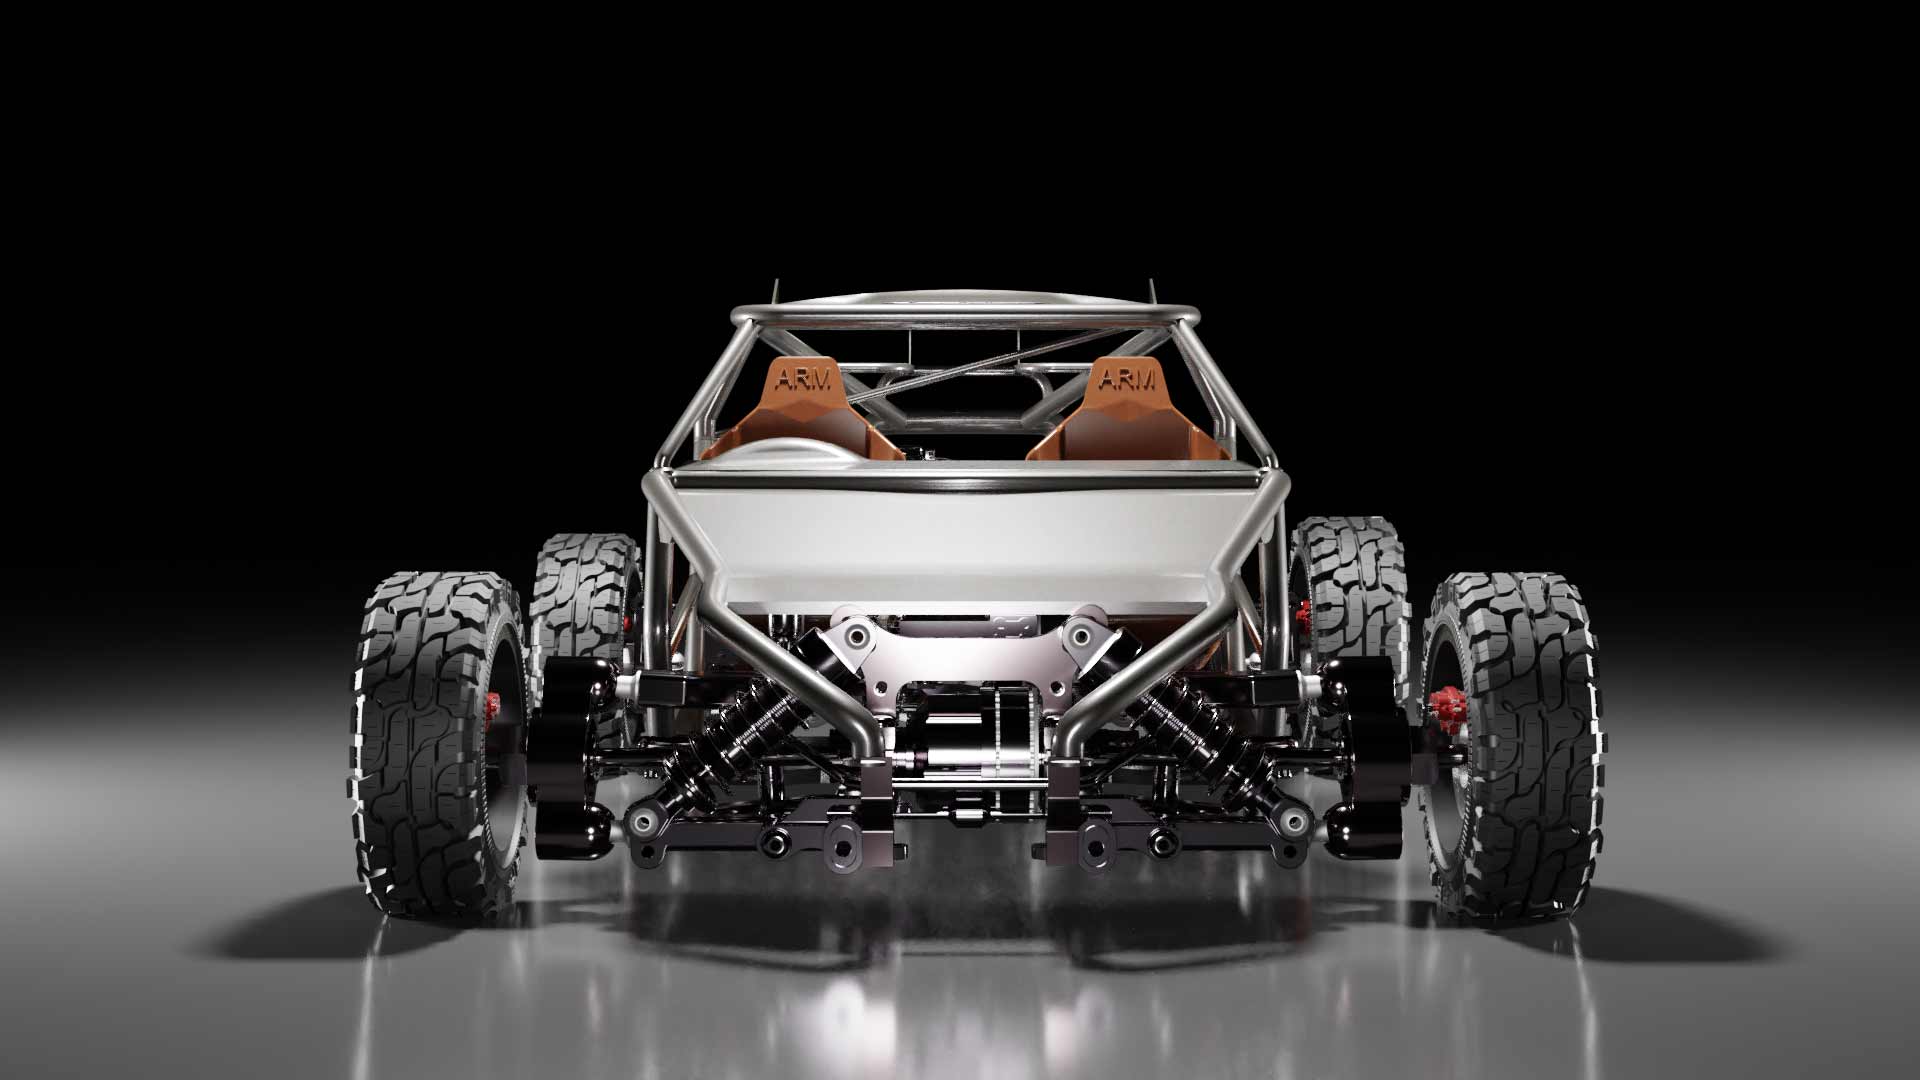
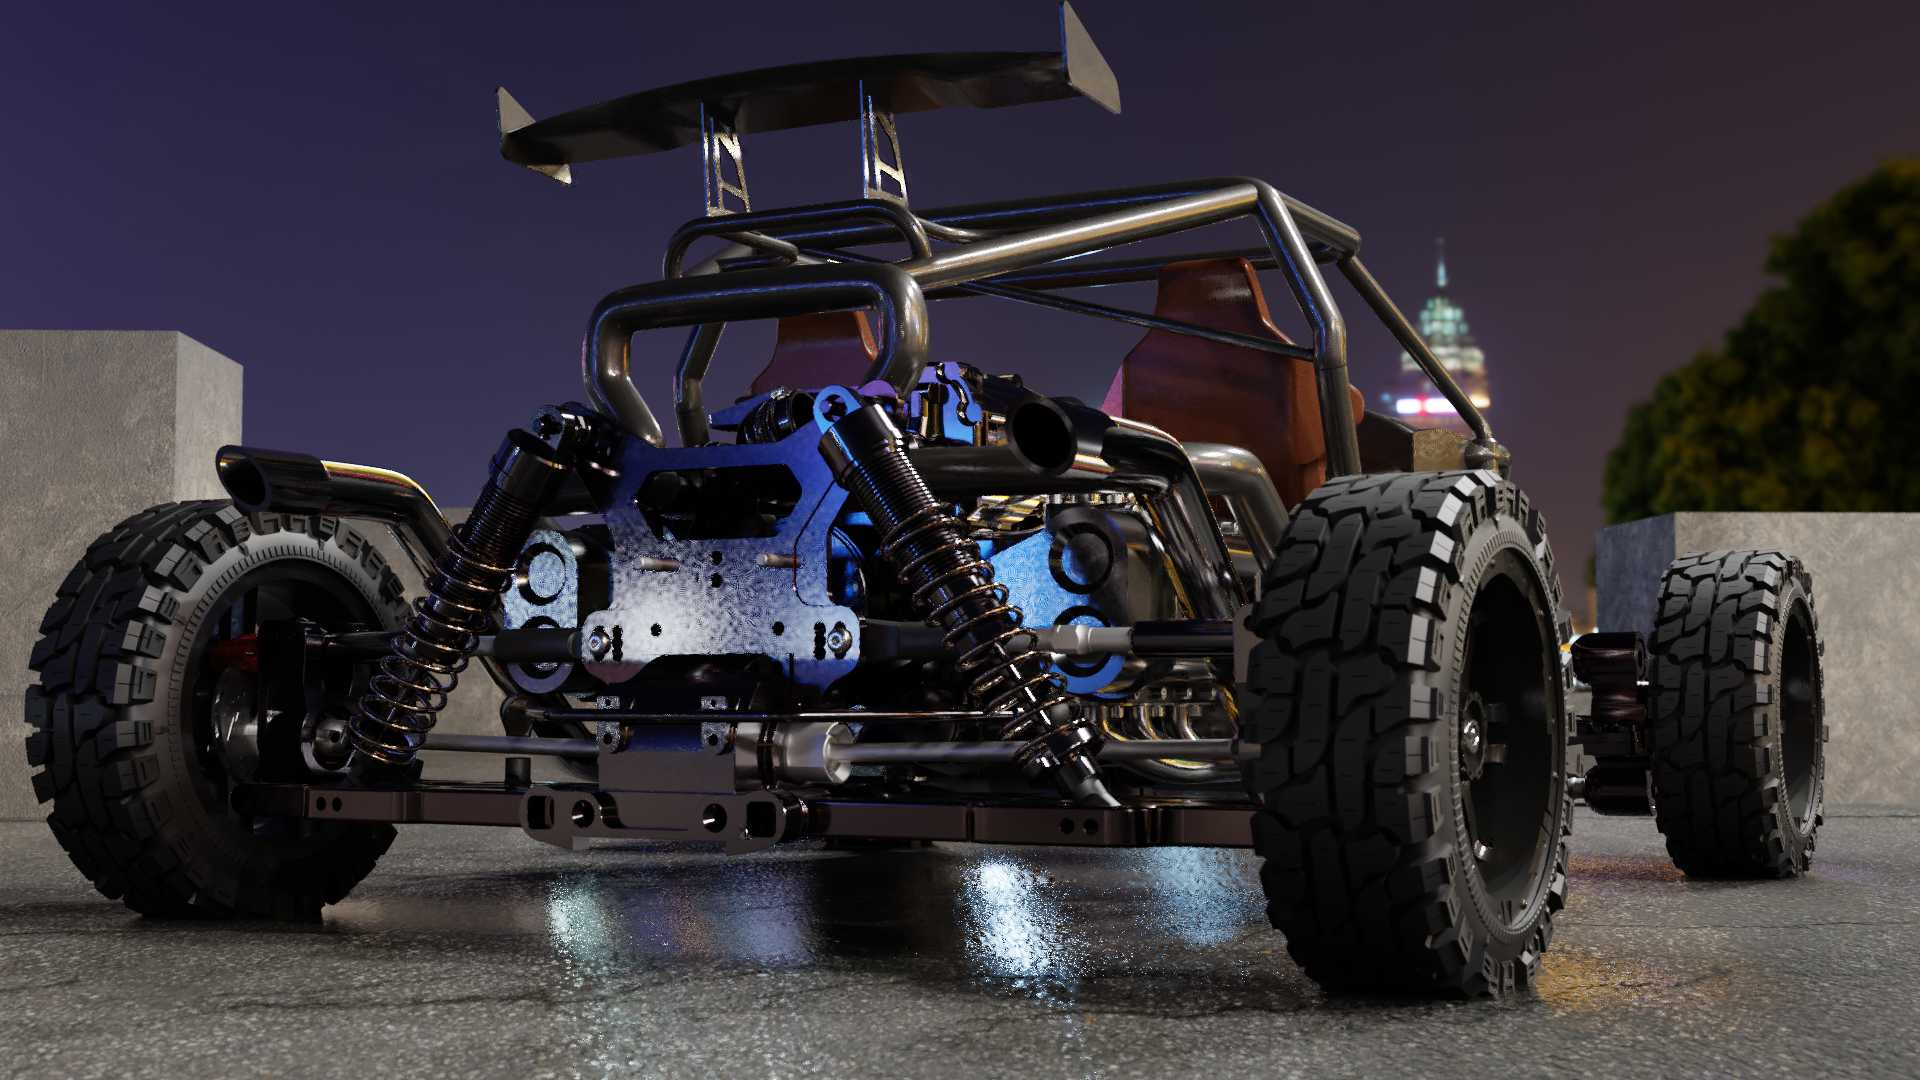
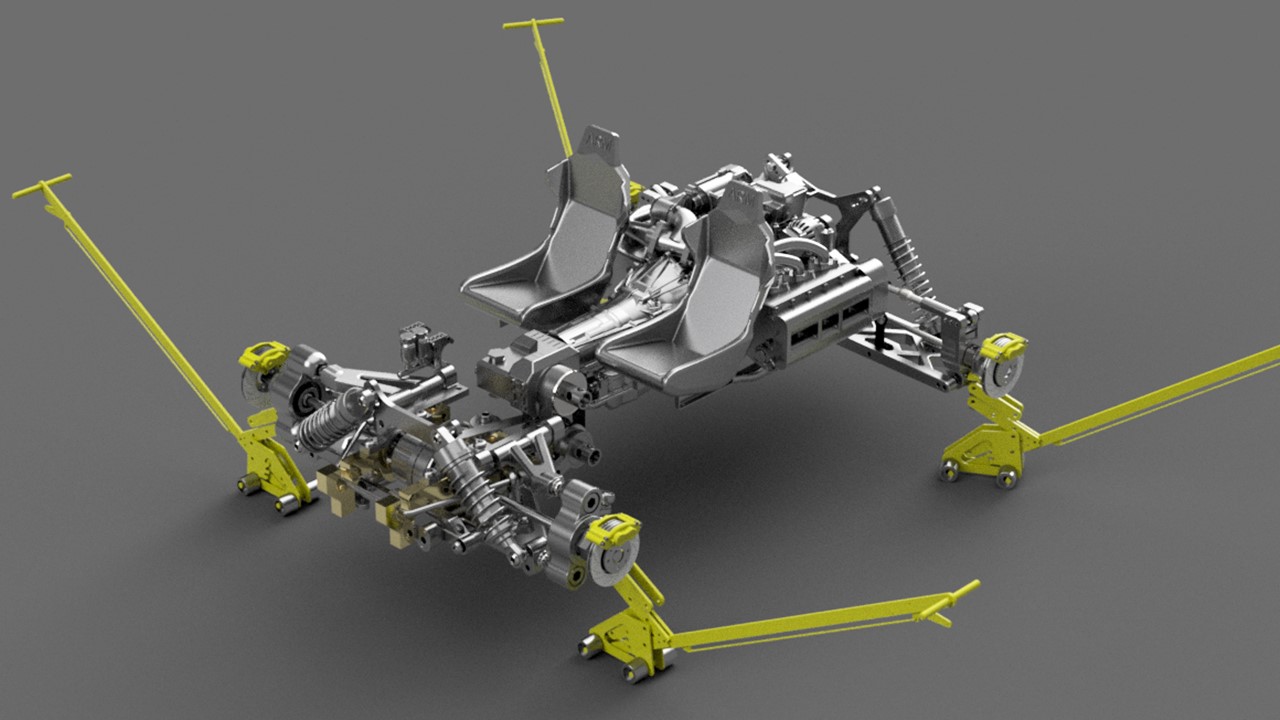
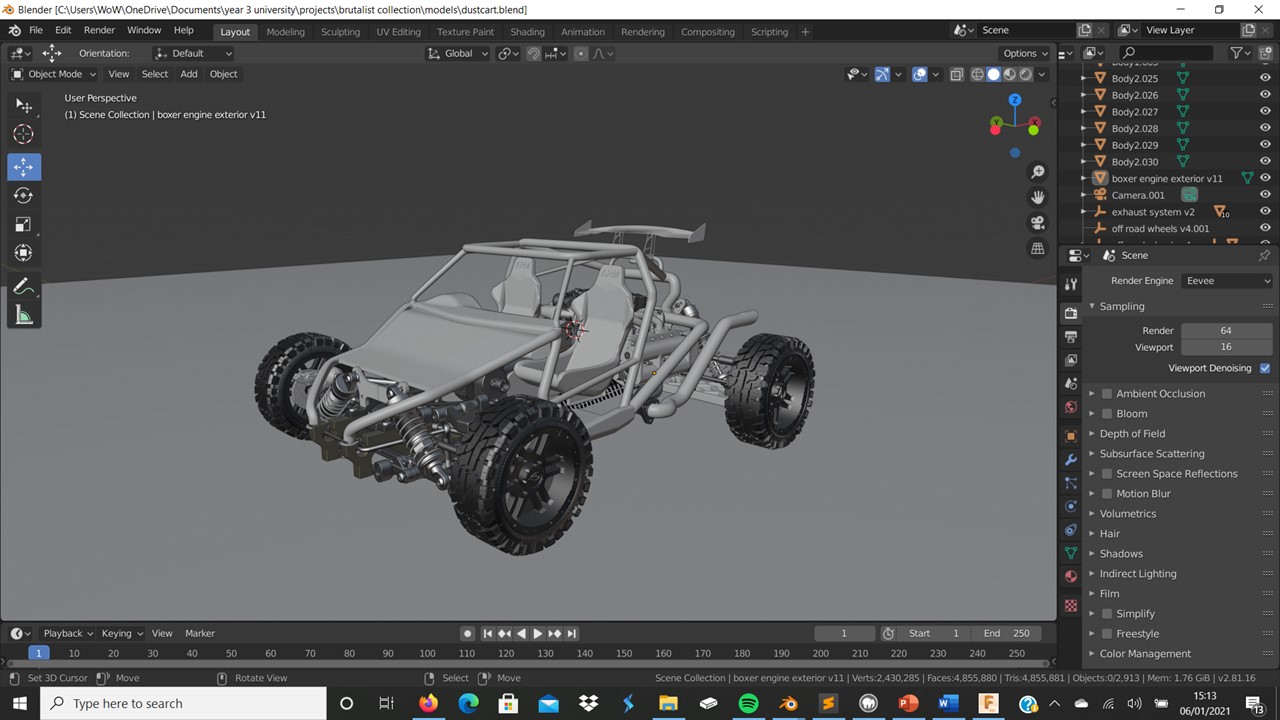
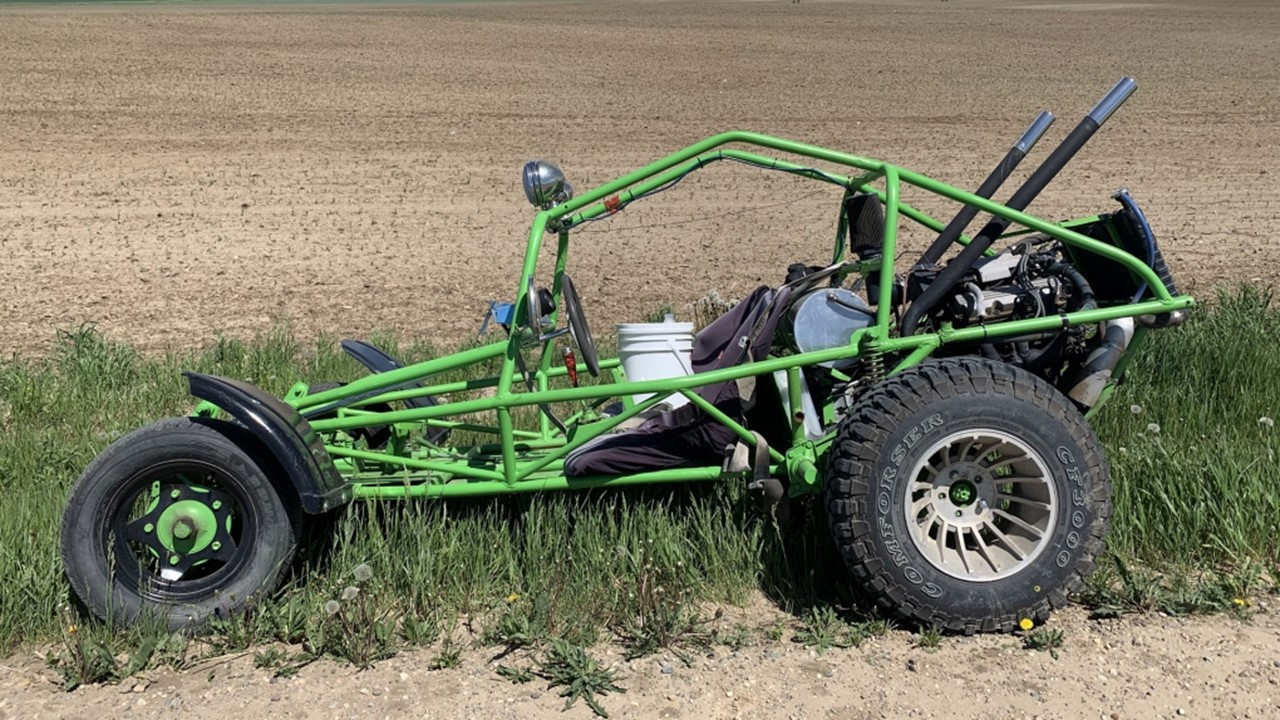
For the boxer cart I wanted to build it from the inside out. I knew the type of engine I wanted to create and then I wanted to build a vehicle to go around that. Sticking to my own design style of exposed components I have allowed the engine and most of the systems to be seen from the outside of the cart.
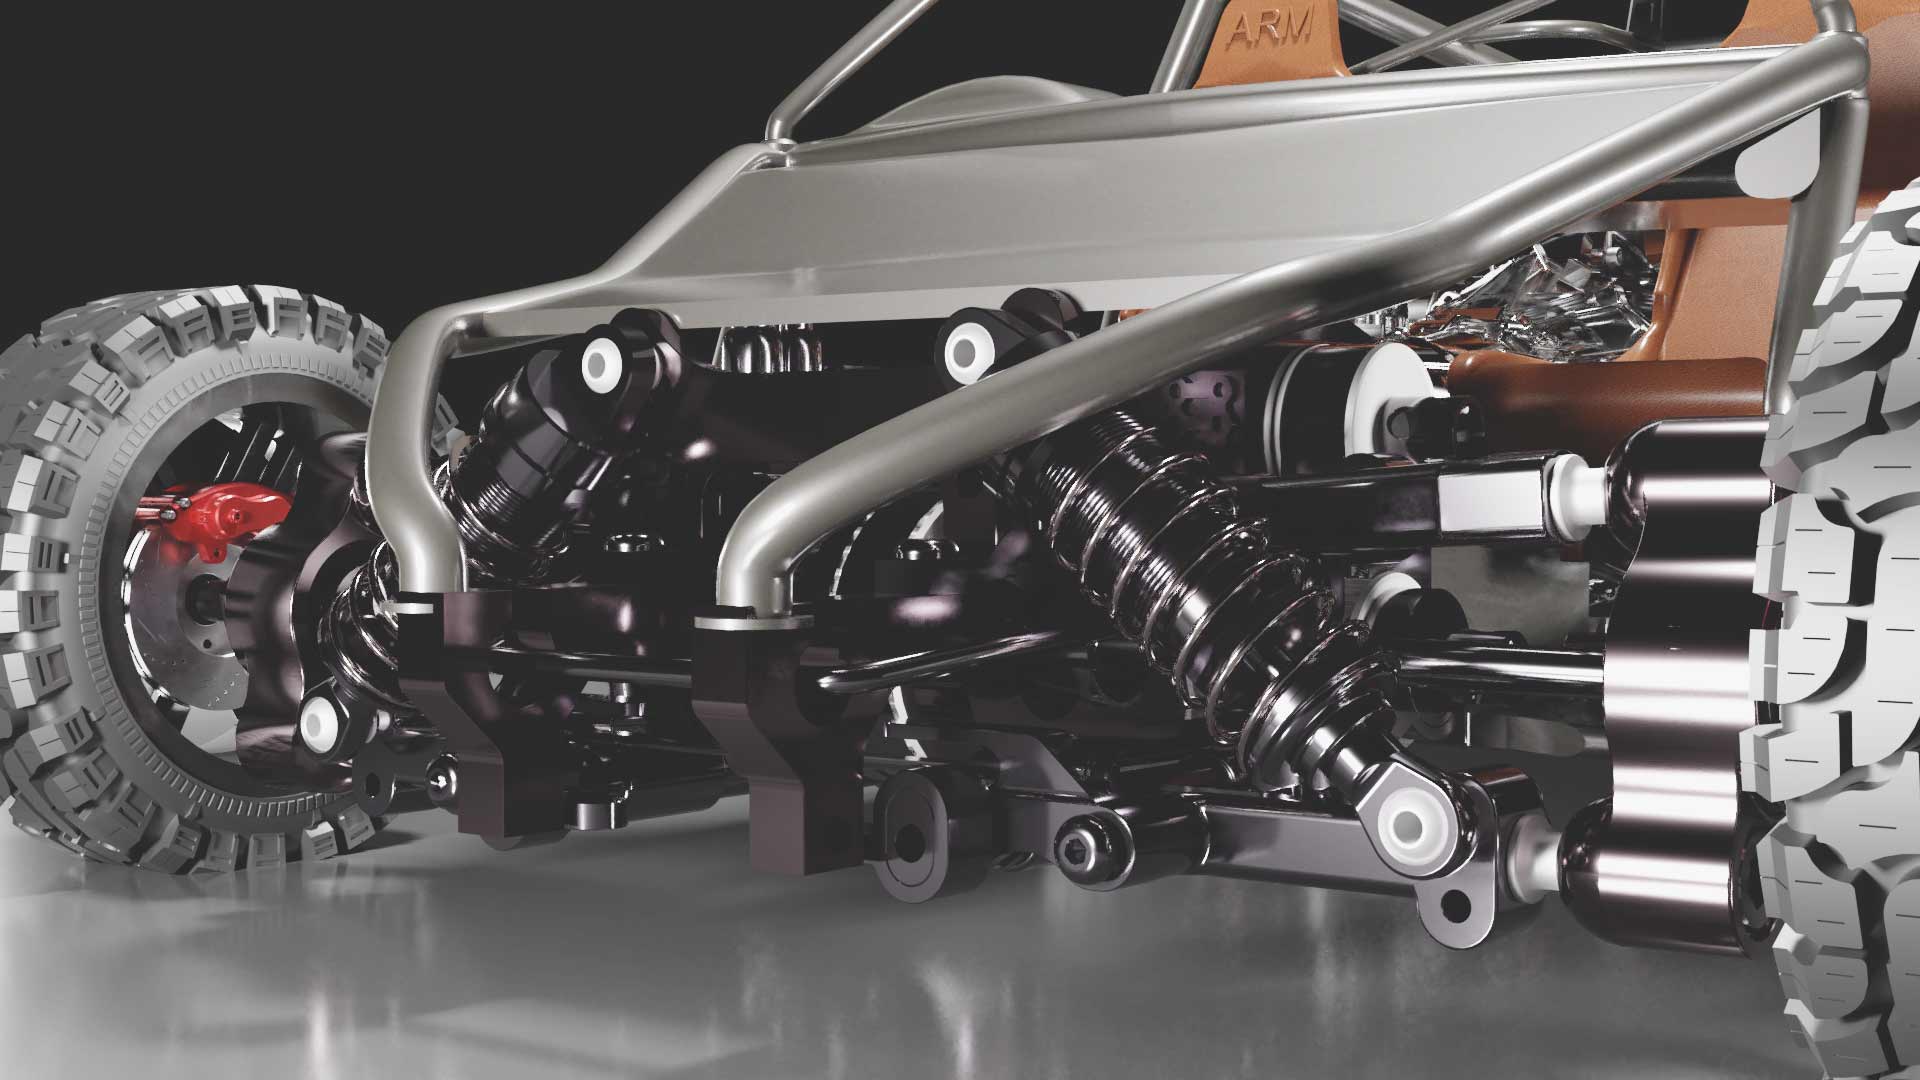
To maximise this industrial look, I wanted massive suspension coilovers to stick out of the vehicle and be visible from the outside. Having made this design choice this meant the frame of the vehicle had to weave around components all the way up to the main structure of the vehicle.
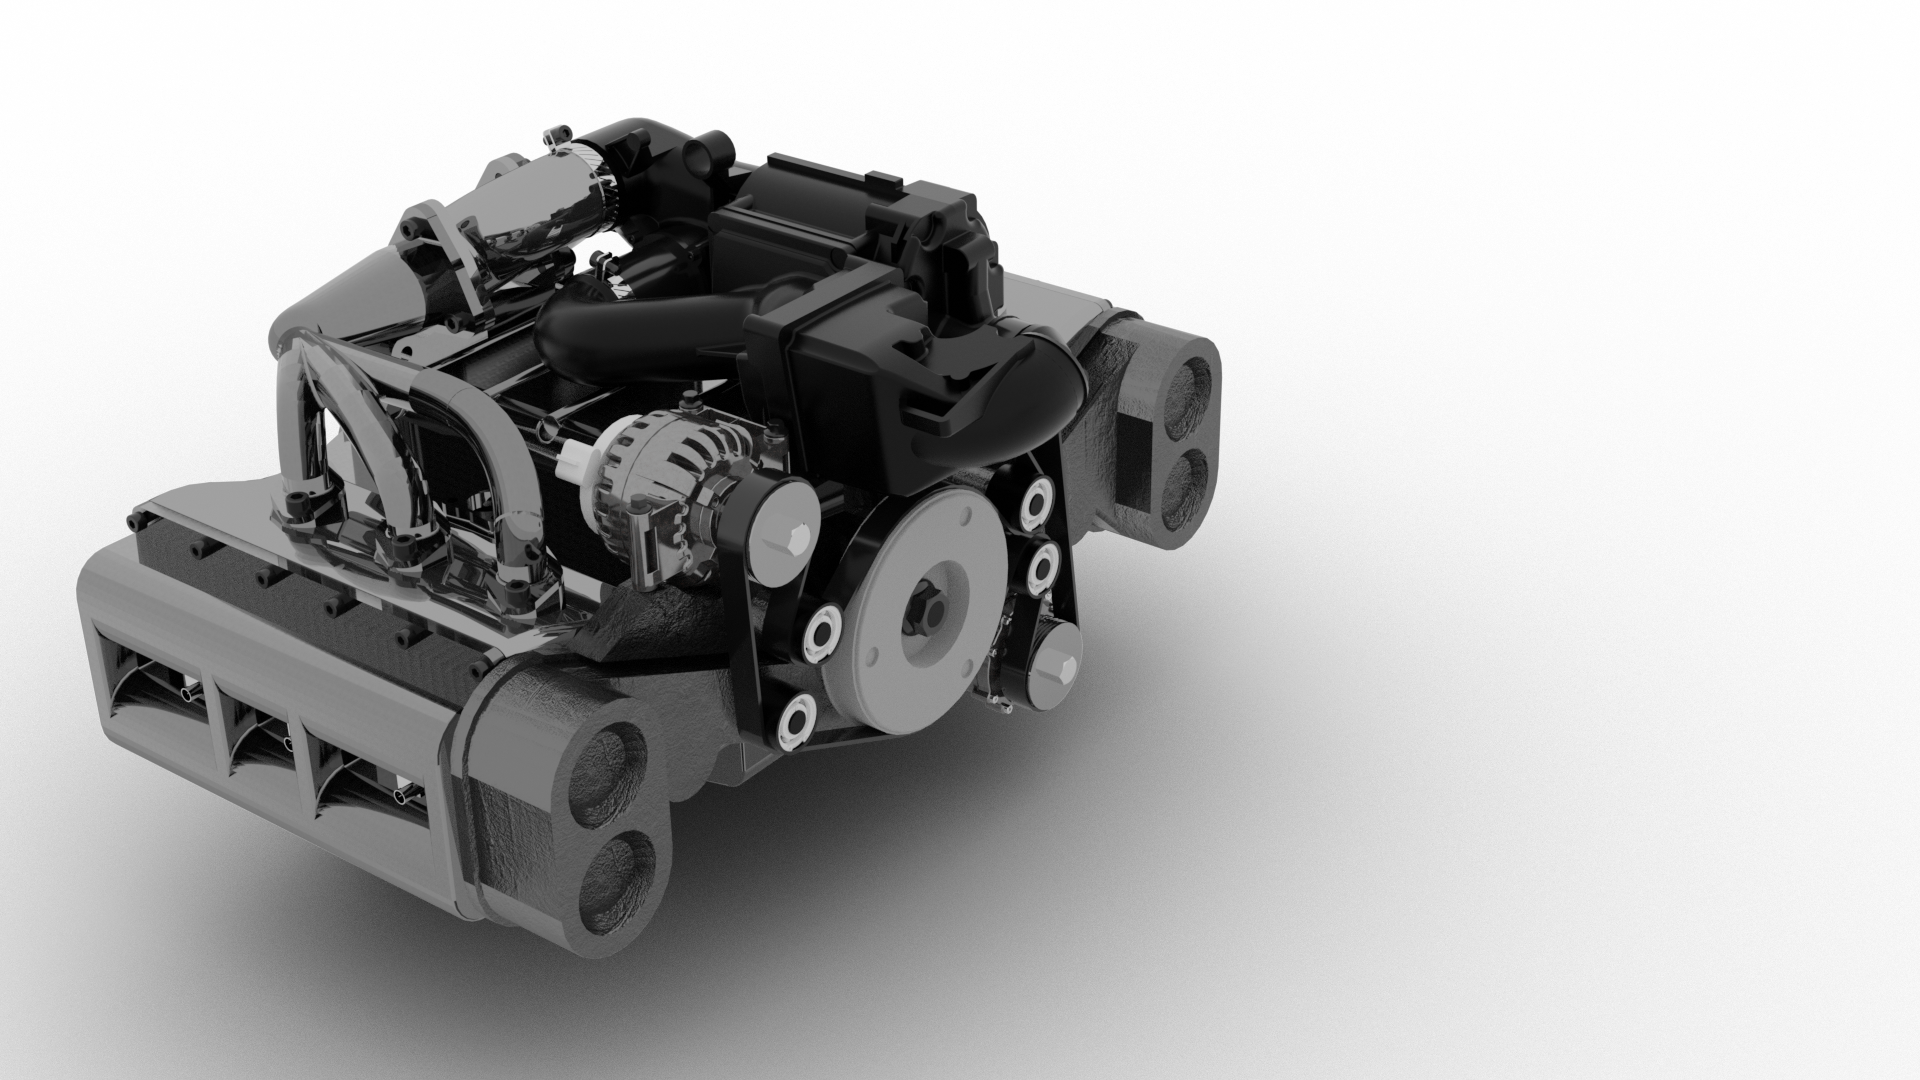
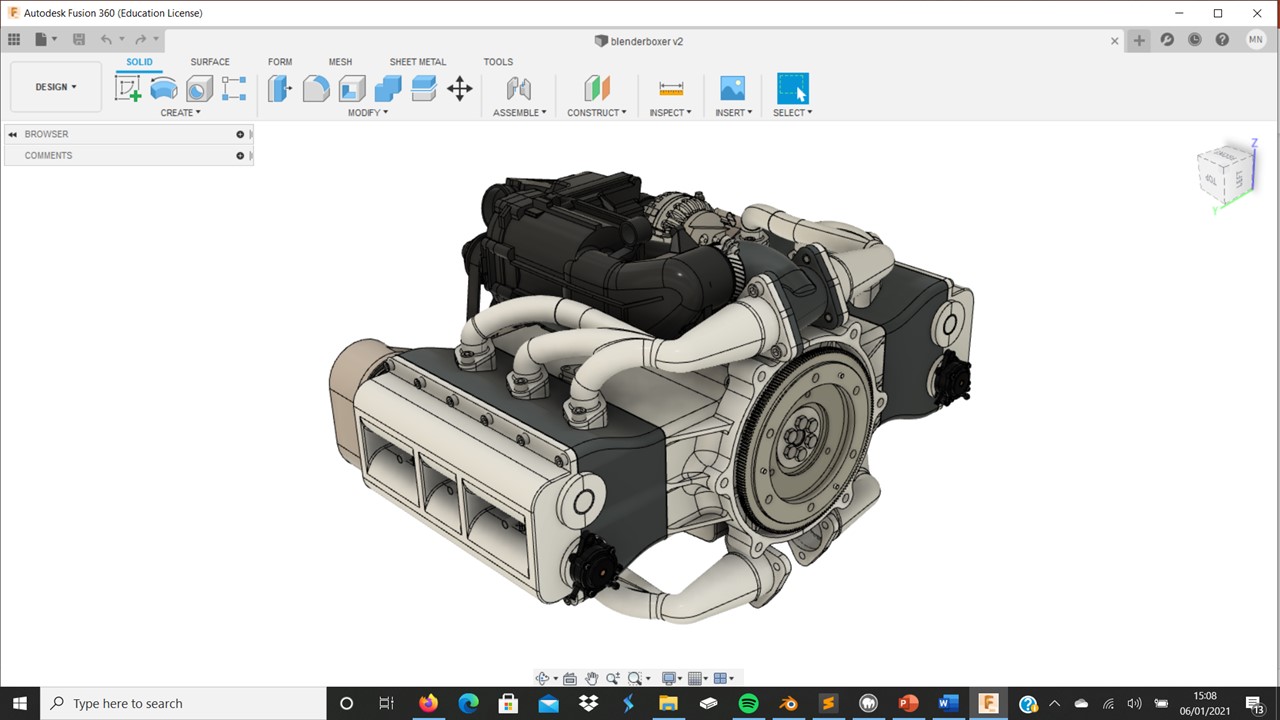
The engine is a six-cylinder boxer engine. This was perfect for what I wanted to achieve as relative to other engines out there it is very flat and therefore allows for the centre of mass to remain nice and low.
How I did It
Research
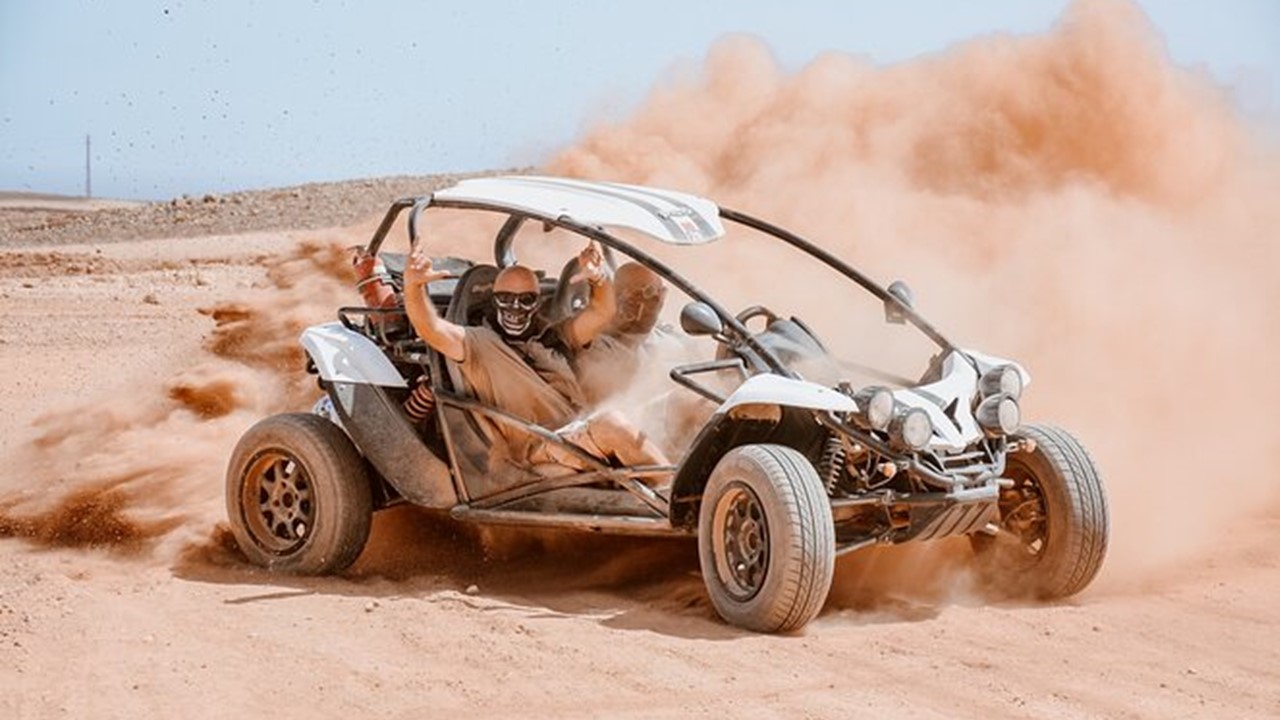
To research this product, as always I turned to Pinterest and YouTube. Pinterest I mainly use for design inspiration rather than technical research. I found many examples of dune buggies and similar projects undertaken all with the same crude industrial style that I was going for. Along with this, on YouTube I found working example videos of vehicles with a similar engine configuration I was aiming for.
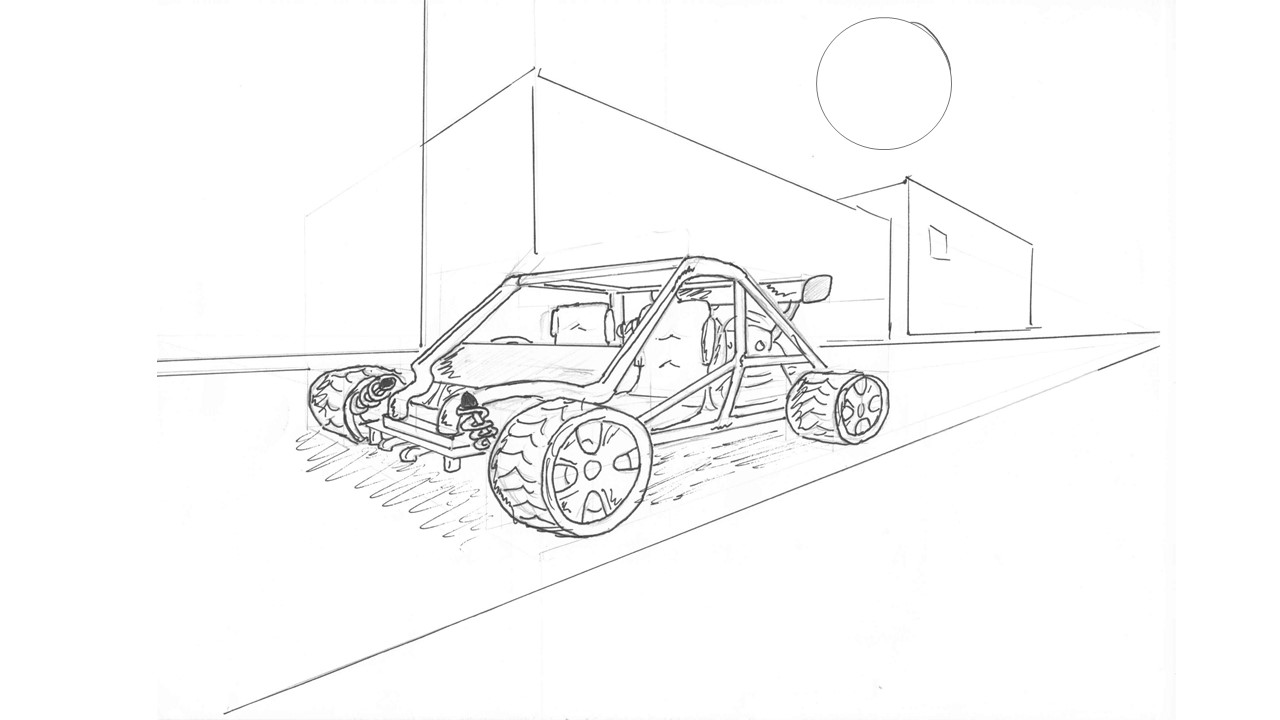
Inspiration & sketches
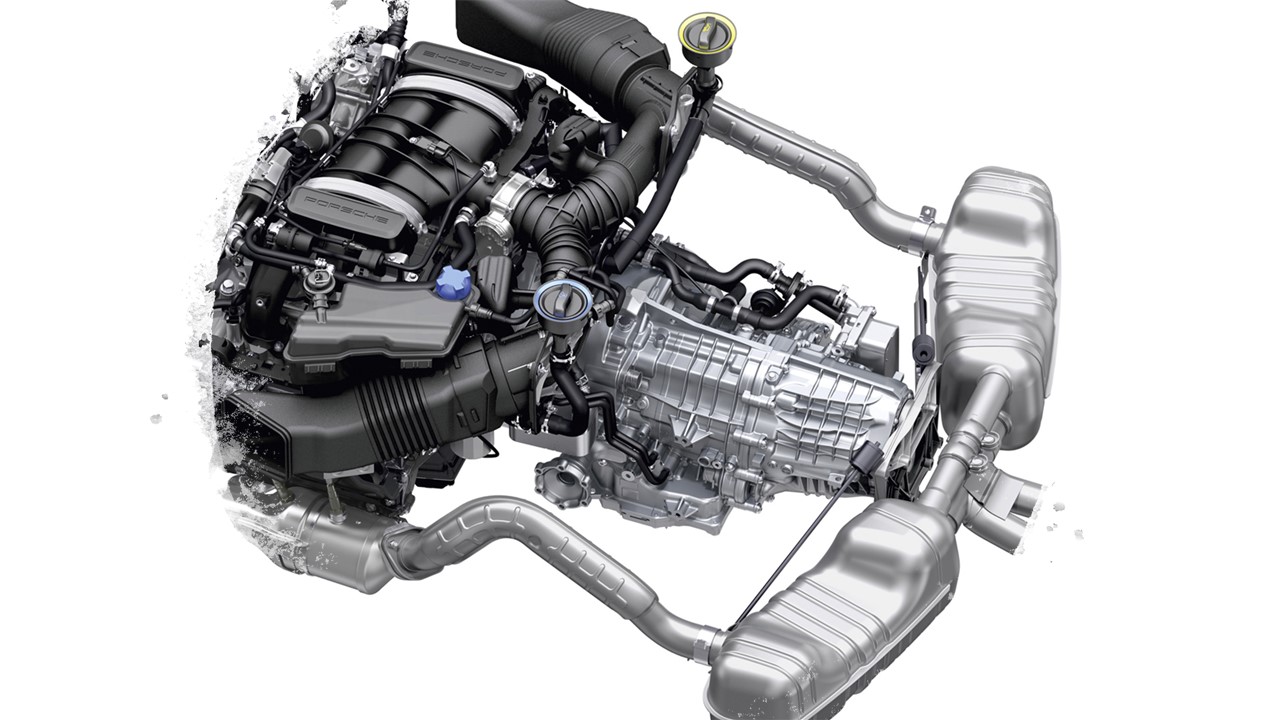
After much research I came across the image seen on the right at the top here. I wanted to recreate this vehicle however with a larger engine and larger components for a more technical aggressive look to the final product. Of this image I particularly like the large, exaggerated exhausts and aimed to replicate this in my own work. I therefore set about sketching my own model here I learned two things: do not use two-point perspective to draw this type of vehicle and that I am not very good at sketching automotive products freehand.
Complex parts
Large file sizes
For the main engine parts I began to come across issues I first experienced last year when creating the Merlin engine. This is with large assemblies hugely slowing down the speed of computing power of a machine. Therefore, for the individual components I used separate Fusion documents to edit them and then one final document at the end to collaborate all of them, so a minimum amount of time had to be spent in a overly large document.
Full Drive train
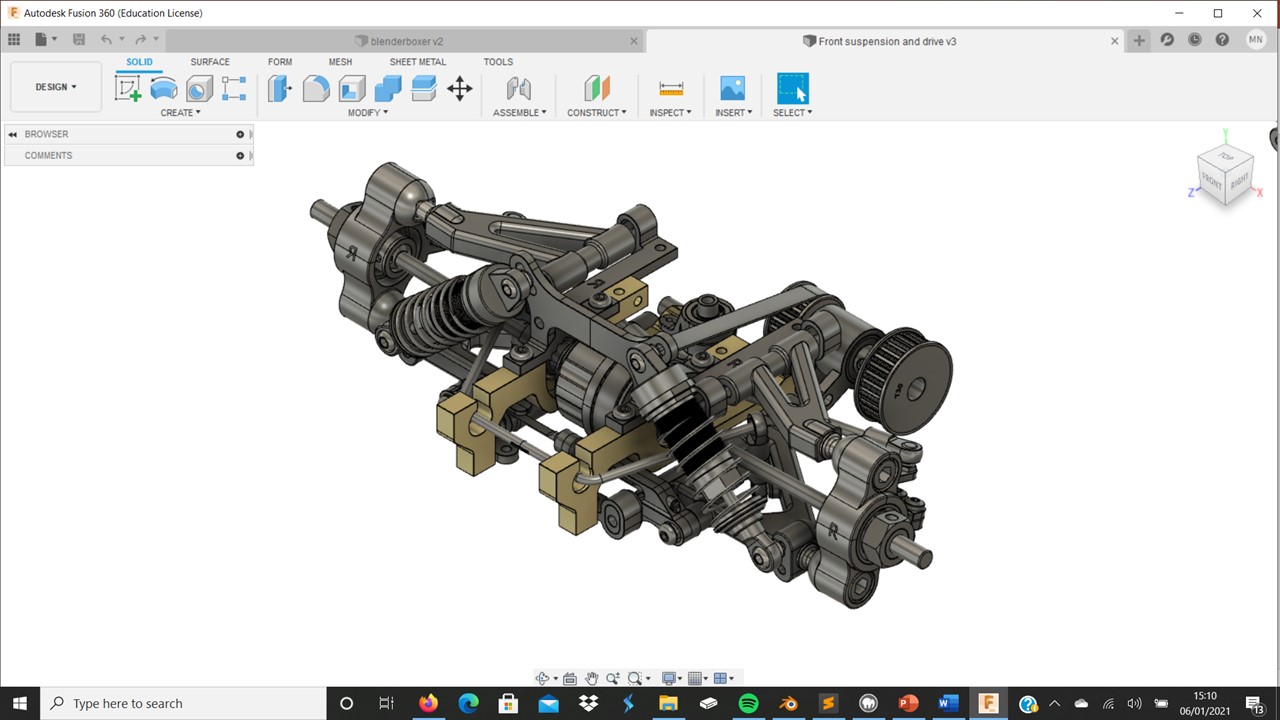
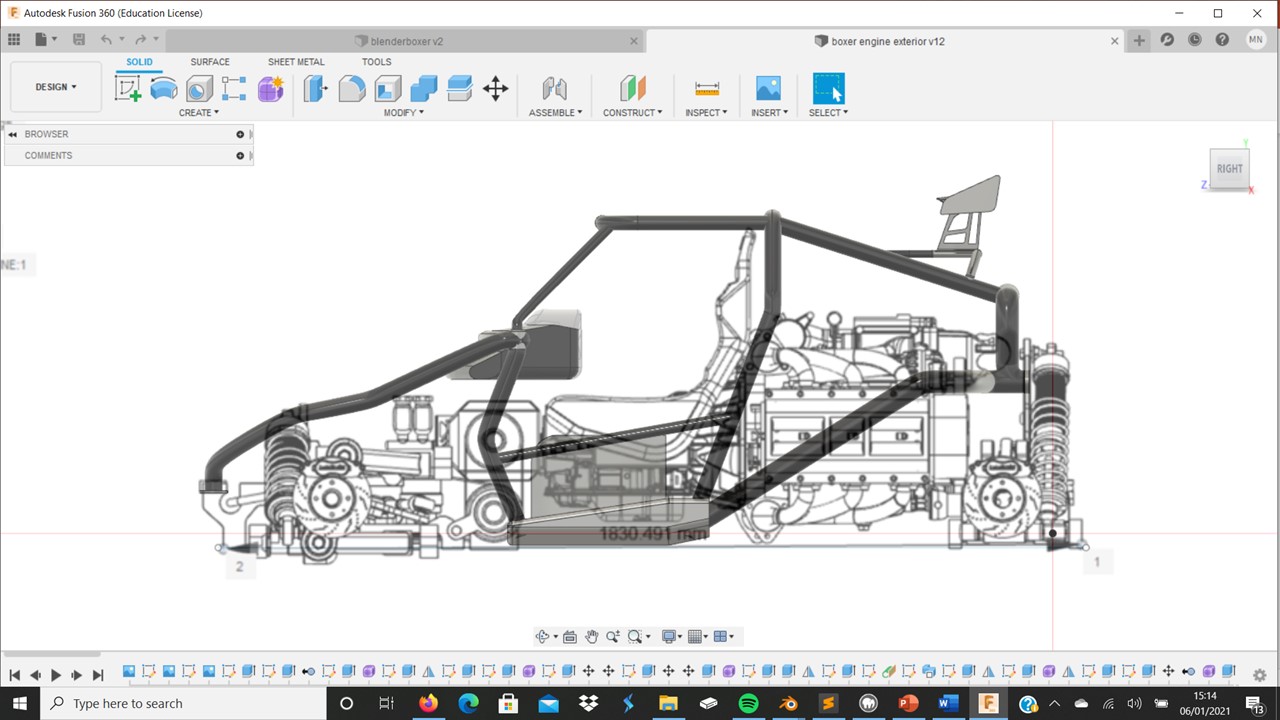
For the rear suspension I was running out of time before I had to begin my next project therefore, I decided to import this directly from GrabCAD As I found this model with the exact parameters I was looking for. This was even better than what I had planned though as the coilovers where the most rear part of the vehicle which was something I never thought to do. The render here is a Fusion render of the full assembly this was about as large a file size as my laptop could handle before crashing.
Final assembly
Framing
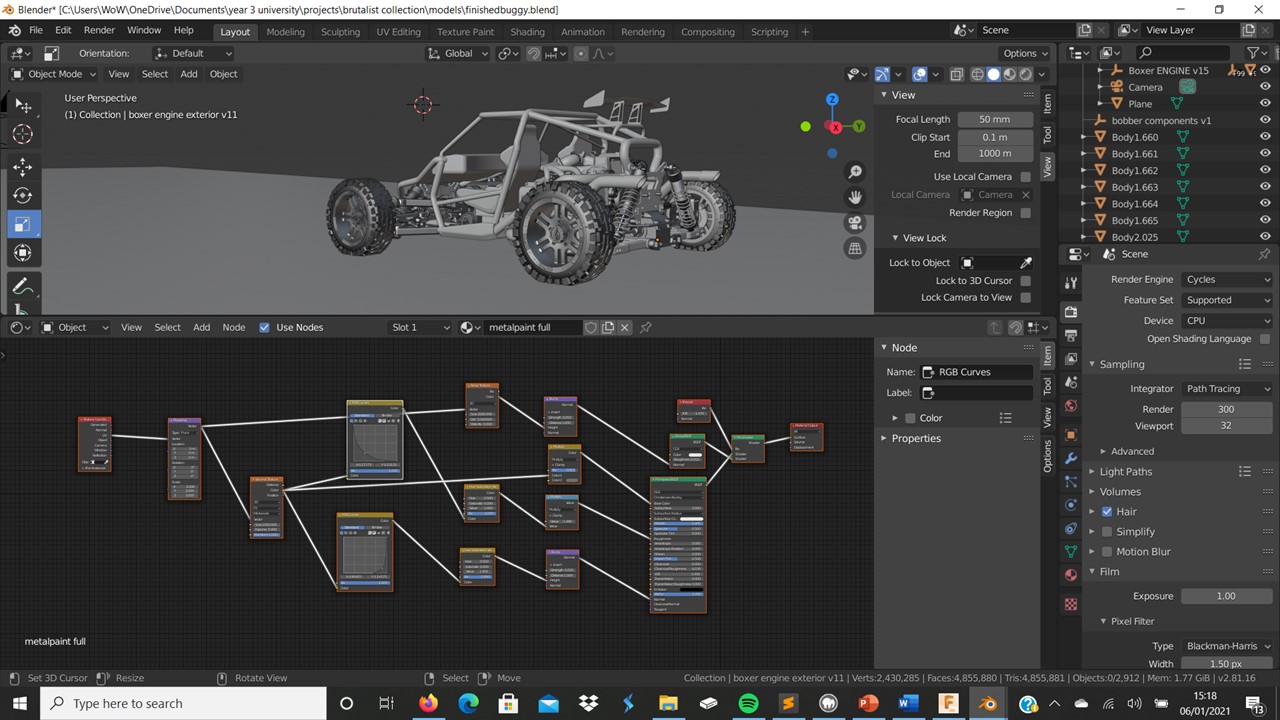
To get around the issue of computational power I decided I would do the final assembly in Blender as it is better at handling large file sizes. However, there was still many components to make. The way I made these was by creating working drawings of what I had made so far. This allowed me to still be aware of the shape of the work I had so far but conserve computational power.
Final Render
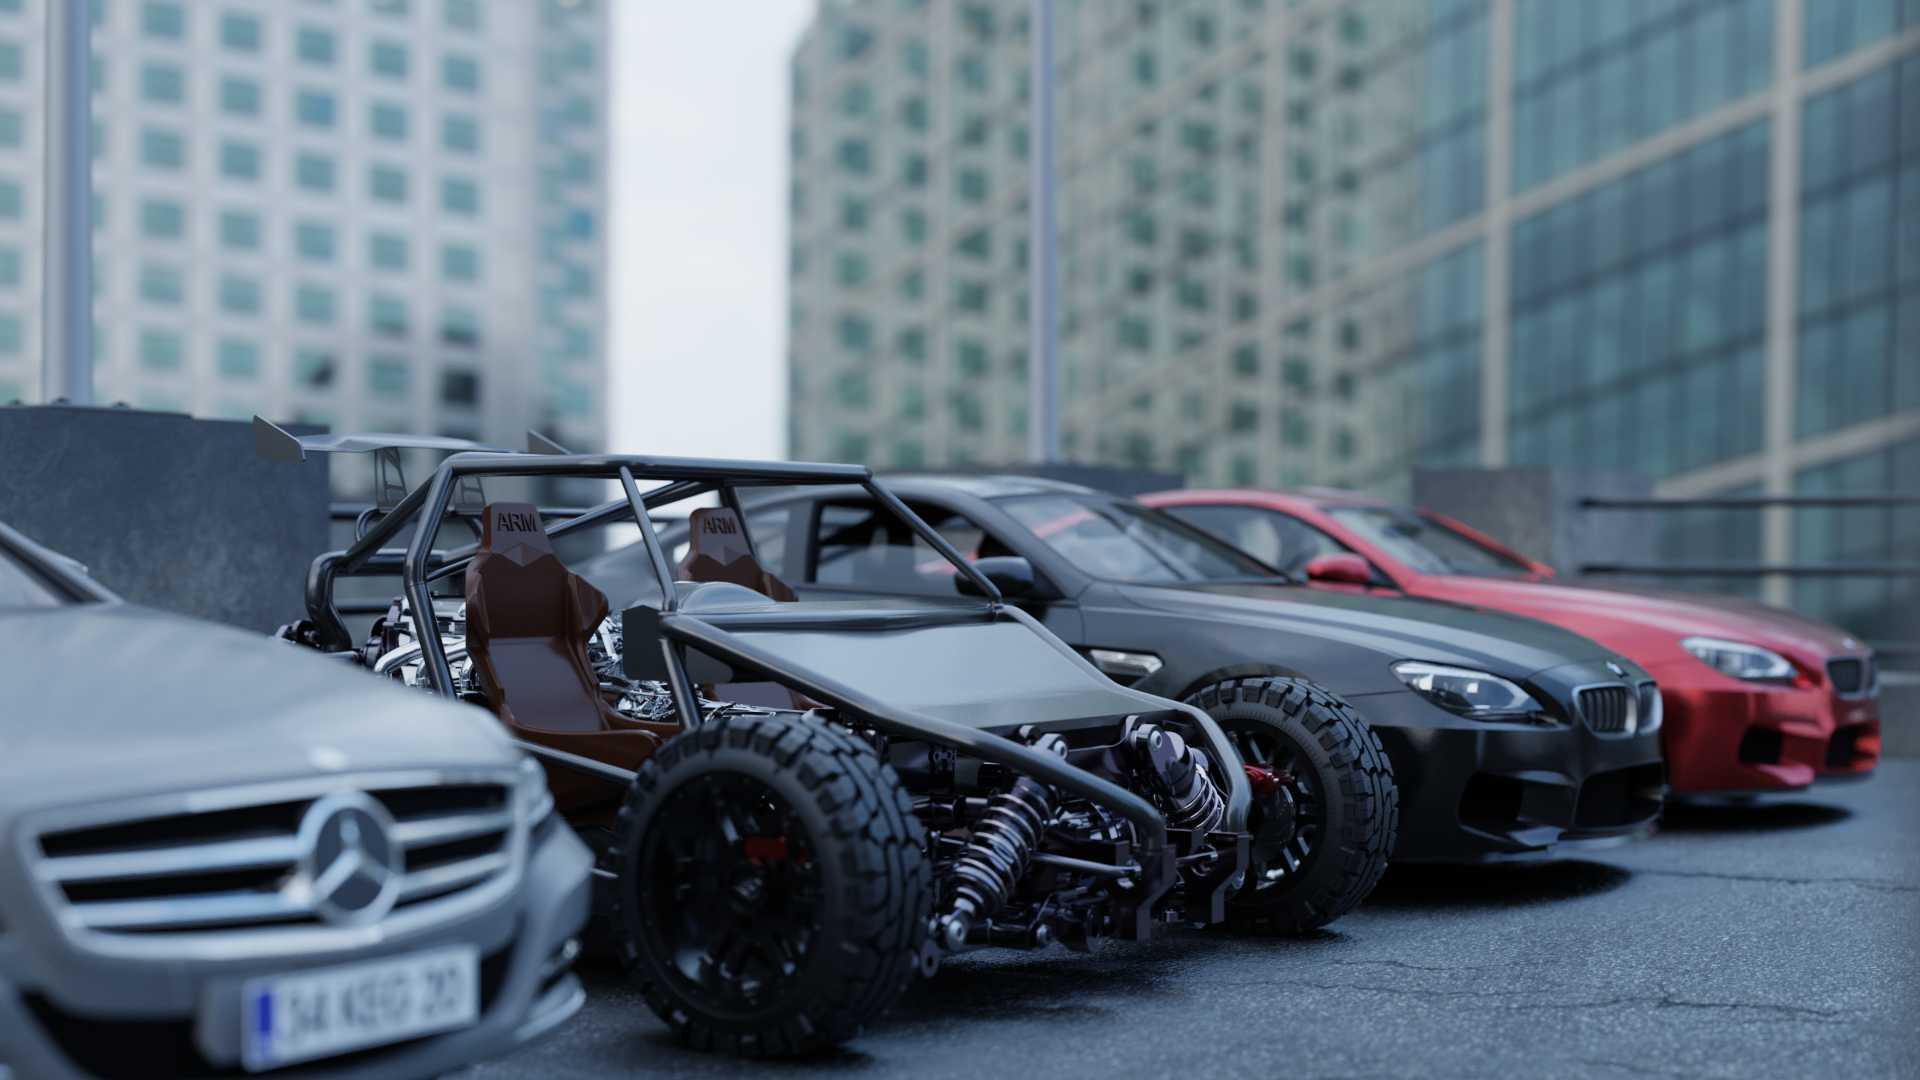
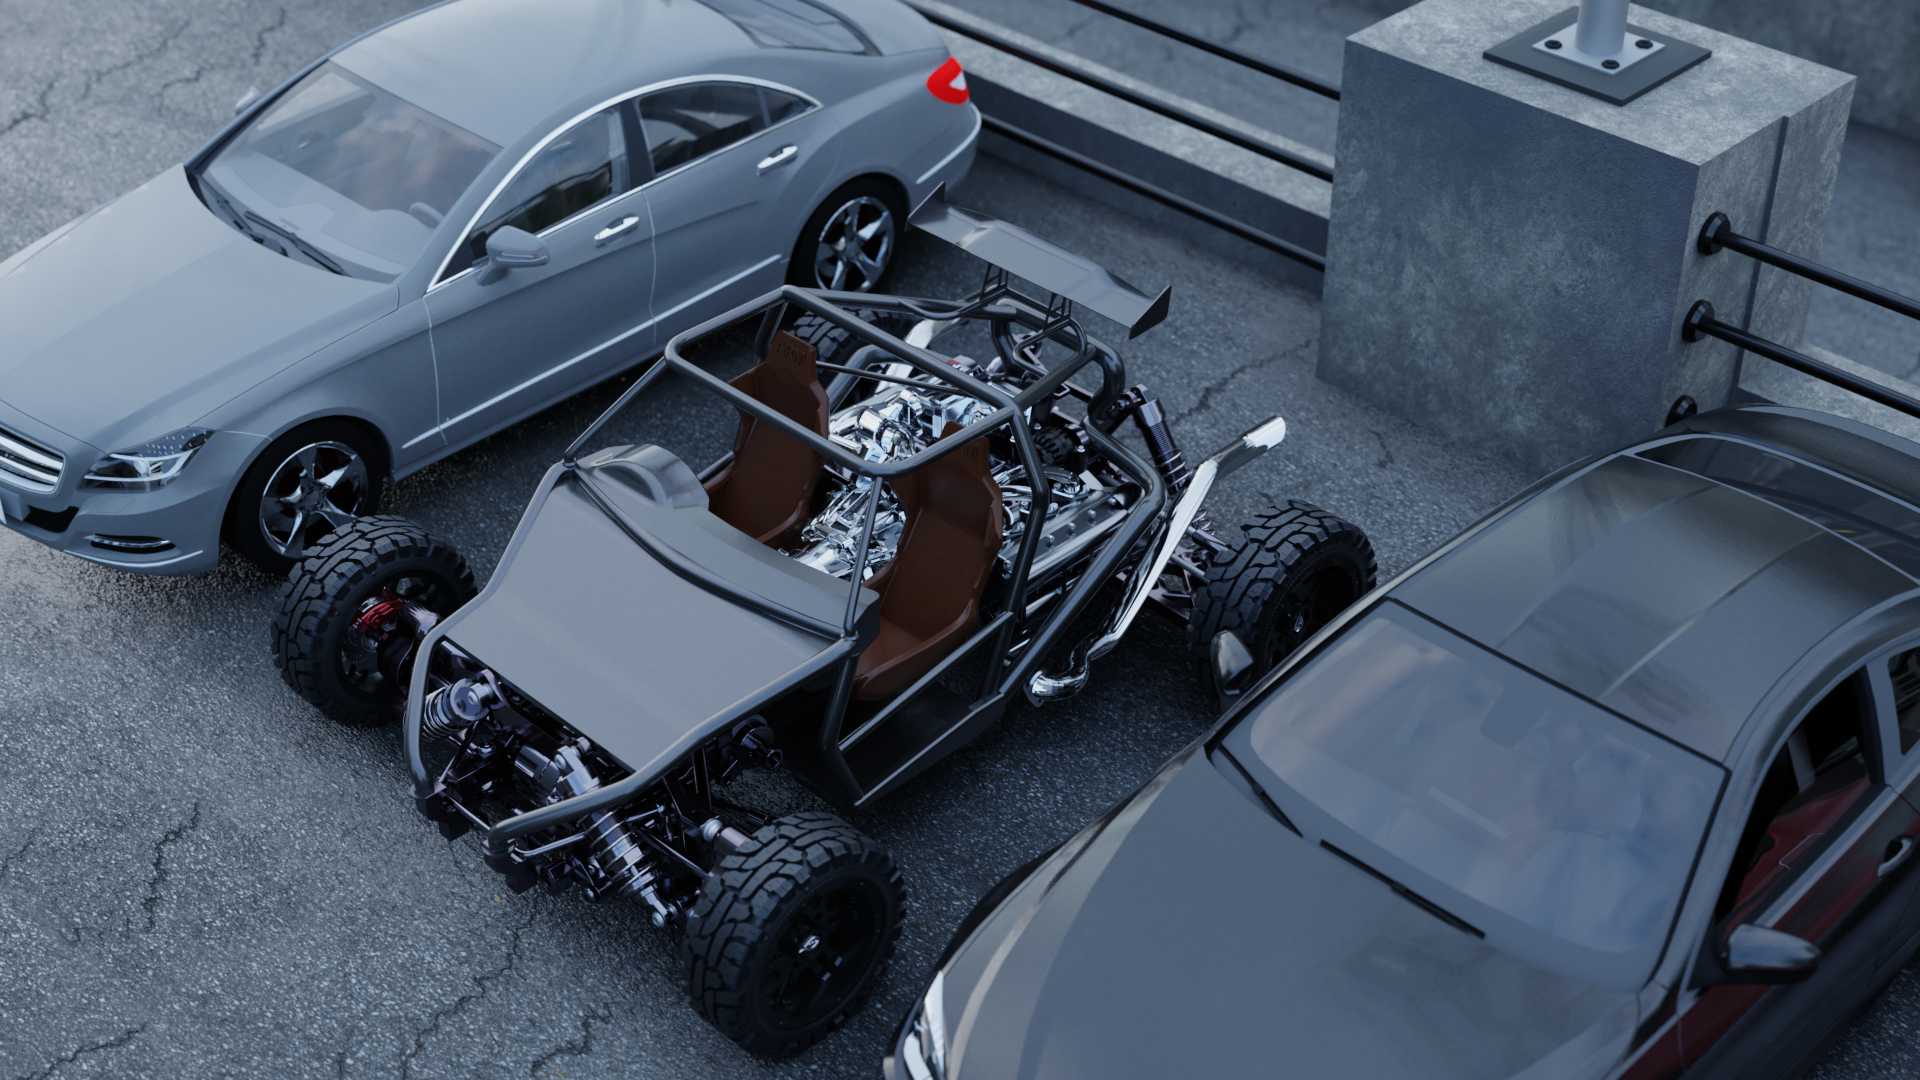
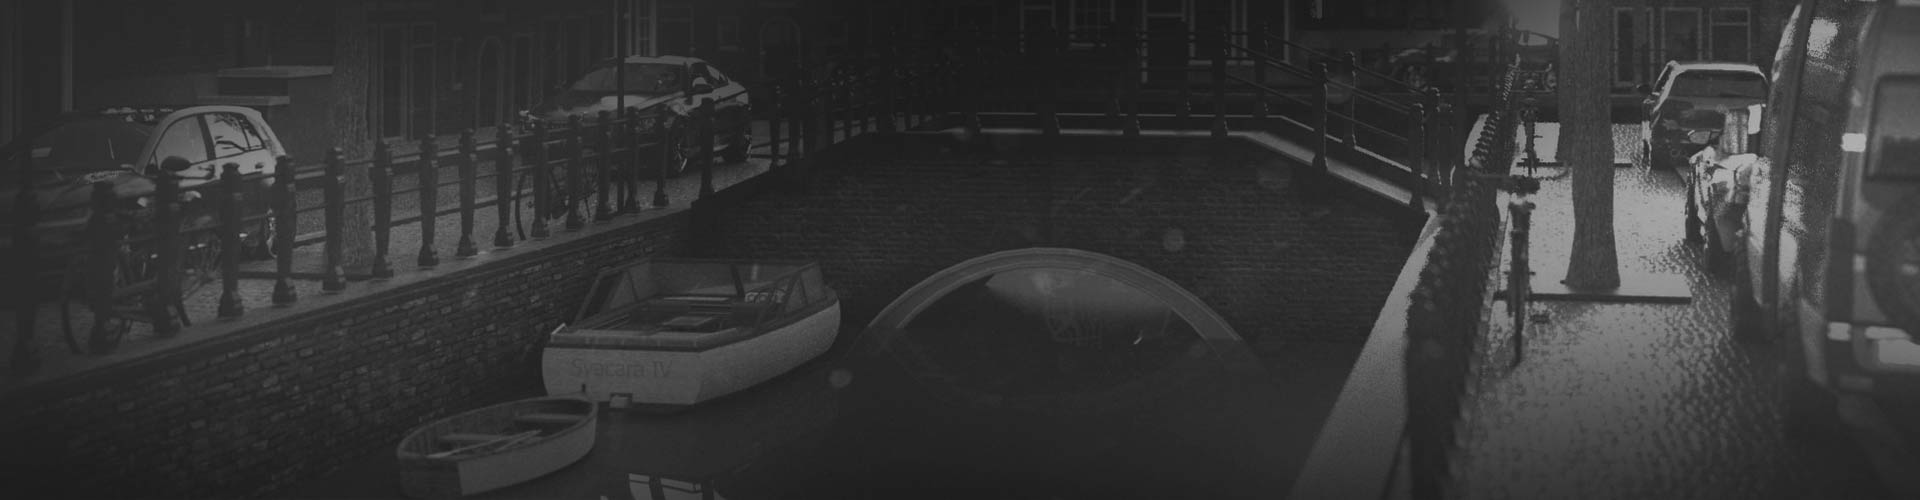
For the final render of the product, I roughly knew what I wanted to create. I wanted to offset the off-road style of the vehicle by putting it somewhere where it would look out of place and therefore stand out even more. For this I thought of an Urban car park and set about quickly modelling one. The other car models I got from the SketchUp warehouse and then retextured in blender to get a more photorealistic look. Then I set the depth of field of the camera to blur its surroundings to draw further focus to my product. The final touch was to add a background, So I found a HDRI of Canary Wharf and rotated it till it looked roughly correct with my built environment.